EasyManuals Logo

Brother CS5055PRW User Manual

Brother CS5055PRW
196 pages
To Next Page IconTo Next Page
To Previous Page IconTo Previous Page
Page #135 background imageLoading...
Page #135 background image
3 - 88
Application of Assembly
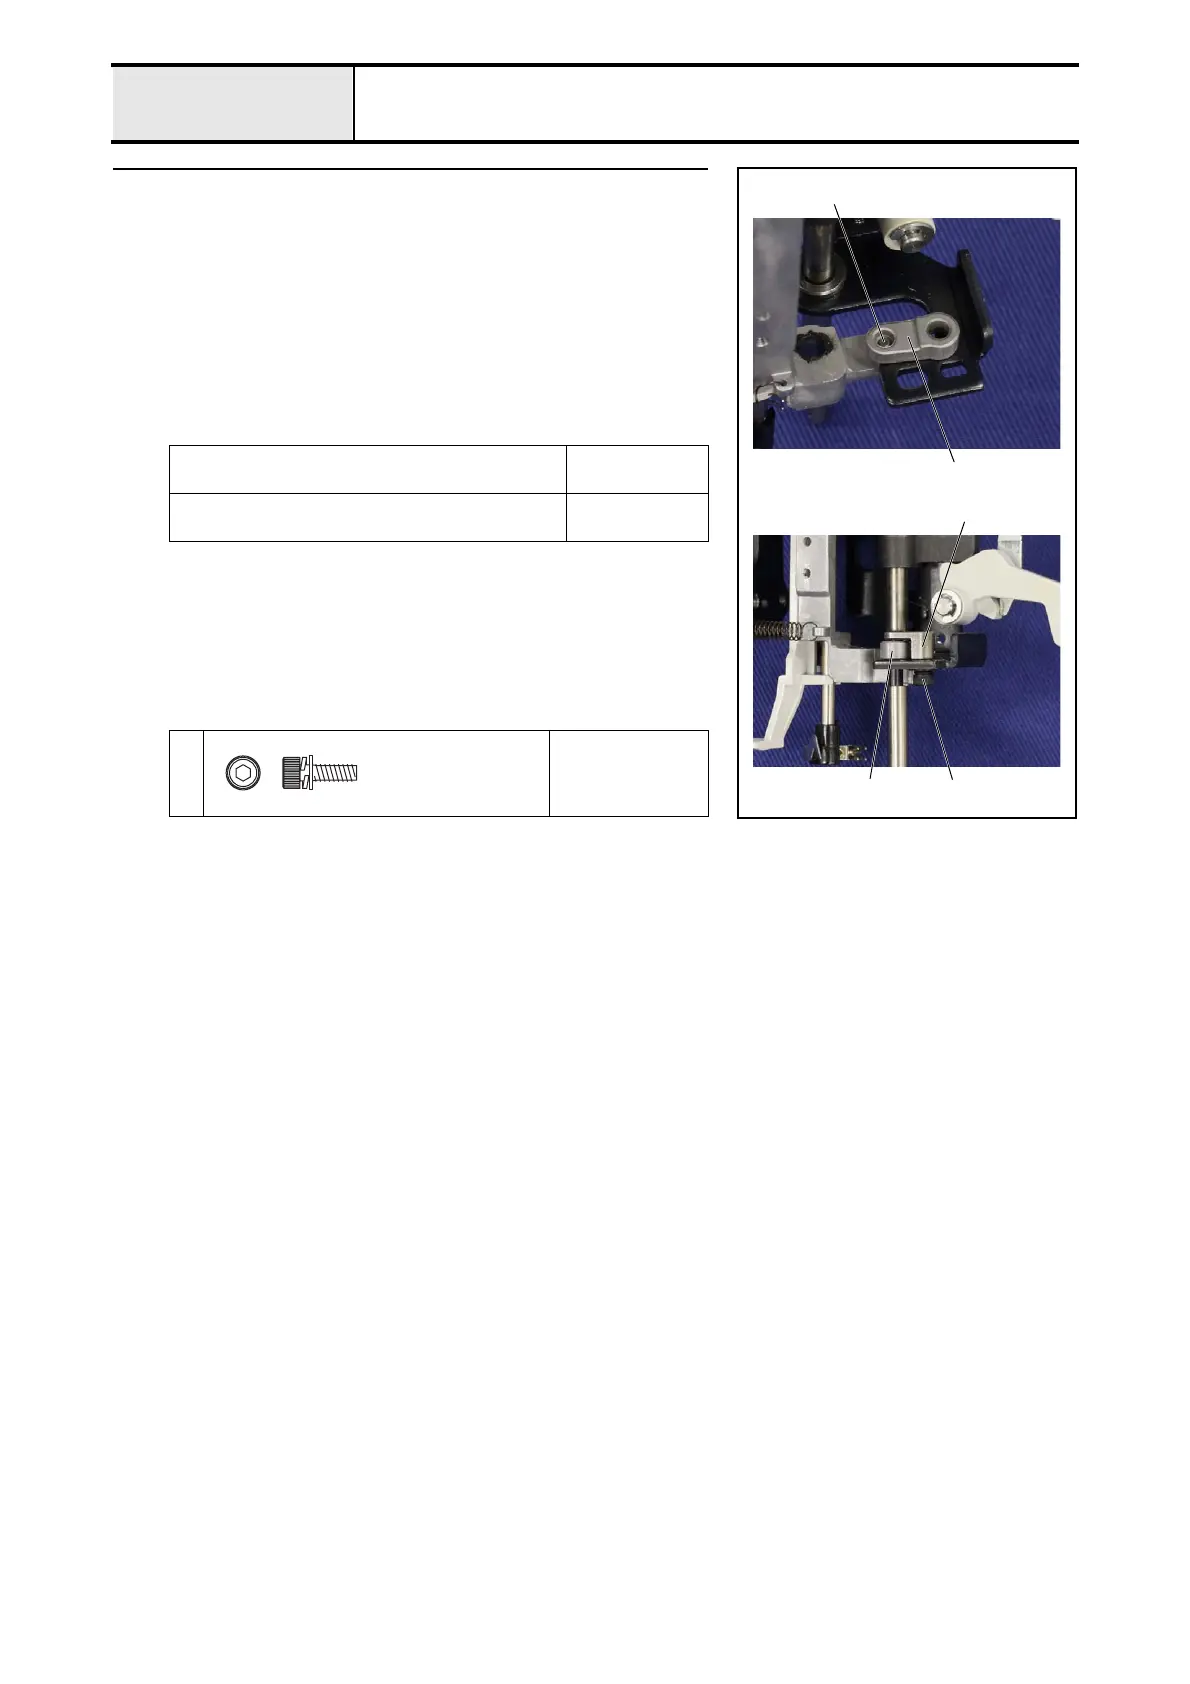
Needle-presser module
15 Attachment of Shaft assy
1. Attach the needle holder block 1 to the needle roller 2 of the needle bar
supporter assy..
*Key point
• Flat surface of the needle holder block 1 is the upper side.
2. Attach the shaft assy. 3 to the needle holder block 1 and the base holder
assy., and then tighten the screw 1 temporarily.
*Key point
• Fully tighten the screw 1 after performing "4-9 Adjustment :
Needle clearance left/right".
Apply EPNOC AP (N) 0 to the needle roller.
Bead
XC8387***
Apply EPNOC AP (N) 0 to the shaft of the shaft
assy.
Bead
XC8387***
1
Torque
Hand start
2
1
1
3
1
Screw
M3X10

Table of Contents

Other manuals for Brother CS5055PRW

Questions and Answers:

Question and Answer IconNeed help?

Do you have a question about the Brother CS5055PRW and is the answer not in the manual?

Brother CS5055PRW Specifications

General IconGeneral
Stitch Number50
Needle ThreaderAutomatic
LCD ScreenYes
Speed ControlYes
Free ArmYes
Maximum Sewing Speed850 stitches per minute
LightingLED
Buttonhole Styles5 one-step
Included Accessoriesneedle set, bobbins, screwdriver, seam ripper, cleaning brush
Presser Feet7 included
Bobbin TypeDrop-in

Related product manuals