EasyManuals Logo

Brother CS5055PRW User Manual

Brother CS5055PRW
196 pages
To Next Page IconTo Next Page
To Previous Page IconTo Previous Page
Page #45 background imageLoading...
Page #45 background image
2 - 30
Basics of Assembly
Main parts
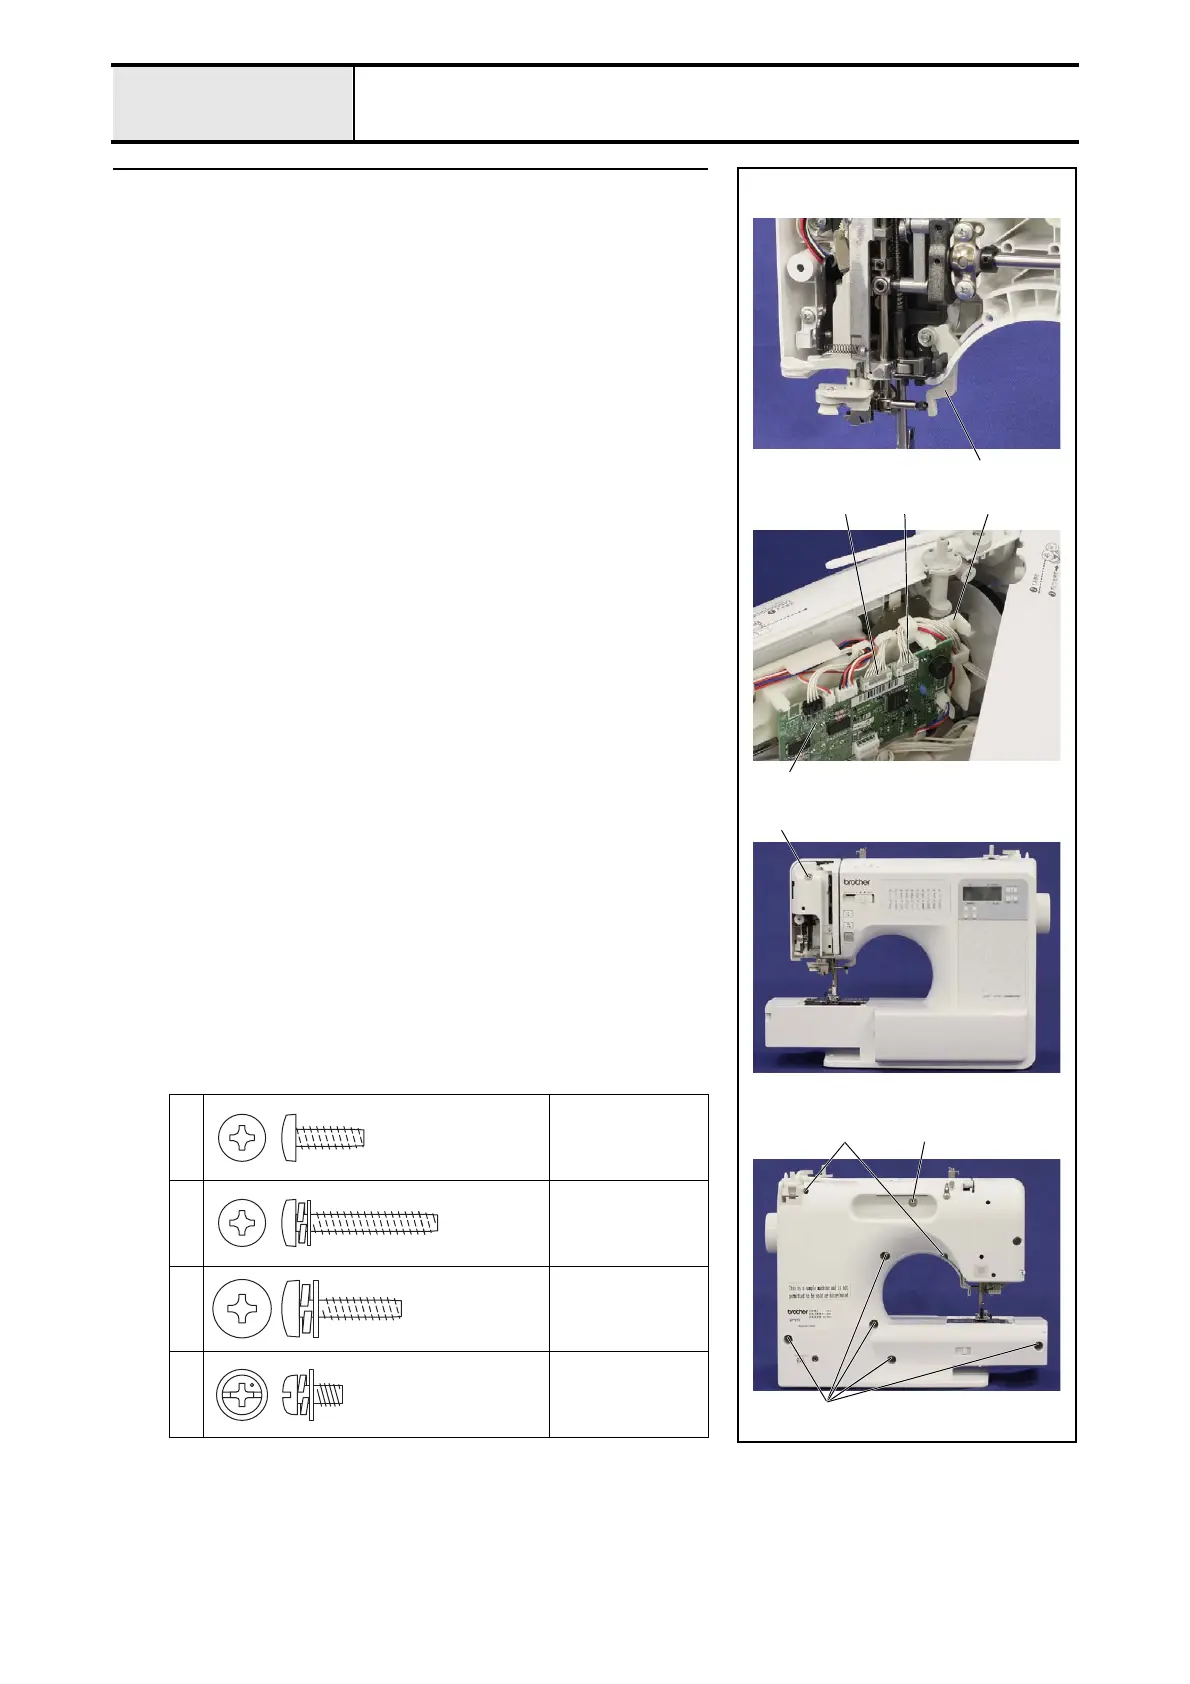
1 Attachment of Front cover assy
1. Lower the presser lever 1.
2. Connect the connectors of the SSVR PCB assy. 2 and the operation PCB
sub assy. 3 to the main PCB assy. 4, and hang the lead wire on the guide
part of the shutter cover 5.
*Key point
• Refer to "Special Instructions of Wiring".
3. Set the front cover assy. to the rear cover assy., and then secure them with
the screw 1 (from the front cover side) and the 2 screws 2, the 5 screws
3 and the screw 4 (from the rear cover side).
→ Refer to 3 - 47 "Assembly of Front cover assy".
1
Torque
0.78 – 1.18 N·m
2
Torque
0.78 – 1.18 N·m
3
Torque
1.18 – 1.57 N·m
4
Torque
0.78 – 1.18 N·m
2
4
3 2 5
1
4
3
1
Giza Tite
M4X12
Giza Tite
M4X25
Giza Tite
M5X18
Screw, Pan (S/P washer)
M4X8

Table of Contents

Other manuals for Brother CS5055PRW

Questions and Answers:

Question and Answer IconNeed help?

Do you have a question about the Brother CS5055PRW and is the answer not in the manual?

Brother CS5055PRW Specifications

General IconGeneral
Stitch Number50
Needle ThreaderAutomatic
LCD ScreenYes
Speed ControlYes
Free ArmYes
Maximum Sewing Speed850 stitches per minute
LightingLED
Buttonhole Styles5 one-step
Included Accessoriesneedle set, bobbins, screwdriver, seam ripper, cleaning brush
Presser Feet7 included
Bobbin TypeDrop-in

Related product manuals