3 - 86
Needle-presser module
Application of Assembly
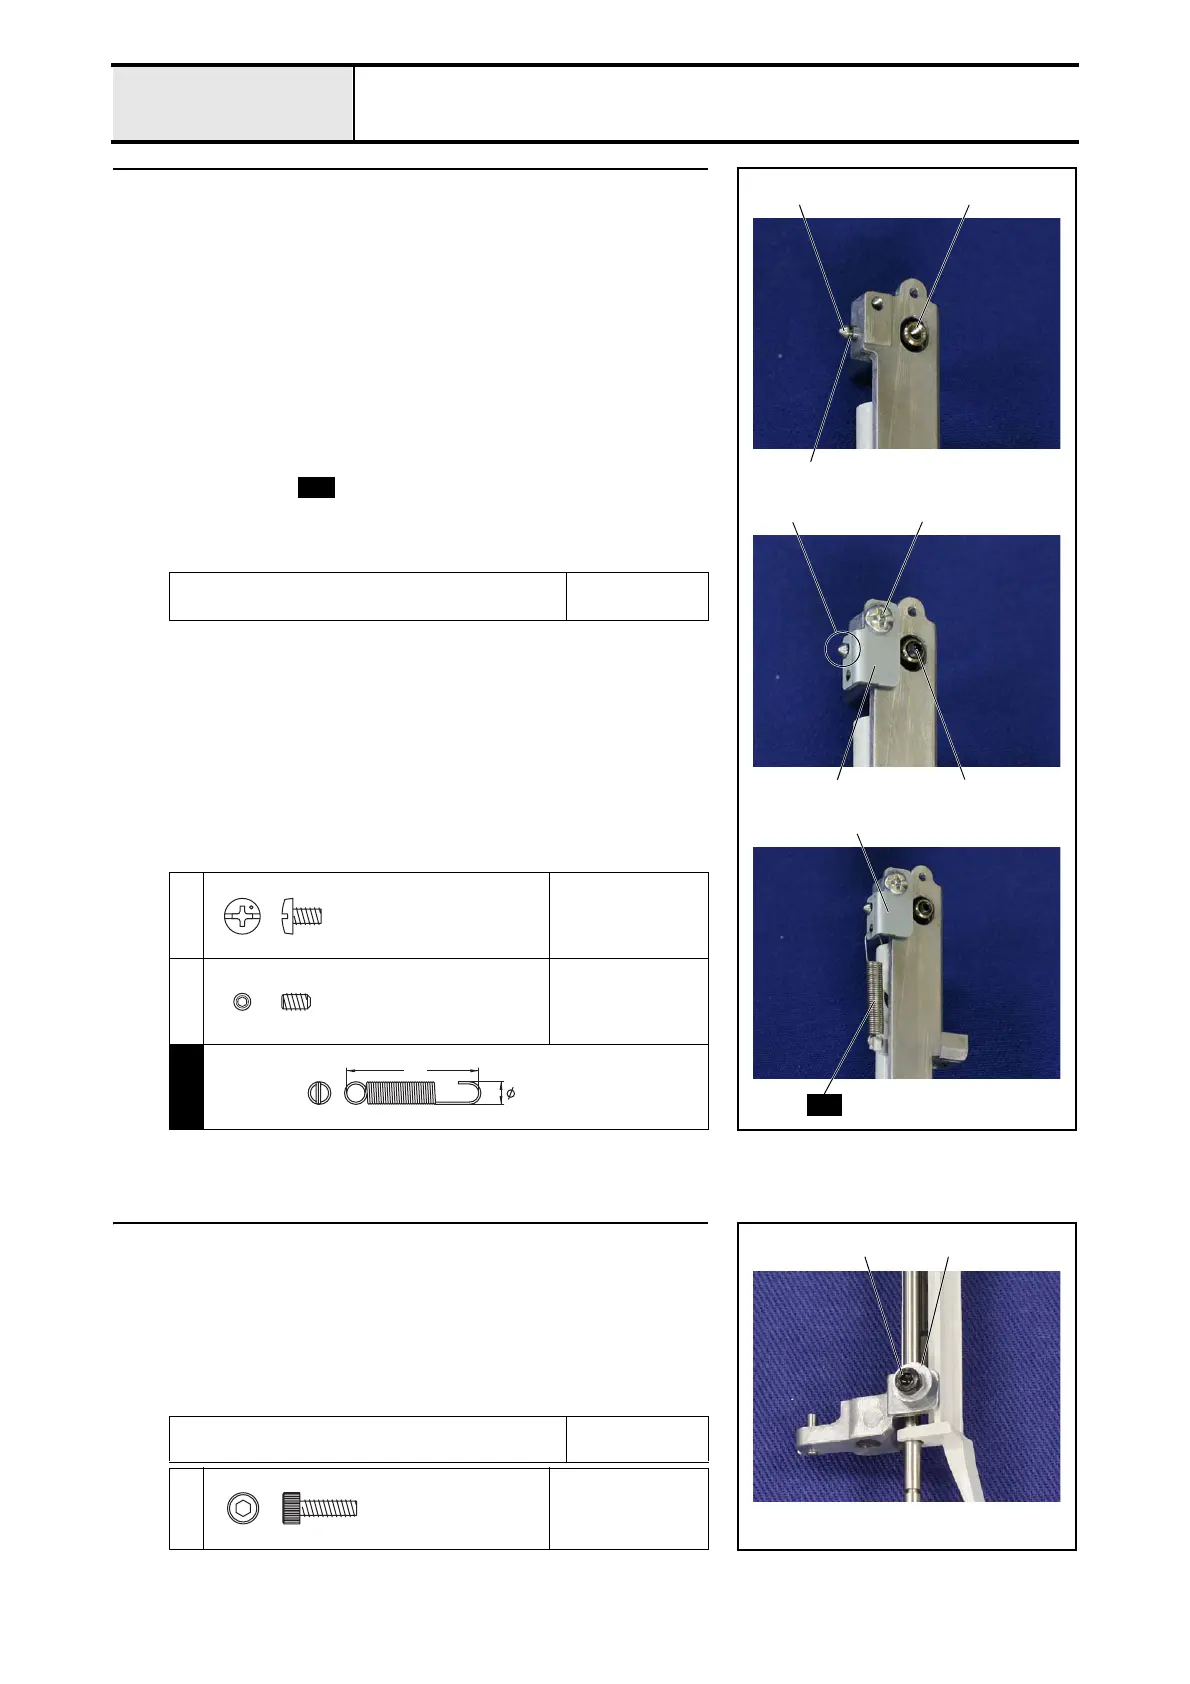
11 Attachment of Needle holder shaft A
1. Insert the needle holder shaft A 1 to the upper side hole of the needle bar
supporter assy., and then insert the shaft 2 into the needle bar supporter
assy., the needle holder shaft A 1 and the needle bar supporter assy..
*Key point
• Check that the groove 3 of the shaft 2 is the left side, when
set the needle bar supporter assy. as shown in the right figure.
2. Set the plate 4 to the needle bar supporter assy. with the screw 1.
*Key point
• Check that the groove 3 of the shaft 2 engaged with the
notch part 5 of the plate 4.
3. Attach the screw 2 to the needle holder shaft A 1.
4. Attach the spring to the plate 4 and the needle bar supporter assy..
*Key point
• Attach the hook side of the spring to the plate 4.
Apply FBK OIL RO 100 to the needle holder shaft
A.
1-2 drops
XC8388***
1
Torque
0.59 – 0.78 N·m
2
Torque
0.59 – 0.78 N·m
S09
2 1
3
1
2
5
4
4
S09
S09
Screw, Bind
M3X5
Set Screw, Socket (CP)
M3X5
SPRING
X50476***
23
4
12 Attachment of Z zigzag adjusting nut
1. Set the Z zigzag adjusting nut 1 to the needle bar supporter assy., and then
tighten the screw 1 temporarily.
*Key point
• Check that the side of the zigzag adjusting nut 1 with the
greatest eccentricity toward the top (see figure at the right).
• Fully tighten the screw 1 after performing "4-7 Adjustment :
Left base line needle drop".
Apply EPNOC AP (N) 0 to the zigzag adjusting nut
Z zigzag lever contact surface.
Bead
XC8387***
1
Torque
Hand start
1 1
Bolt, Socket
M3X10
 Loading...


