4 - 10
Adjustment Needle bar rising
[Adjustment standard]
The right edge of the needle must align with the rotary hook point when the needle bar raised 2.9 to 3.3mm up from
its lowest position.
[Adjustment procedure]
1. Remove the presser foot, the needle plate B and the needle plate A, then remove the inner rotary hook.
2. Start the test mode.
3. Select the pattern number "02" (3-point needle drop mode).
4. Press (Reverse/reinforcement stitch button) and move the needle bar to the left base line, then turn off the
power.
5. Turn the pulley by hand and move the needle bar to its lowest position.
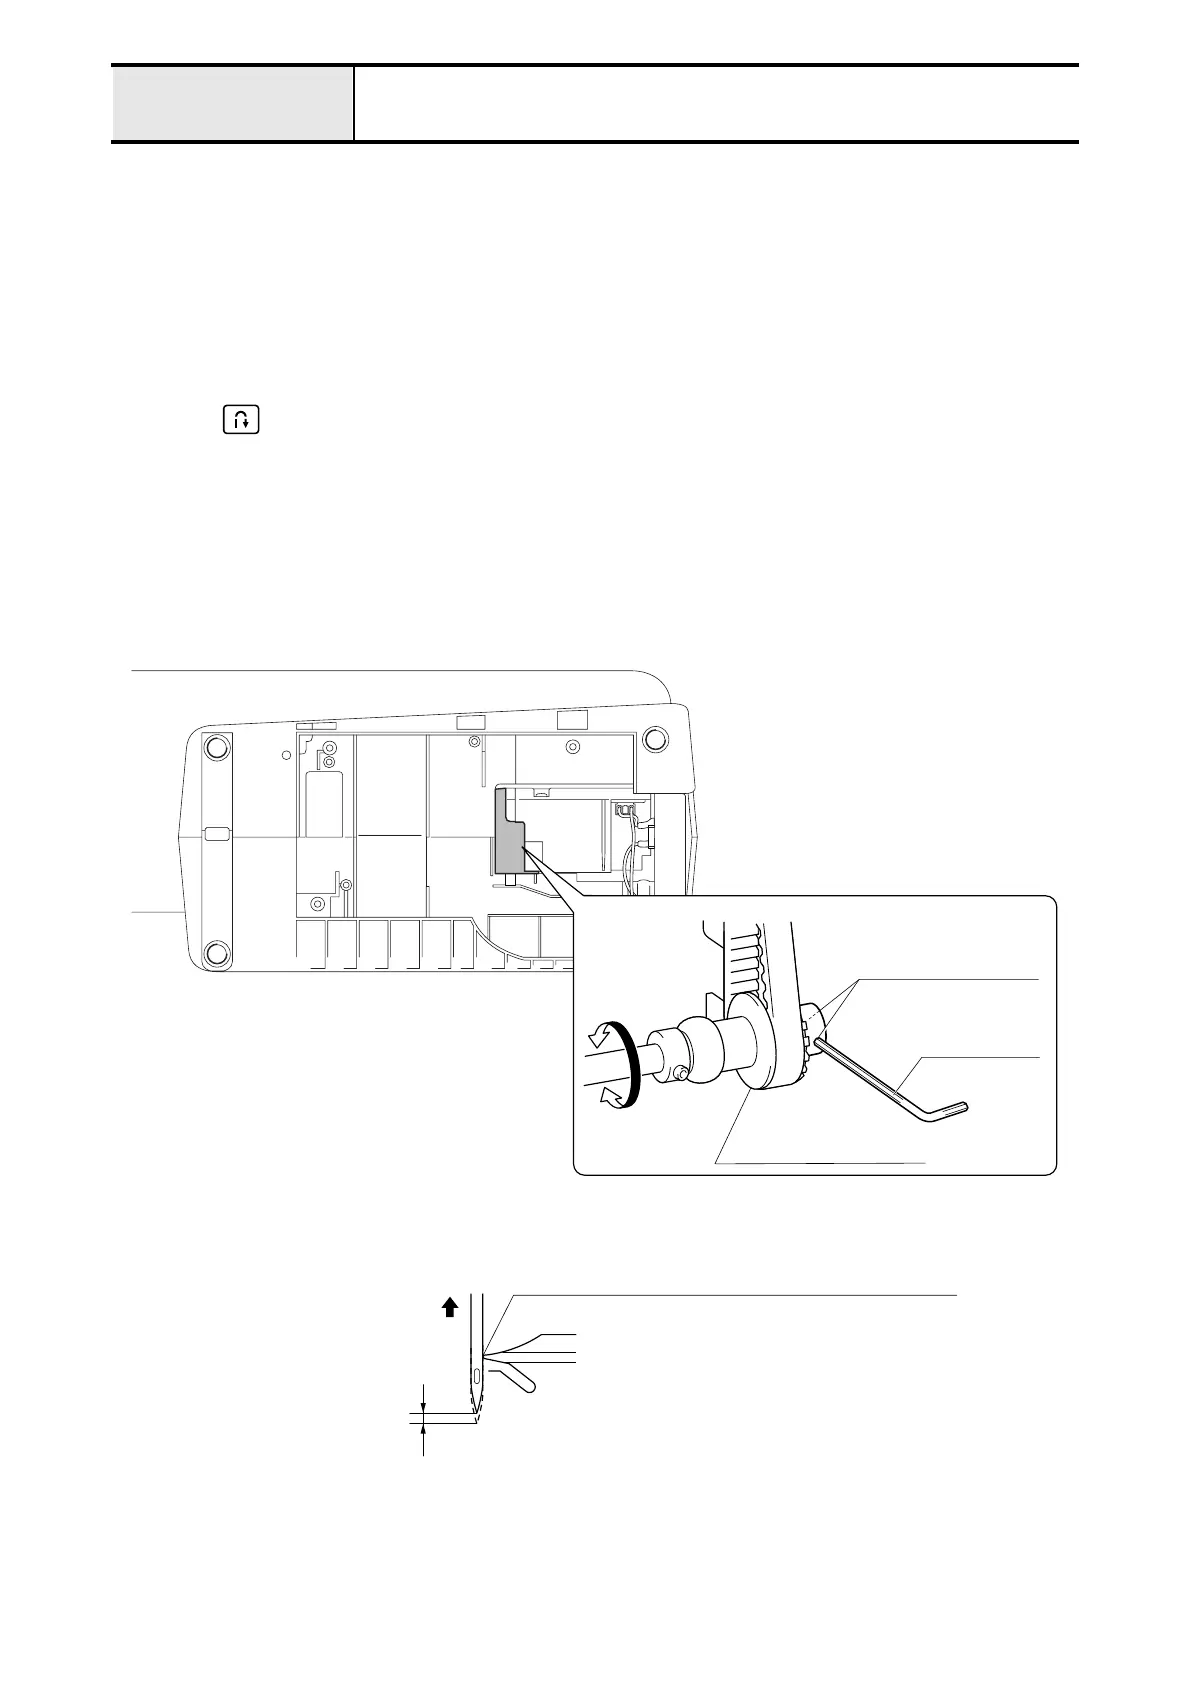
6. Remove the base cover.
7. Loosen the 2 screws (set screws socket (CP) M5 x 5) of the lower shaft pulley D with the hex wrench (2.5mm).
8. Turn the pulley by hand and raise the needle bar 2.9 to 3.3 mm from its lowest position, then turn the outer rotary
hook by hand and align the right edge of the needle with the outer rotary hook point.
9. Tighten the 2 screws (set screws socket (CP) M5 x 5) of the lower shaft pulley D.
Set screws socket
(CP) M5 x 5 (2pcs.)
Lower shaft pulley D
2.9 - 3.3mm
The right edge of the needle aligns with the
outer rotary hook point when the needle bar
raised 2.9 to 3.3mm up from its lowest position.
Hex wrench
(2.5mm)
 Loading...


