EasyManuals Logo

Brother CS5055PRW User Manual

Brother CS5055PRW
196 pages
To Next Page IconTo Next Page
To Previous Page IconTo Previous Page
Page #101 background imageLoading...
Page #101 background image
3 - 54
Main parts
Application of Assembly
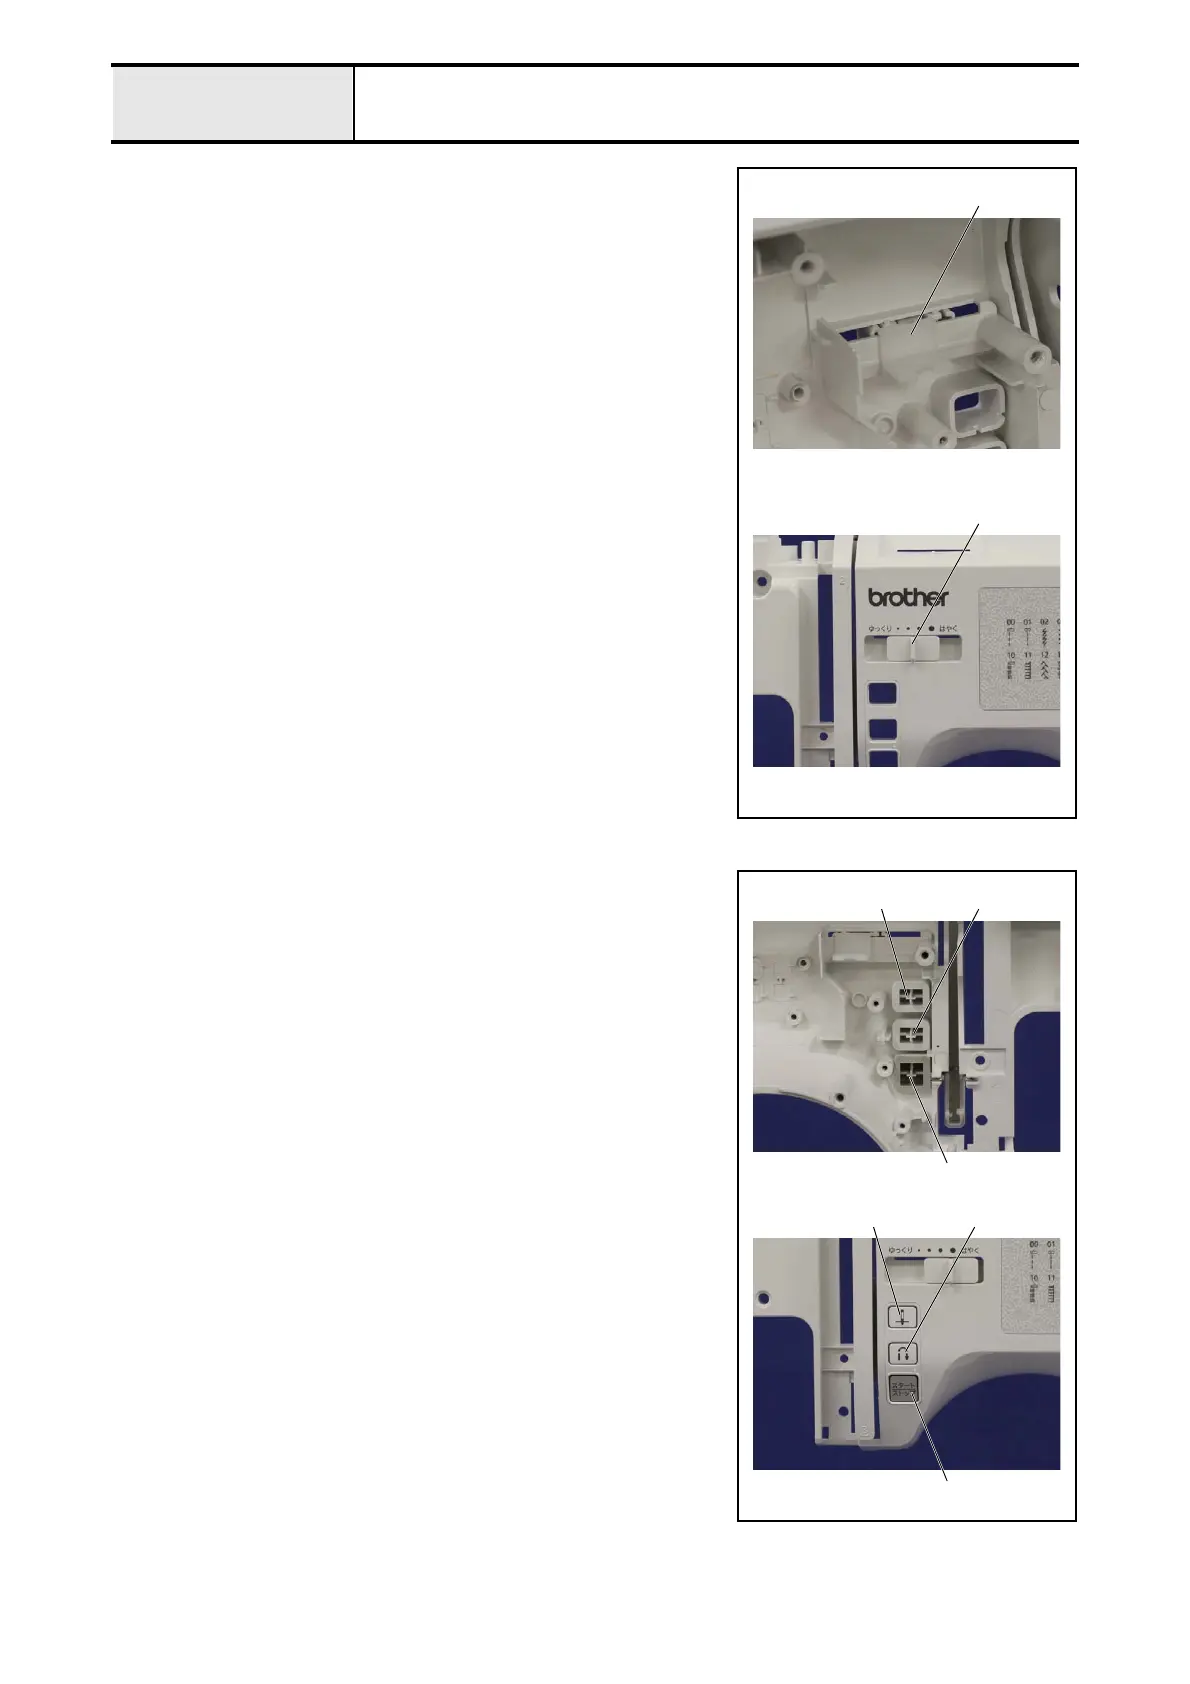
2-9 Attachment of SV keytop
1. Set the SV joint plate 1 to the front cover assy..
2. Set the SV keytop 2 to the front cover assy..
*Key point
Check that the 2 ribs of the SV keytop 2 engaged with the 2
positioning holes of the SV joint plate 1.
*Note
As for the SV keytop 2, it is not mounted by the model.
1
2
2-10Attachment of SS/Reverse/NP buttons
1. Set the SS button 1, the reverse button 2 and the NP button 3 to the
front cover assy..
*Note
As for the SS button 1 and the NP button 3, it is not mounted
by the model.
2
1
3
2
1
3

Table of Contents

Other manuals for Brother CS5055PRW

Questions and Answers:

Question and Answer IconNeed help?

Do you have a question about the Brother CS5055PRW and is the answer not in the manual?

Brother CS5055PRW Specifications

General IconGeneral
Stitch Number50
Needle ThreaderAutomatic
LCD ScreenYes
Speed ControlYes
Free ArmYes
Maximum Sewing Speed850 stitches per minute
LightingLED
Buttonhole Styles5 one-step
Included Accessoriesneedle set, bobbins, screwdriver, seam ripper, cleaning brush
Presser Feet7 included
Bobbin TypeDrop-in

Related product manuals