5 - 18
Failure Investigation
for Electronic Parts
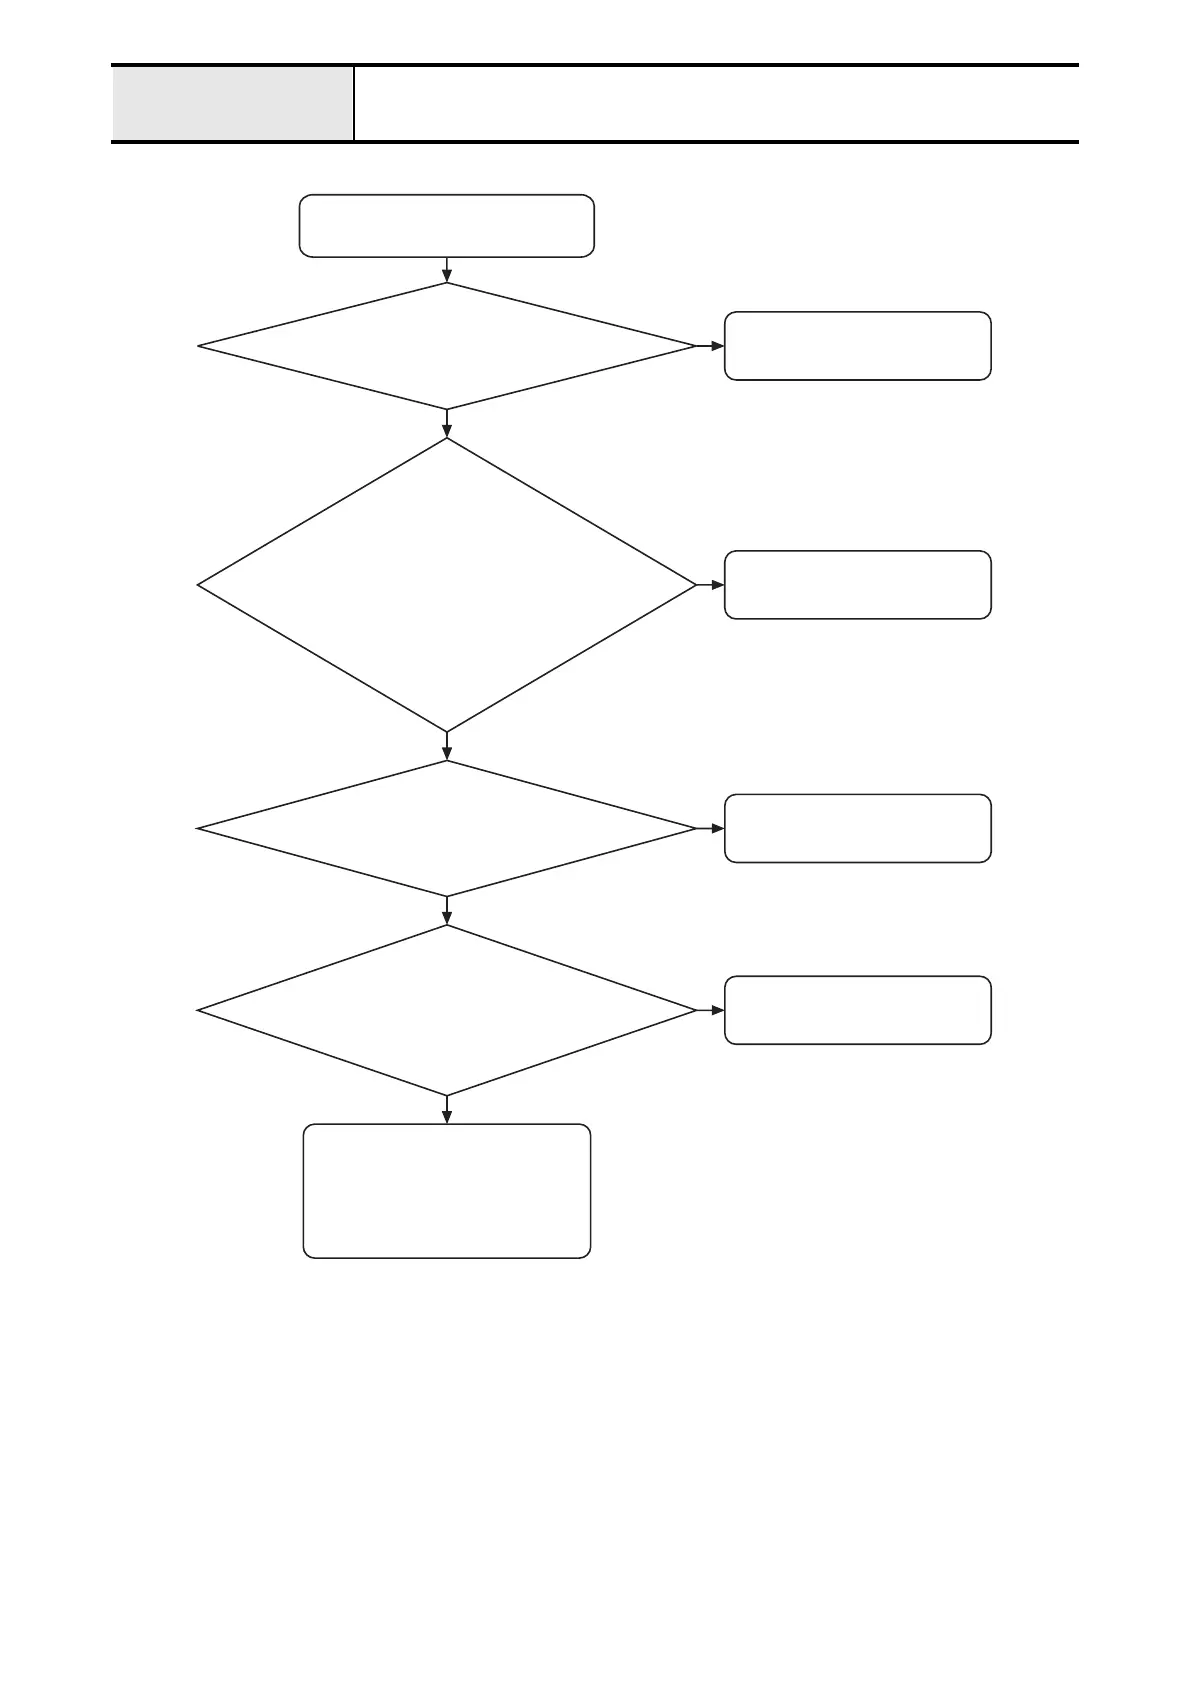
LED lamp does not light
LED lamp does not light.
Connect it correctly.
N
Y
Y
Are the operation PCB assy. and LED
lamp assy. connected correctly?
Connect it correctly.
N
Y
Y
In case of models equipped with the
LCD back light, is the LCD (back light
PCB assy.) lead wire connected to
the operation PCB assy. correctly?
Replace the power supply
PCB assy.
N
Is the voltage between pin 4 and 3 at
the power supply PCB assy.
connector 30V DC?
Connect it correctly.
N
Are the main PCB assy. and the operation
PCB assy. connected correctly?
Replace the LED lamp assy.
or
Replace the operation PCB assy.
or
Replace the main PCB assy.
 Loading...


