EasyManuals Logo

Brother CS5055PRW User Manual

Brother CS5055PRW
196 pages
To Next Page IconTo Next Page
To Previous Page IconTo Previous Page
Page #106 background imageLoading...
Page #106 background image
3 - 59
Main parts
Application of Assembly
Application
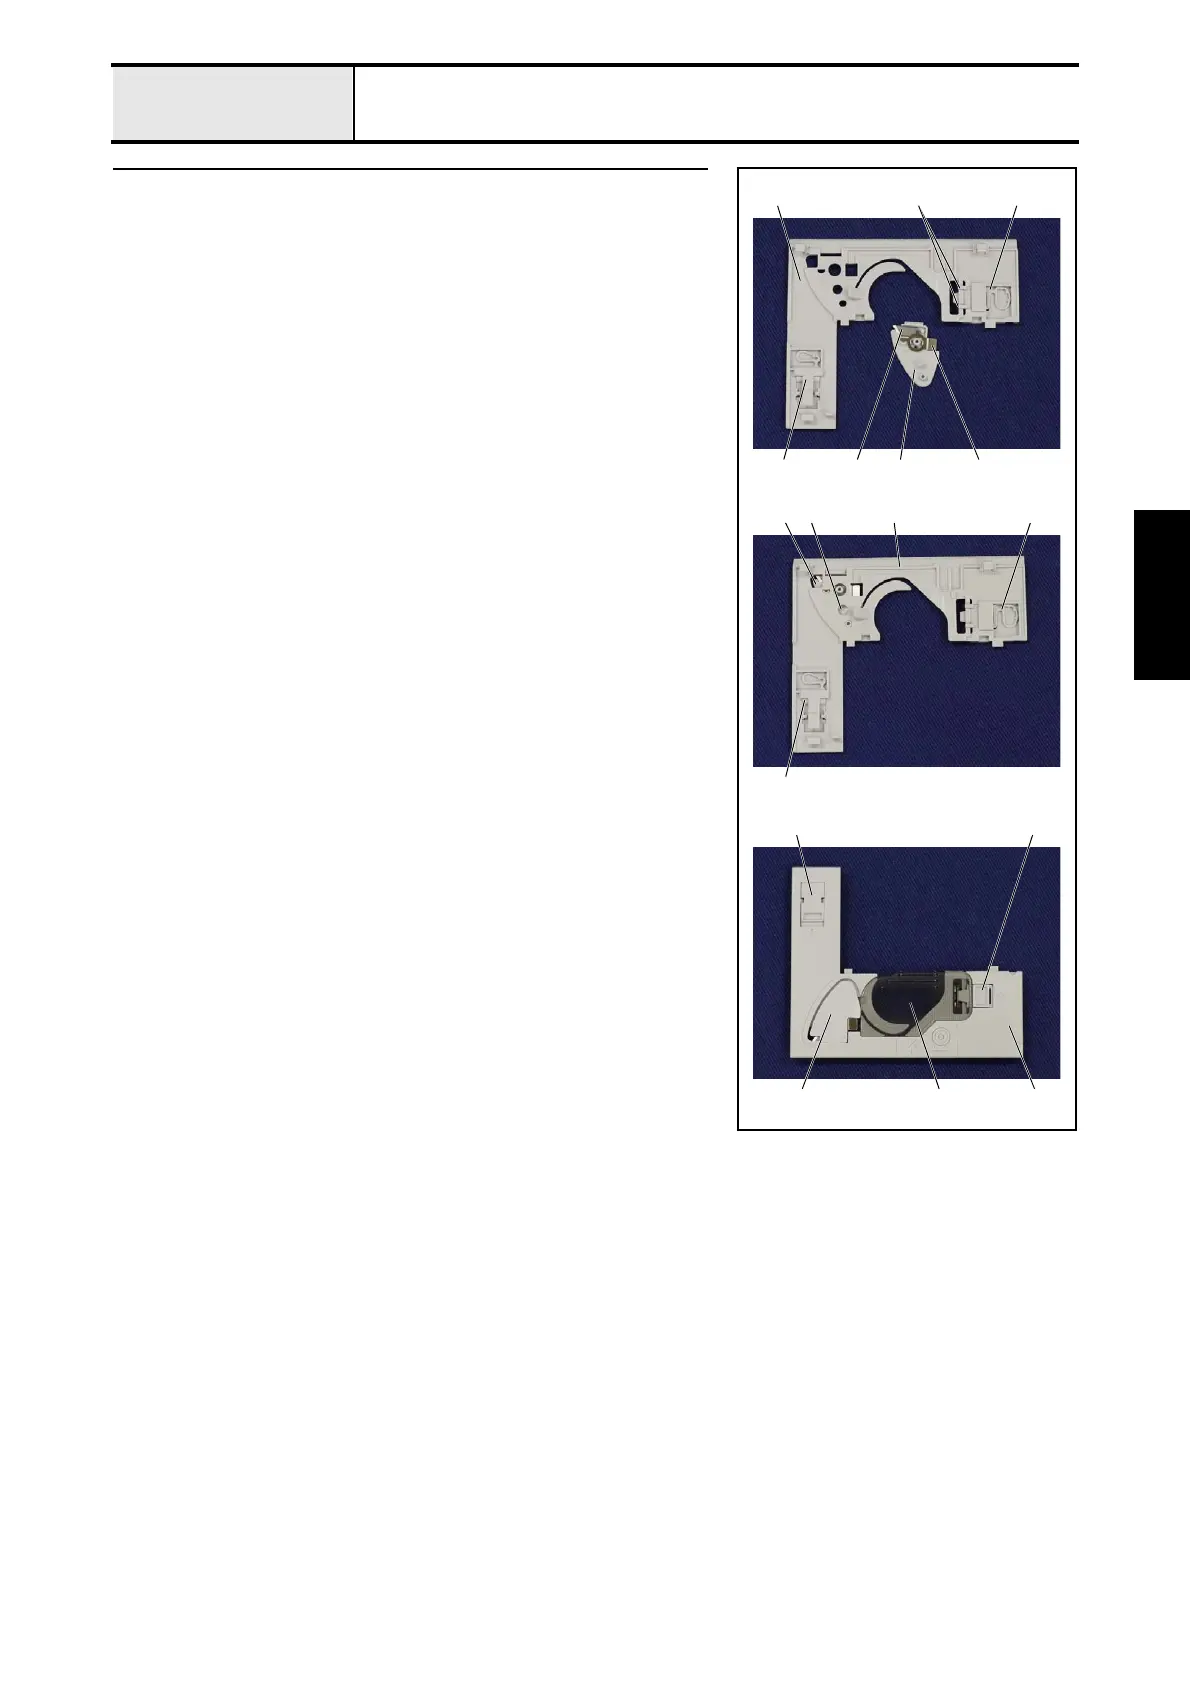
3 Assembly of Needle plate B assy
1. Remove the slide button 1 to the needle plate B assy. 2.
*Key point
• Check that hang the 2 hooks 3 on the needle plate B assy.
2.
2. Attach the slide button B 4 to the needle plate B assy. 2.
3. Attach the NT lower thread cutter 6 and the spring plate 7 to the cutter
cover 5.
4. Attach the cutter cover 5 to the needle plate B assy. 2
*Key point.
• Check that hang the hook 8 on the needle plate B assy. 2.
5. Attach the needle plate cover 9 to the needle plate B assy. 2.
12
4
1
4
14
5 9
6 75
3
5 8 2
2

Table of Contents

Other manuals for Brother CS5055PRW

Questions and Answers:

Question and Answer IconNeed help?

Do you have a question about the Brother CS5055PRW and is the answer not in the manual?

Brother CS5055PRW Specifications

General IconGeneral
Stitch Number50
Needle ThreaderAutomatic
LCD ScreenYes
Speed ControlYes
Free ArmYes
Maximum Sewing Speed850 stitches per minute
LightingLED
Buttonhole Styles5 one-step
Included Accessoriesneedle set, bobbins, screwdriver, seam ripper, cleaning brush
Presser Feet7 included
Bobbin TypeDrop-in

Related product manuals