EasyManuals Logo

Brother CS5055PRW User Manual

Brother CS5055PRW
196 pages
To Next Page IconTo Next Page
To Previous Page IconTo Previous Page
Page #20 background imageLoading...
Page #20 background image
2 - 5
Main parts
Basics of Disassembly
Basics
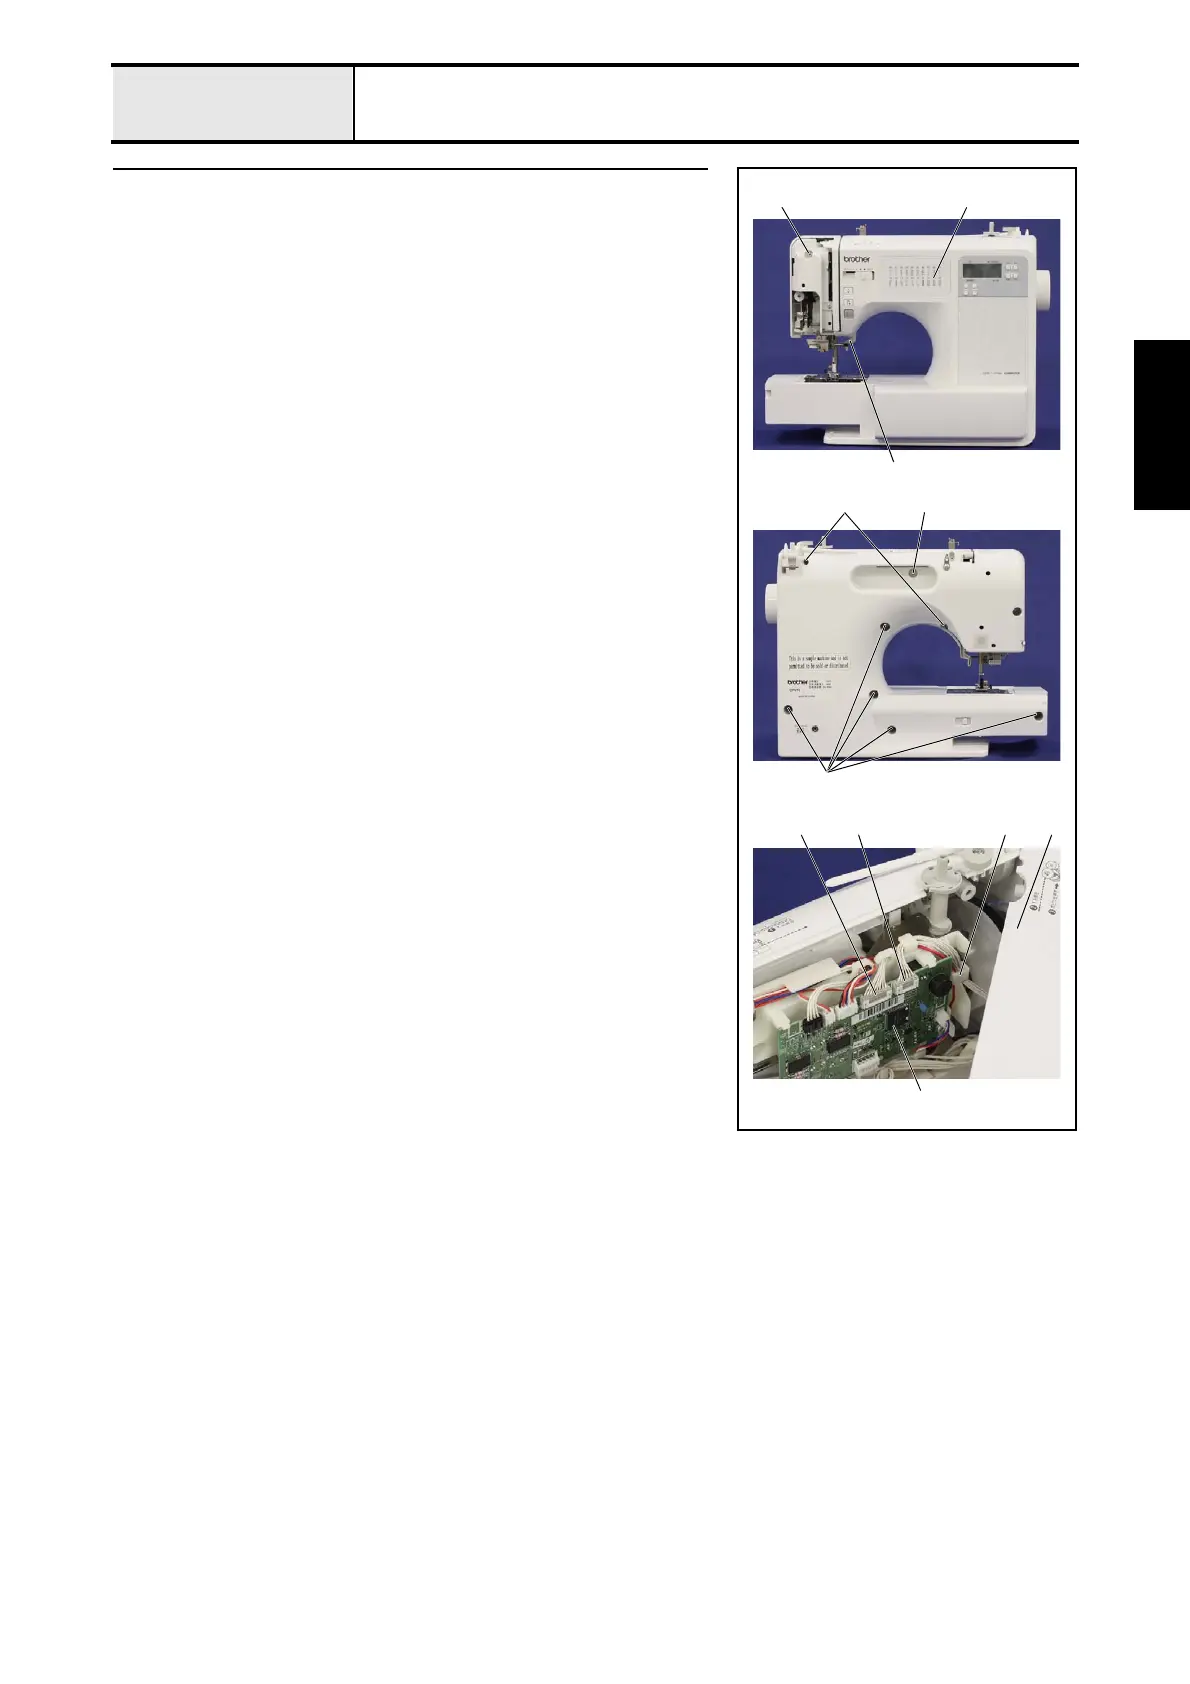
5 Removal of Front cover assy
1. Lower the presser lever 1.
2. Remove the screw 1 from the side of the front cover and remove the
screw 2, 2 screws 3 and 5 screws 4 from the side of the rear cover, and
then remove the front cover assy. 2.
3. Remove the lead wires from the guide parts of the shutter cover 3.
4. Remove the connector of the operation PCB sub assy. 4 and the connector
of the SSVR PCB assy. 5 from the main PCB 6.
Refer to 3 - 4 "Disassembly of Front cover assy".
4 5
3
2
2
4
1
1
3 2
6

Table of Contents

Other manuals for Brother CS5055PRW

Questions and Answers:

Question and Answer IconNeed help?

Do you have a question about the Brother CS5055PRW and is the answer not in the manual?

Brother CS5055PRW Specifications

General IconGeneral
Stitch Number50
Needle ThreaderAutomatic
LCD ScreenYes
Speed ControlYes
Free ArmYes
Maximum Sewing Speed850 stitches per minute
LightingLED
Buttonhole Styles5 one-step
Included Accessoriesneedle set, bobbins, screwdriver, seam ripper, cleaning brush
Presser Feet7 included
Bobbin TypeDrop-in

Related product manuals