4 - 7
Adjustment
Adjustment
Left base line needle drop
[Adjustment standard]
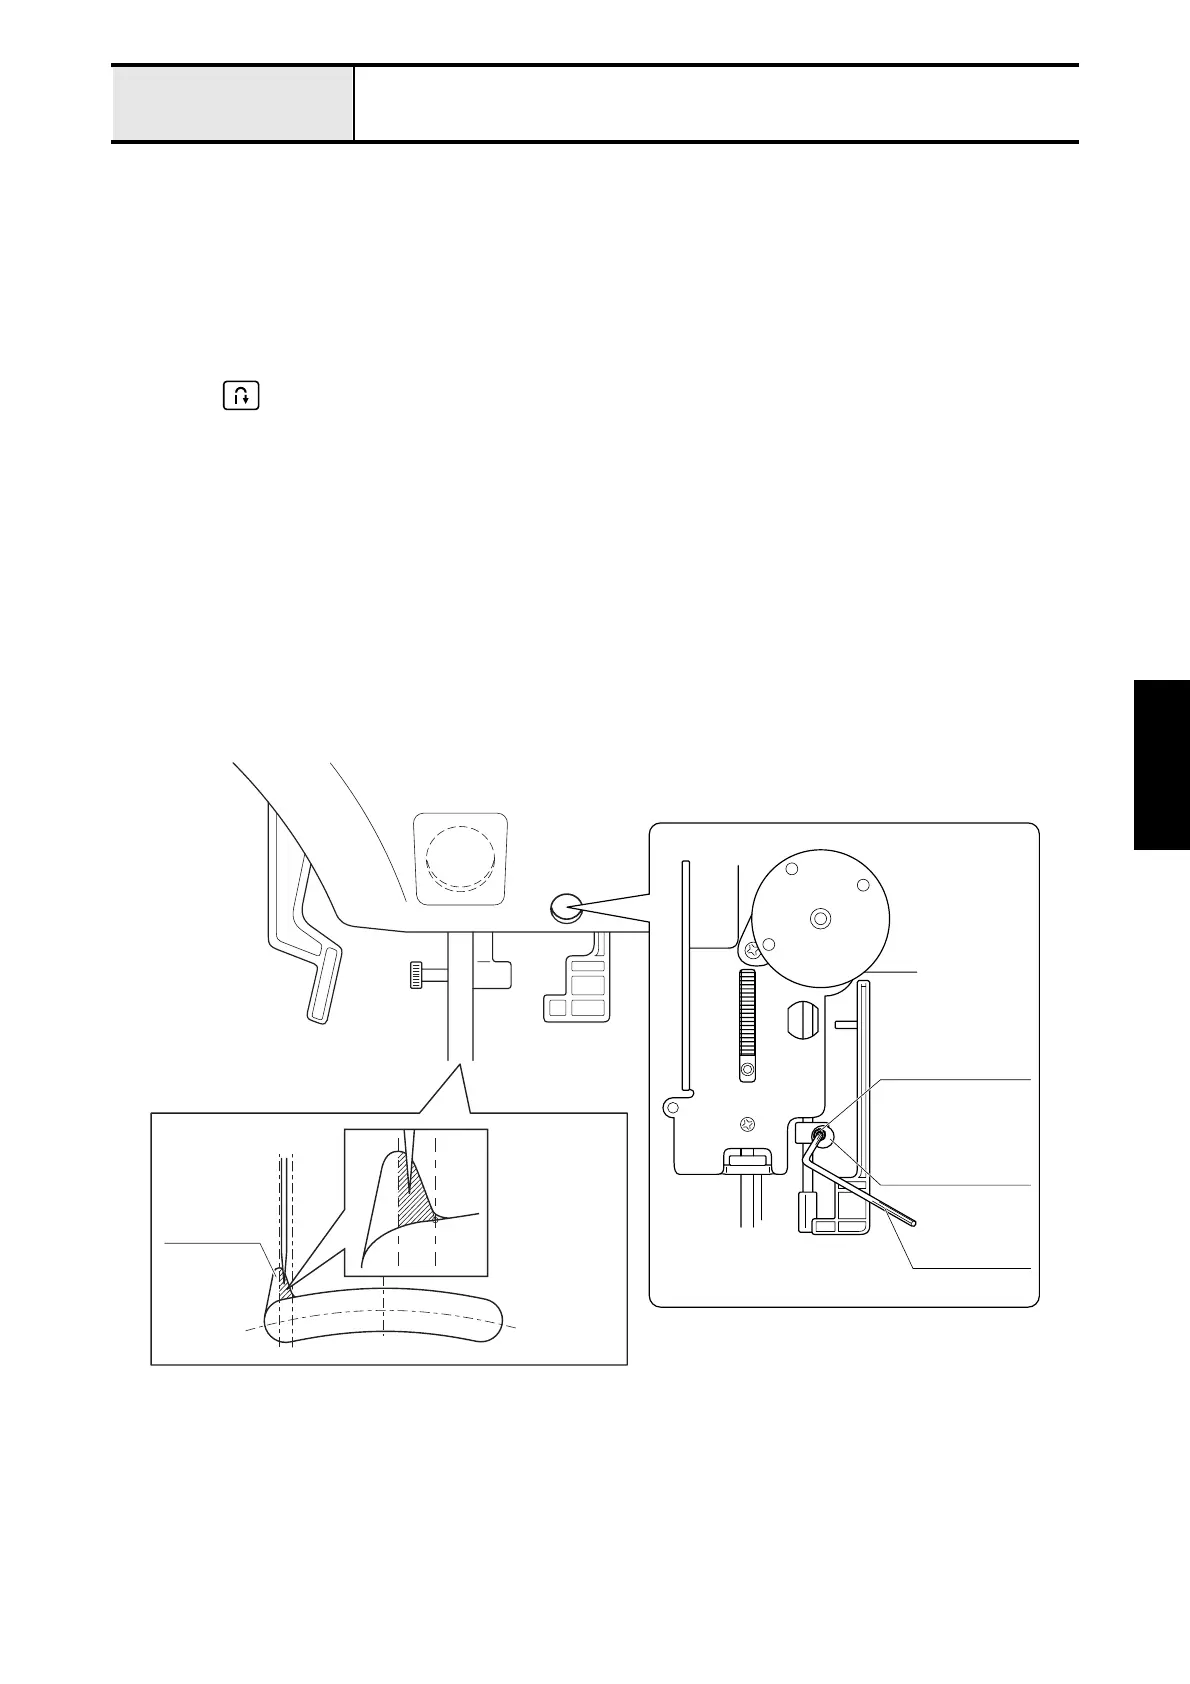
The needle top (left base line) must drop in the right side of “V” groove on the needle plate A.
[Adjustment procedure]
1. Remove the presser foot.
2. Start the test mode.
3. Select the pattern number "02" (3-point needle drop mode).
4. Press (Reverse/reinforcement stitch button) and move the needle bar to the left base line, then turn off the
power.
5. Turn the pulley by hand, until the needle top comes to the needle plate A surface.
6. Loosen the screw (bolt socket M3 x 10) of the zigzag adjusting nut with the hex wrench (2.5mm).
7. Turn the zigzag adjusting nut by finger, to adjust the needle top drops in the right side of “V” groove on the needle
plate A.
8. Tighten the screw (bolt socket M3 x 10) of the zigzag adjusting nut.
*Key point
• Tighten it while fixing the zigzag adjusting nut by finger so that the zigzag adjusting nut does not turn.
NOTE
• Refer to the next page “4-8 Rotary hook unit position“ when it cannot be adjusted correctly using the above
procedure.
Needle top
drops in
shadow area.
"V" groove
Bolt socket M3 x 10
Zigzag adjusting nut
Hex wrench
(2.5mm)
 Loading...


