EasyManuals Logo

Brother CS5055PRW User Manual

Brother CS5055PRW
196 pages
To Next Page IconTo Next Page
To Previous Page IconTo Previous Page
Page #110 background imageLoading...
Page #110 background image
3 - 63
Needle bar, presser mechanism / Upper shaft mechanism
Application of Assembly
Application
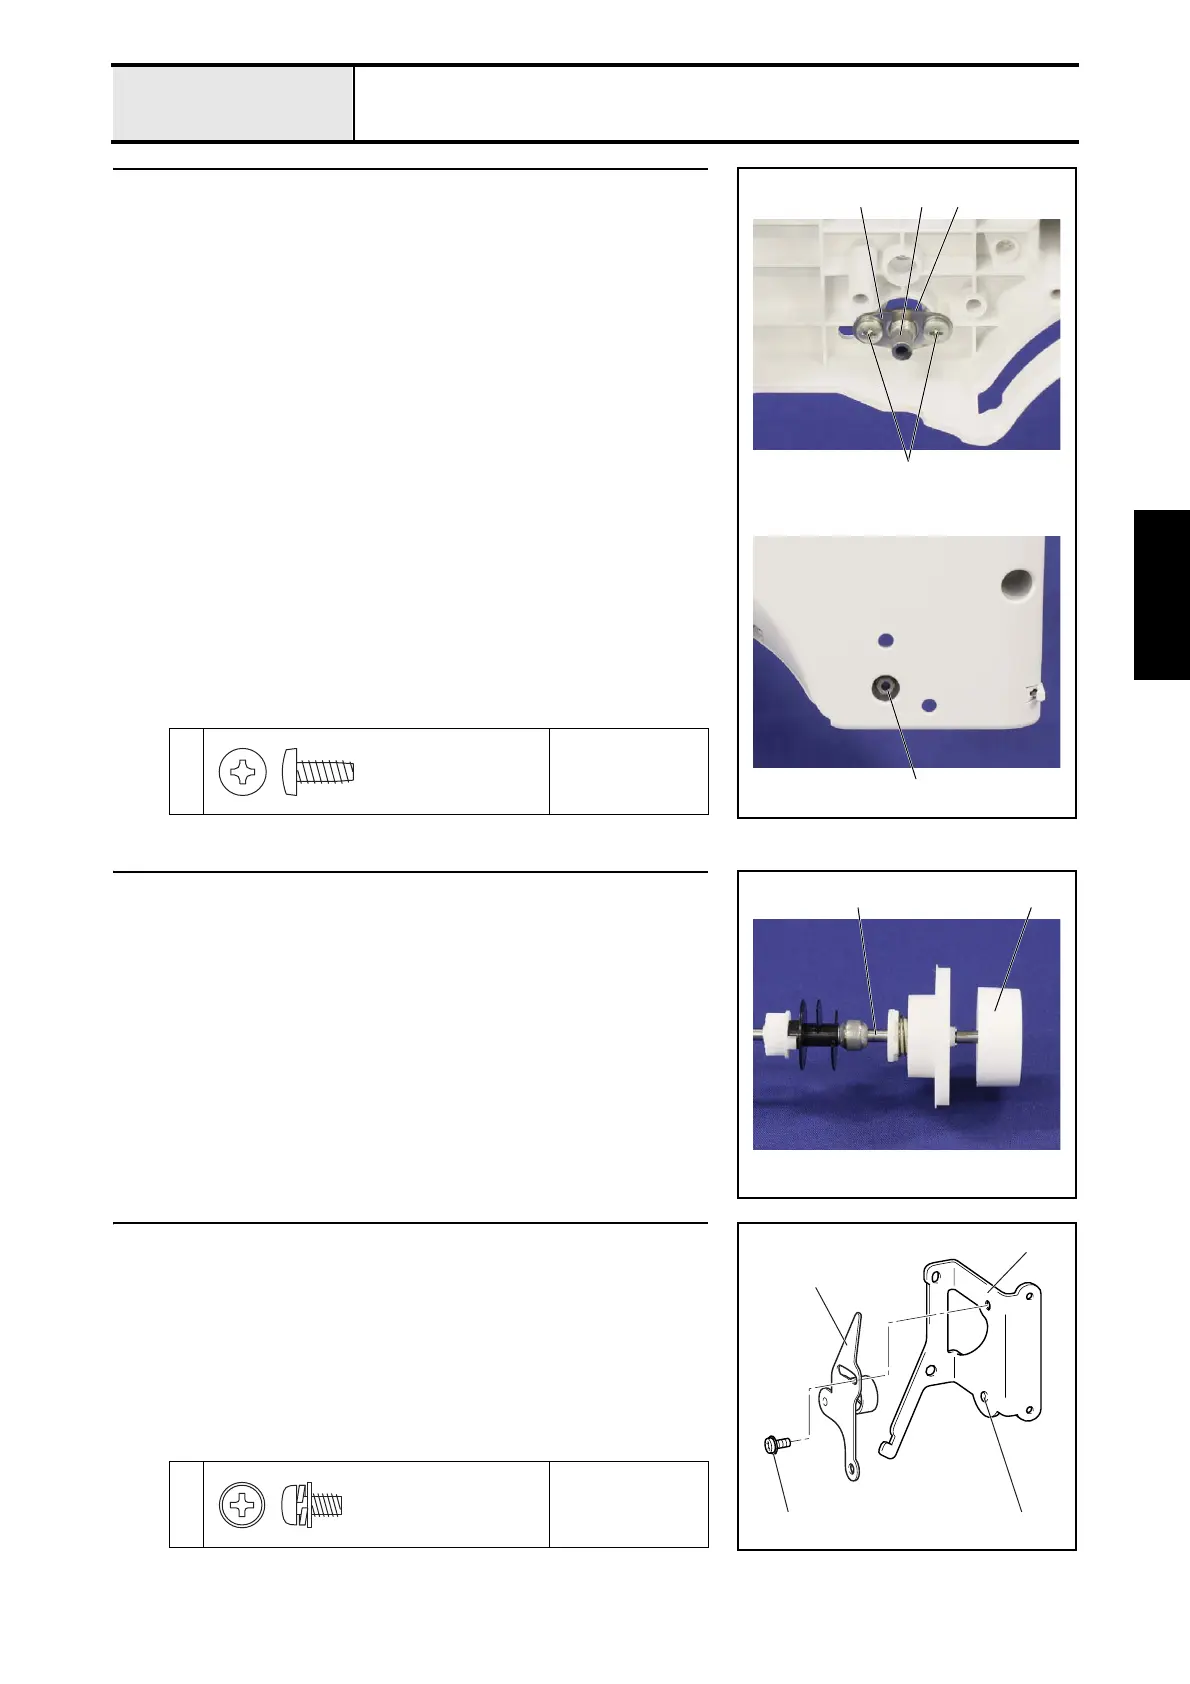
1 Attachment of Plate spring
1. Set the adjusting plate 1 and the plate spring 2 in this order from the
inside of the rear cover assy. with the 2 screws 1.
2. Fully tighten the adjusting screw 3 to the plate spring 2.
1
Torque
0.78 – 1.18 N·m
1
1
32
3
Taptite, Bind B
M4X10
2 Assembly of Upper shaft assy
1. Attach the pulley 2 to the upper shaft assy. 1.
21
3 Assembly of Tension pulley assy
1. Align the boss 3 of the tension pulley holder 2 with the hole of the
tension pulley assy. 1, and then temporarily tighten the screw 1.
*Key point
• Fully tighten the screw 1 after performing "4 - 4 Adjustment :
Timing belt tension".
1
Torque
Hand start
1
1
2
3
Screw, Pan (S/P washer)
M4X8

Table of Contents

Other manuals for Brother CS5055PRW

Questions and Answers:

Question and Answer IconNeed help?

Do you have a question about the Brother CS5055PRW and is the answer not in the manual?

Brother CS5055PRW Specifications

General IconGeneral
Stitch Number50
Needle ThreaderAutomatic
LCD ScreenYes
Speed ControlYes
Free ArmYes
Maximum Sewing Speed850 stitches per minute
LightingLED
Buttonhole Styles5 one-step
Included Accessoriesneedle set, bobbins, screwdriver, seam ripper, cleaning brush
Presser Feet7 included
Bobbin TypeDrop-in

Related product manuals