3 - 81
Needle-presser module
Application of Assembly
Application
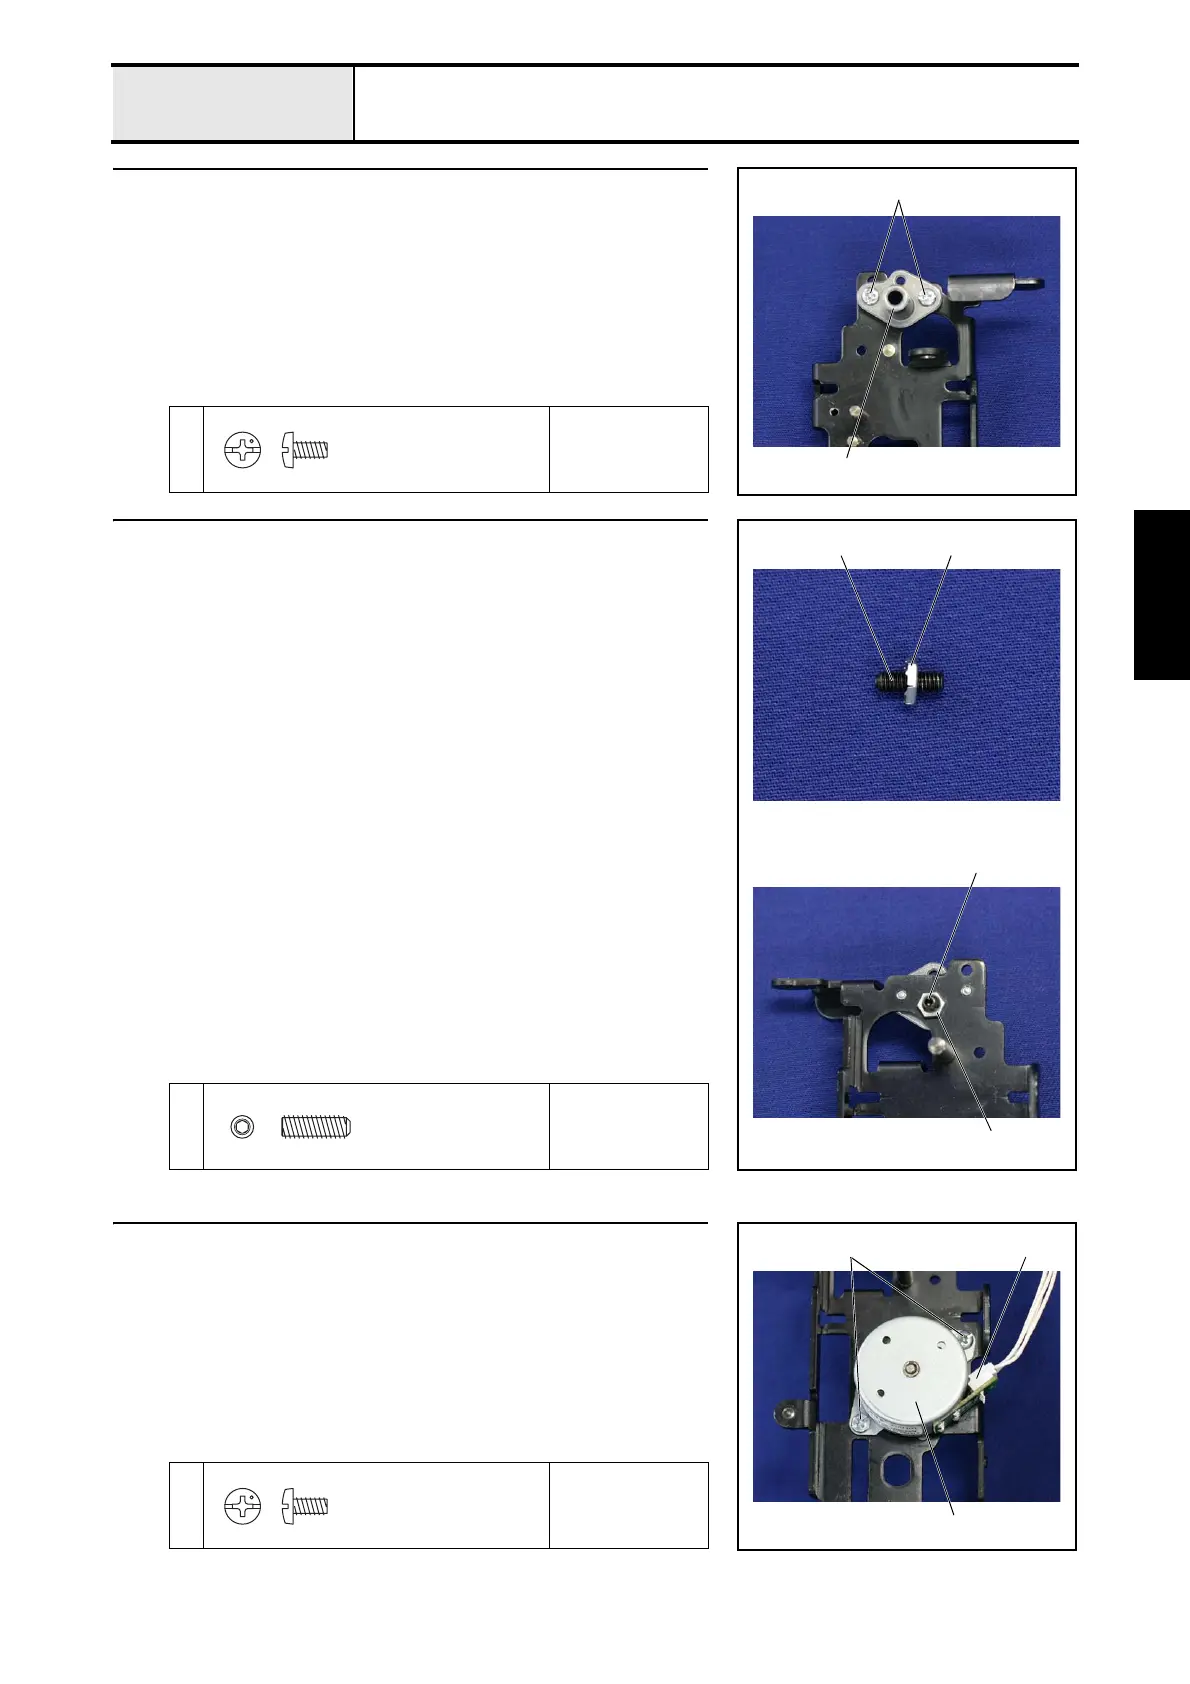
1 Attachment of Shaft bushing
1. Set the shaft bushing 1 to the base holder assy. with the 2 screws 1.
1
Torque
0.78 – 1.18 N·m
1
1
Screw, Bind
M3X6
2 Attachment of Lock nut
1. Attach the lock nut 1 with the screw 1.
*Key point
• Tighten the lock nut 1 to about half of the screw 1.
2. Attach the screw 1 to the base holder assy..
*Key point
• Tighten it until the lock nut 1 hit the base holder assy..
• Refer to "4-18 Adjustment : Needle and presser foot front/back
position".
1
Torque
0.39 – 0.49 N·m
1 1
1
1
Set Screw, Socket (CP)
M4X12
3 Attachment of Z pulse motor
1. Attach the Z pulse motor 1 to the base holder assy. with the 2 screws 1.
2. Attach the lead wire sub assy. 2 to the Z pulse motor 1.
1
Torque
0.78 – 1.18 N·m
21
1
Screw, Bind
M3X6
 Loading...


