MONITOR PANEL SETUP
Both main and small LS can be stereo,
3 stereo, or 5.1 independently. DIM,
CUT and SOLO operate on both sets
of loudspeakers. DIM and CUT can be
externally operated. DIM can be controlled
from the TB if it is set to do so using
condition switching set up on the Options
TX-REH screen.
The Control Room Misc Functions selection
button allows listening modes to be applied
to the Control Room monitor, and APFL
functions to be set up. The Listen Modes
and APFL functions are located in two
seperate banks, and are chosen in the
same way as monitor sources.
The send ports for the LS monitor insert
are patched on on the I/O - Outputs - Mon
TB & Osc Screen. The return ports are
patched on the Options - Mon TB & Tone
- MON SEL (EXT I/P) screen. The LS
monitor insert is switched in and out using
the button on this panel.
(6) Meter Selectors 1-4
Any of the available sources can be
assigned to 4 meter selectors 1, 2, 3 and 4.
Meters 1 -4 can be surround, stereo, phase
and can have an optional separate M/S
(L-R sum/difference) meter. With any of the
meter buttons selected, the misc functions
bank (bank 8) allows Tone and M/S to be
selected for that meter.
Decoder Remotes
The Decoders selection button allows
any decoders which are installed to be
controlled.
Pressing this button allows the user to
select a decoder, and gives access to
decoder remote functions displayed on the
Monitor Selections panel. The different
types of decoder are located in seperate
banks, and functions are chosen in the
same way as monitor sources.
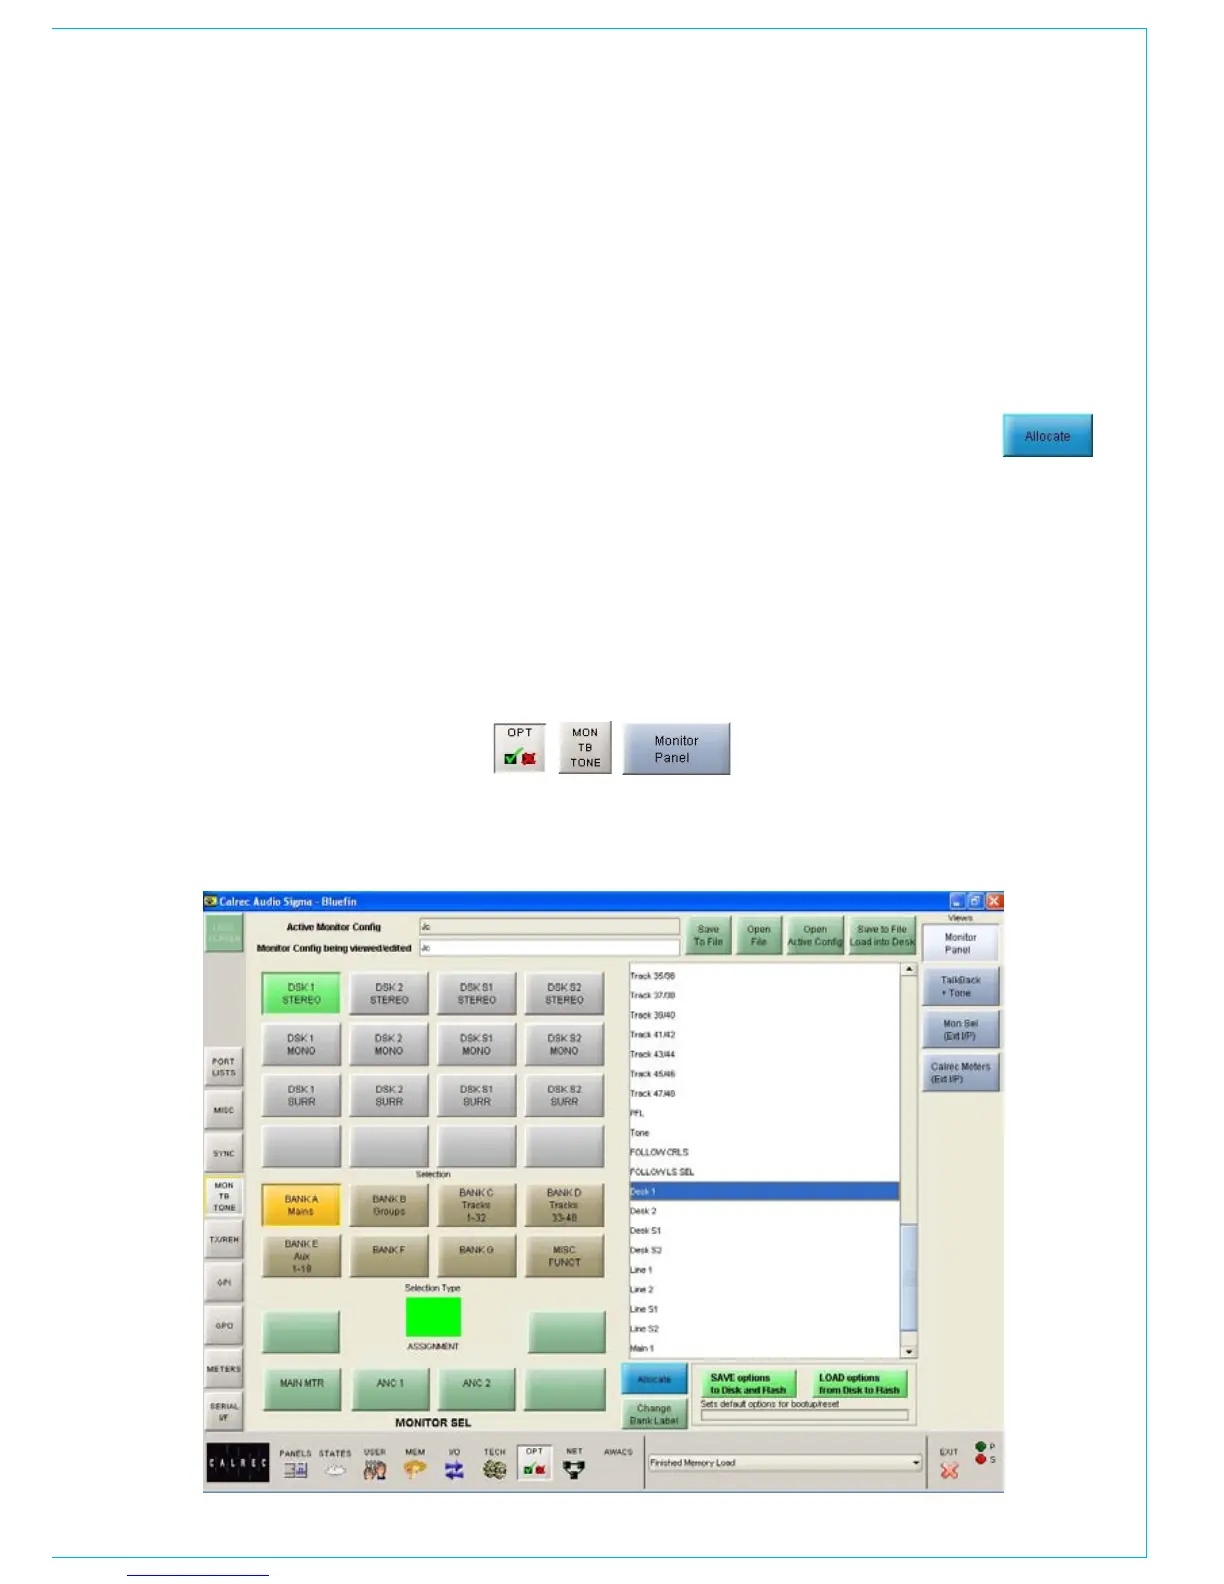
Monitor Selection Panel Setup
Screen
This screen allows all the available monitor
sources to be allocated to 7 banks of 16
selection buttons. This means that sources
of the same type can be banked together
for ease of access on the assignable
monitor selection panel.
The left side of the screen shows a
representation of the monitor selection
panel. The right side of the screen lists
all the available monitor sources. Monitor
sources are allocated to the 16 selection
buttons on each bank as follows:
Select the required bank (The selection
buttons on the screen will change to the
current button settings for that bank).
Select the button to which you want
•
to assign a source (screen button will
flash)
Select the required monitor source
•
from the list
Select “Allocate” •
For external sources, a pop up window
allows the user to enter a suitable label for
the button, and define the source as mono,
stereo or surround.
Each bank can be given a user friendly
label using this screen. Select a bank,
and then select the “Change Bank Label”
button. Labels for the middle and bottom
rows on the button can be entered. The top
row will always display the bank number.
Changes to the monitor configuration
on this screen will not take effect on the
panels until the configuration is saved, and
loaded onto the console.