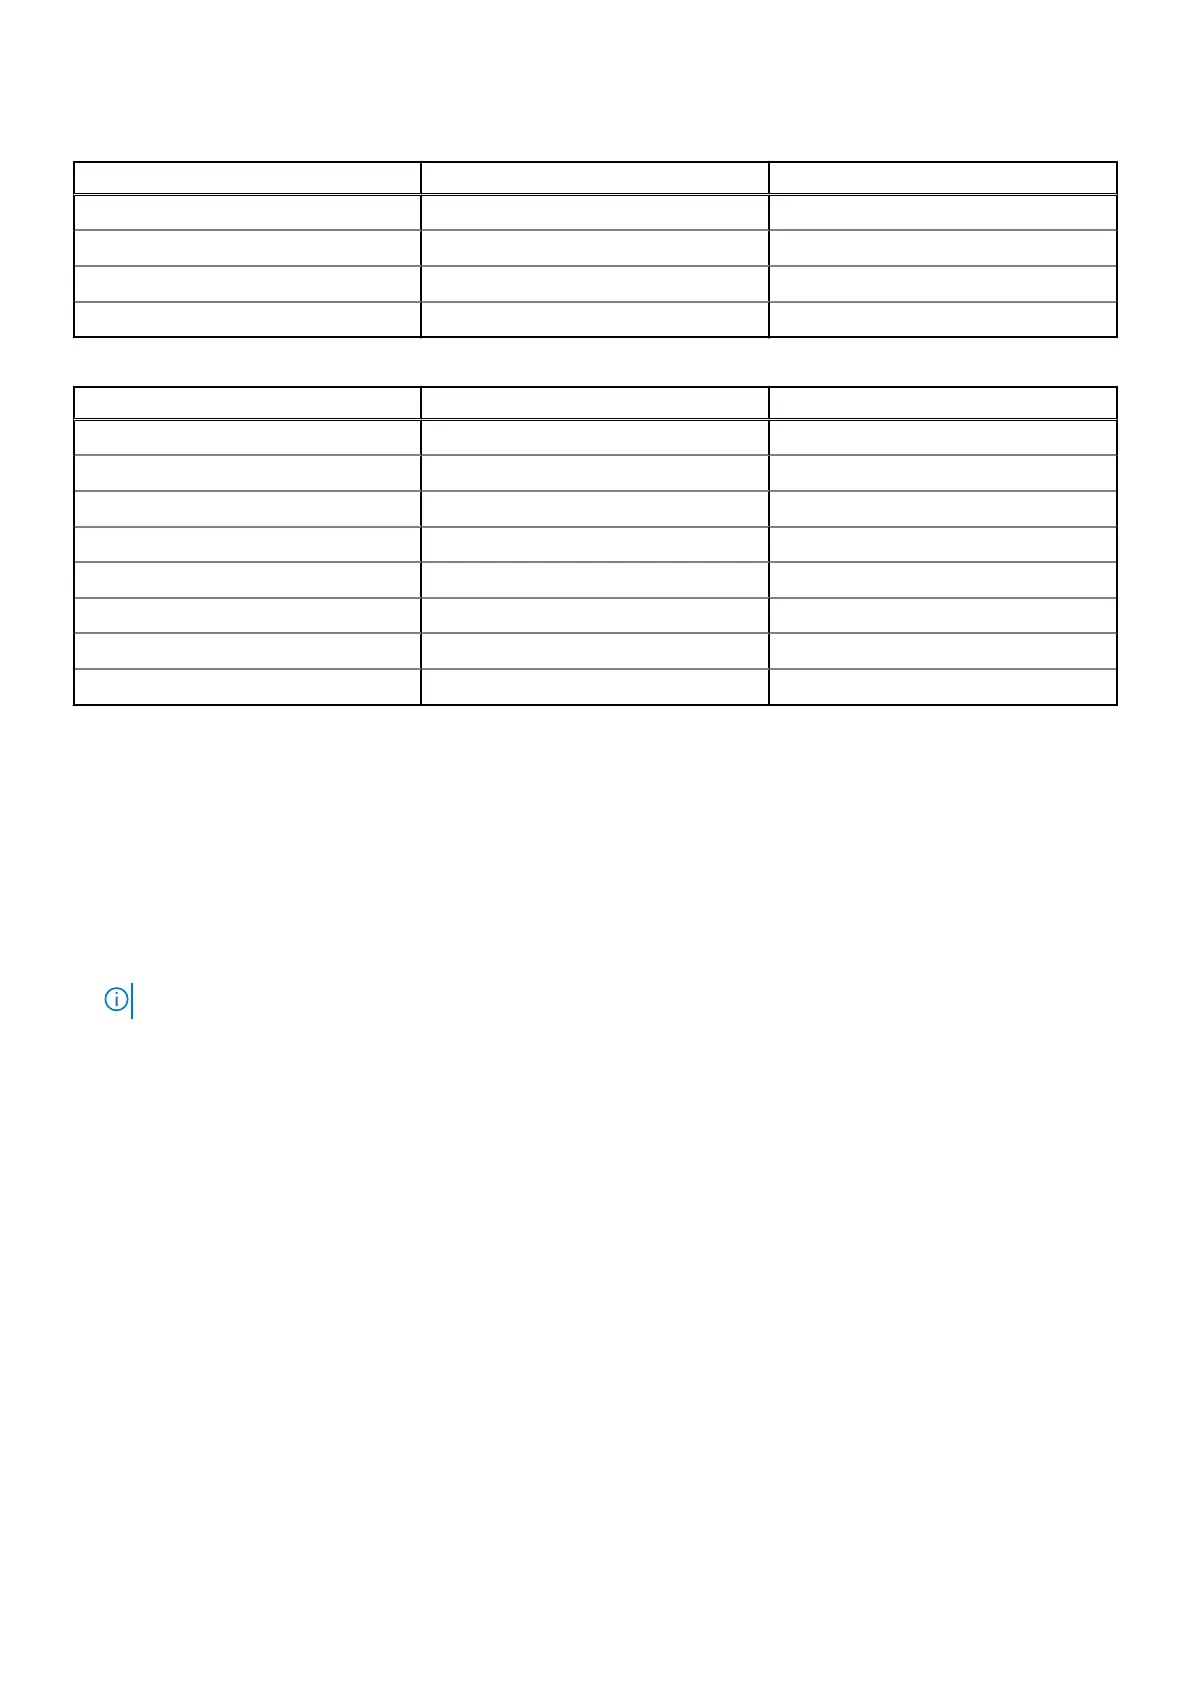
Table 64. Configuration 1: R1A_HL+R2A(continued)
Card type Slot priority Maximum number of cards
NVIDIA (GPU: L4, 24GB, FH) 3, 2, 1 1
M.2 NVMe Riser HW Non-RAID Integrated slot 1
BOSS-N1 Integrated slot 1
ROR-N1 Integrated slot 1
Table 65. Configuration 5_Config1 wHM
Card type Slot priority Maximum number of cards
INTEL (NIC: 25GB, FH) 3, 2, 1 3
INTEL (NIC: 100GB, FH) 3, 2, 1 3
INTEL(NIC: MacLaren, FH) 3, 2, 1 1
Mellanox (NIC: 100GB, FH) 3, 2, 1 3
NVIDIA (GPU: L4, 24GB, FH) 3, 2, 1 1
M.2 NVMe Riser HW Non-RAID Integrated slot 1
M.2 NVMe Riser HW Non-RAID HM Integrated slot 1
FOXCONN ROR-N1 HM Integrated slot 1
Removing the expansion card riser 1
Prerequisites
1. Follow the safety guidelines listed in Safety instructions.
2. Follow the procedure listed in Before working inside your system.
3. Remove the air shroud
4. Remove the M.2 direct riser
5. Remove the side cover .
6. Disconnect the riser card power cables from 2U PDB and 4x signal cables from connectors on the system board.
NOTE: Observe the routing of the cable as you remove it from the system.
Steps
1. Using the Phillips 2 screwdriver, loosen the captive screws that secure the riser 1 on the 2U sled.
2. Hold the expansion card riser 1 by the edges and lift the expansion card riser from the riser connector on the 2U sled.
Installing and removing system components
87

 Loading...


