(g.101/D)
(g.102/D)
(g.103/D)
(g.104/D)
1
2
1
C3
2
3
2
3
1
LIGHTS
The lights on the machine must always be efficient and
function perfectly. Check the lights are functioning properly
every day. If any lights are damaged, they must be replaced
immediately. Immediately replace any burnt out light bulbs.
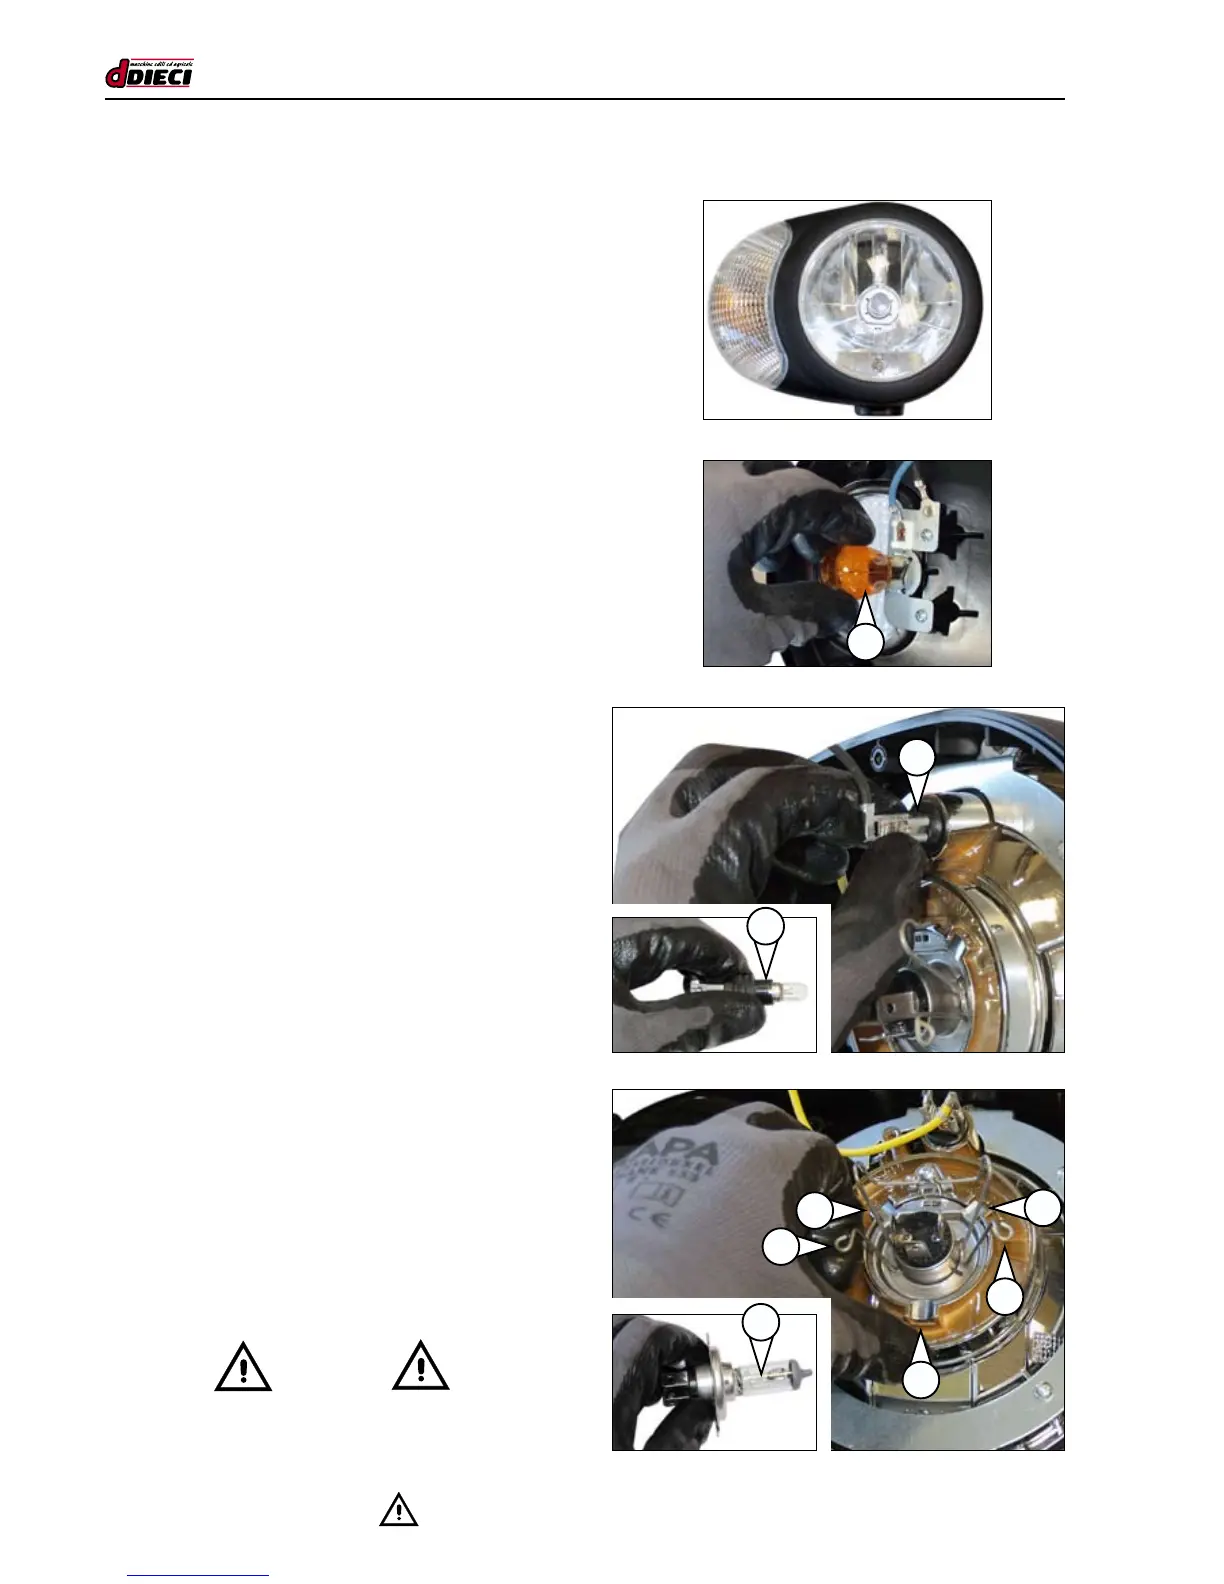
FRONT HEADLIGHT
(g.101/D)
The front headlight consists in an indicator light, side light
and low/high beam headlight.
To access the light bulbs:
- Stop the machine and act on the battery cut-off switch to
disconnect the power supply.
- Remove the head light power connector on the rear.
- Remove the front part of the head light by unscrewing
the screws located on the rear cover.
To re-close the head light, reverse the procedure described
above (ensure the seal is positioned correctly).
How to replace the direction indicator light bulb
(g.102/D Pos.“1”)
- Press the upper part of the light bulb.
- Turn the light bulb while continuing to press to release
the light bulb.
Carry out the same procedure to install a new light bulb.
How to replace the side light bulb
(g.103/D Pos.“1”)
- Grip the rear where the electrical connections are loca-
ted (g.103/D Pos.“2”).
- Turn and pull the rear part towards you.
- Extract the support; press the upper part of the light bulb.
- Turn the light bulb while continuing to press to release
the light bulb.
Carry out the same procedure to install a new light bulb. Re-
insert the support in its housing.
How to replace the low/full beam light bulb
(g.104/D Pos.“1”)
- Pull the electrical connector towards you to remove.
- Raise the tabs (g.104/D Pos.“2”) and shift sideways to
release the bulb.
- Replace the bulb and then reverse the procedure de-
scribed above to fasten and reconnect the light bulb.
Ensure you match the slots on the light xture (g.104/D
Pos.“3”) to guarantee correct installation.
- CAUTION -
Light bulbs are very fragile. Handle with care.
Never handle low beam light bulbs with bare hands.