(g.71/D)
(g.72/D)
G
F
G
F
REDUCTION GEAR AND DIFFERENTIAL AXLES
The gures are indicative and may not be the same as the
parts assembled on your machine.
The references to maintenance holes refer to the following
pages, which illustrate two standard axles with reduction
gear for more exact identication.
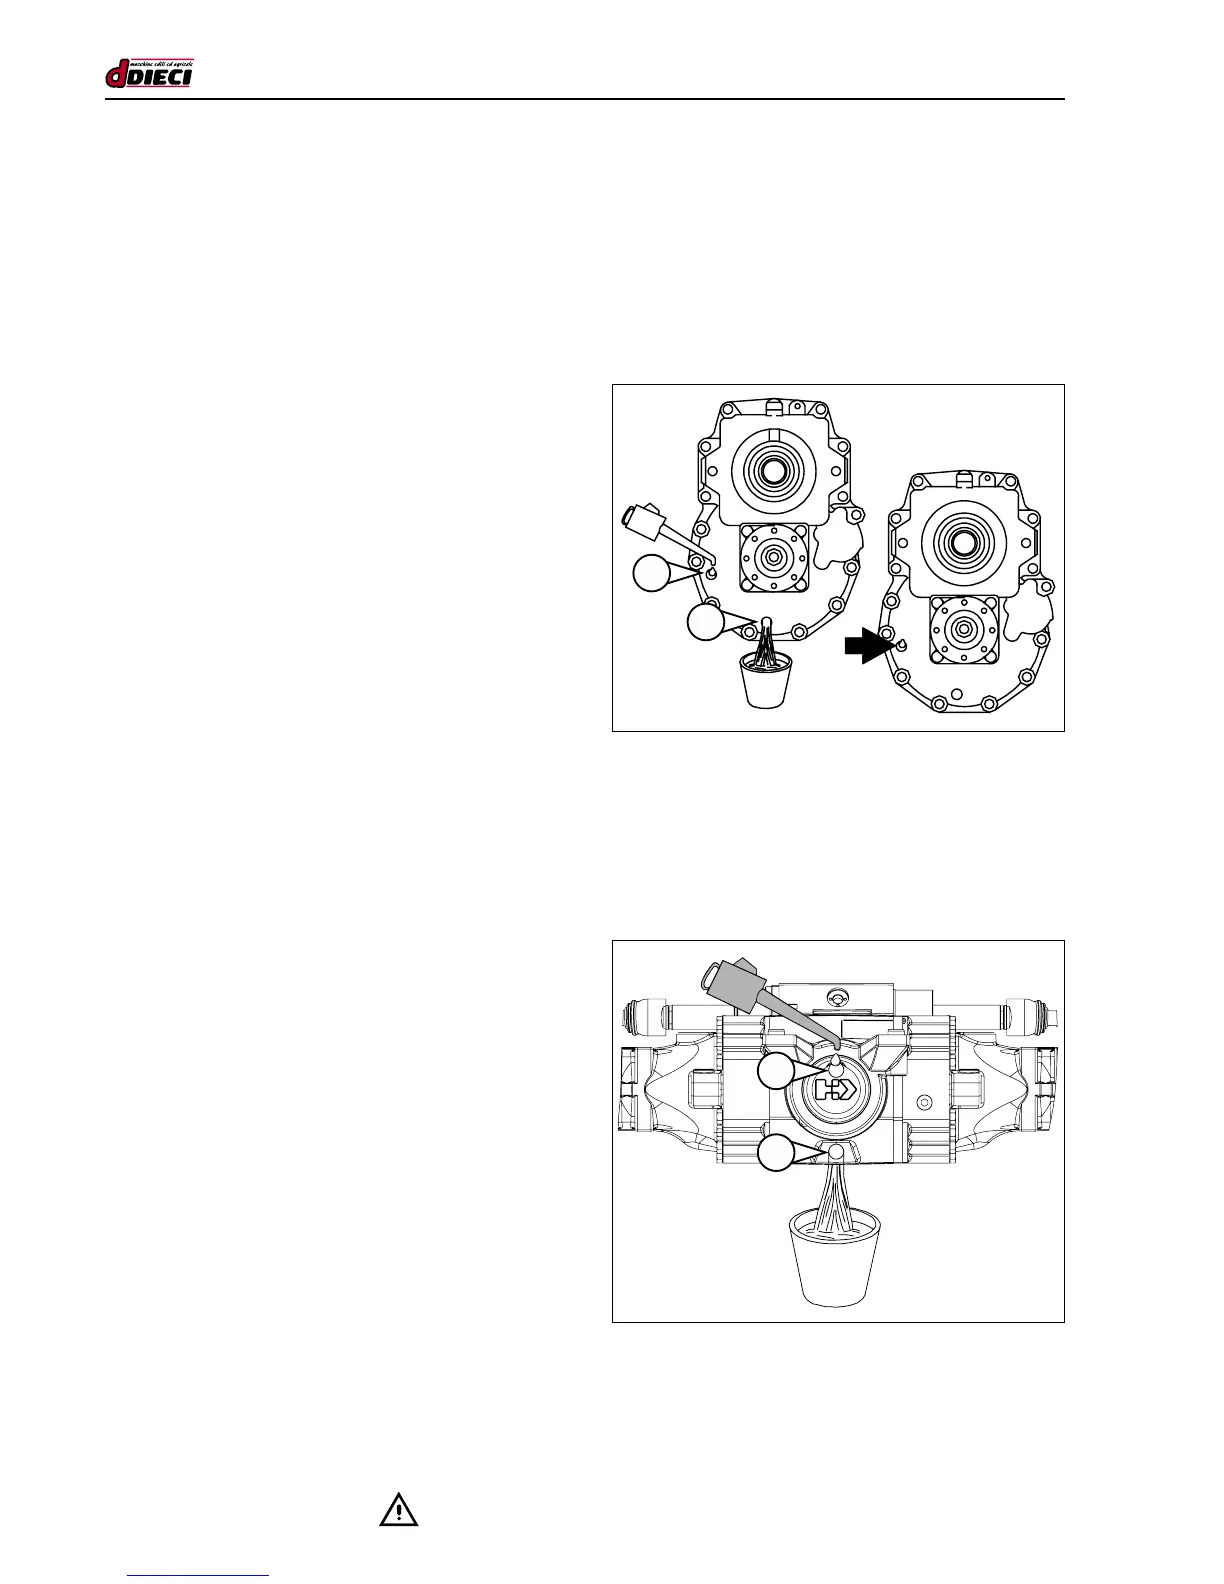
Reduction gear
Changing the oil
(Fig.71/D)
1. Place the machine on a at and level surface while the
differential oil is still hot.
2. Switch off the engine and remove the ignition key.
Place a “maintenance work in progress” sign in the cab.
3. Place a container below the drain caps to collect the
exhausted oil during the replacement procedure.
4. Remove the drain plug (g.71/D Pos. “G”) and the ller/
level cap (g. 71/D Pos. “F”) to drain all the oil completely.
5. Allow the oil to drain away completely.
6. Replace the drain plugs and tighten well.
7. Pour clean oil of the approved type through the ller/level
cap (g.71/D Pos. “F”).
8. The level is correct when oil flows out of the filler/level
cap (g.71/D Pos. “F”).
9. Check for any leaks from the drain caps.
10. Reassemble the filler/level cap and tighten securely.
Front/rear differential axles
Changing the oil
(Fig.72/D)
1. Place the machine on a at and level surface while the
differential oil is still hot.
2. Switch off the engine and remove the ignition key.
Place a “maintenance work in progress” sign in the cab.
3. Place a container below the drain caps to collect the
exhausted oil during the replacement procedure.
4. Remove the drain plug (g.72/D Pos. “G”) and the ller/
level cap (g.72/D Pos. “F”) to drain all the oil completely.
5. Allow the oil to drain away completely.
6. Replace the drain plugs and tighten well.
7. Pour clean oil of the approved type through the ller/level
cap (g.72/D Pos. “F”).
8. The level is correct when oil flows out of the filler/level
cap (g.72/D Pos. “F”).
9. Check for any leaks from the drain caps.
10. Reassemble the ller/level cap and tighten securely.