(g.102/C)
PUSH BUTTONS
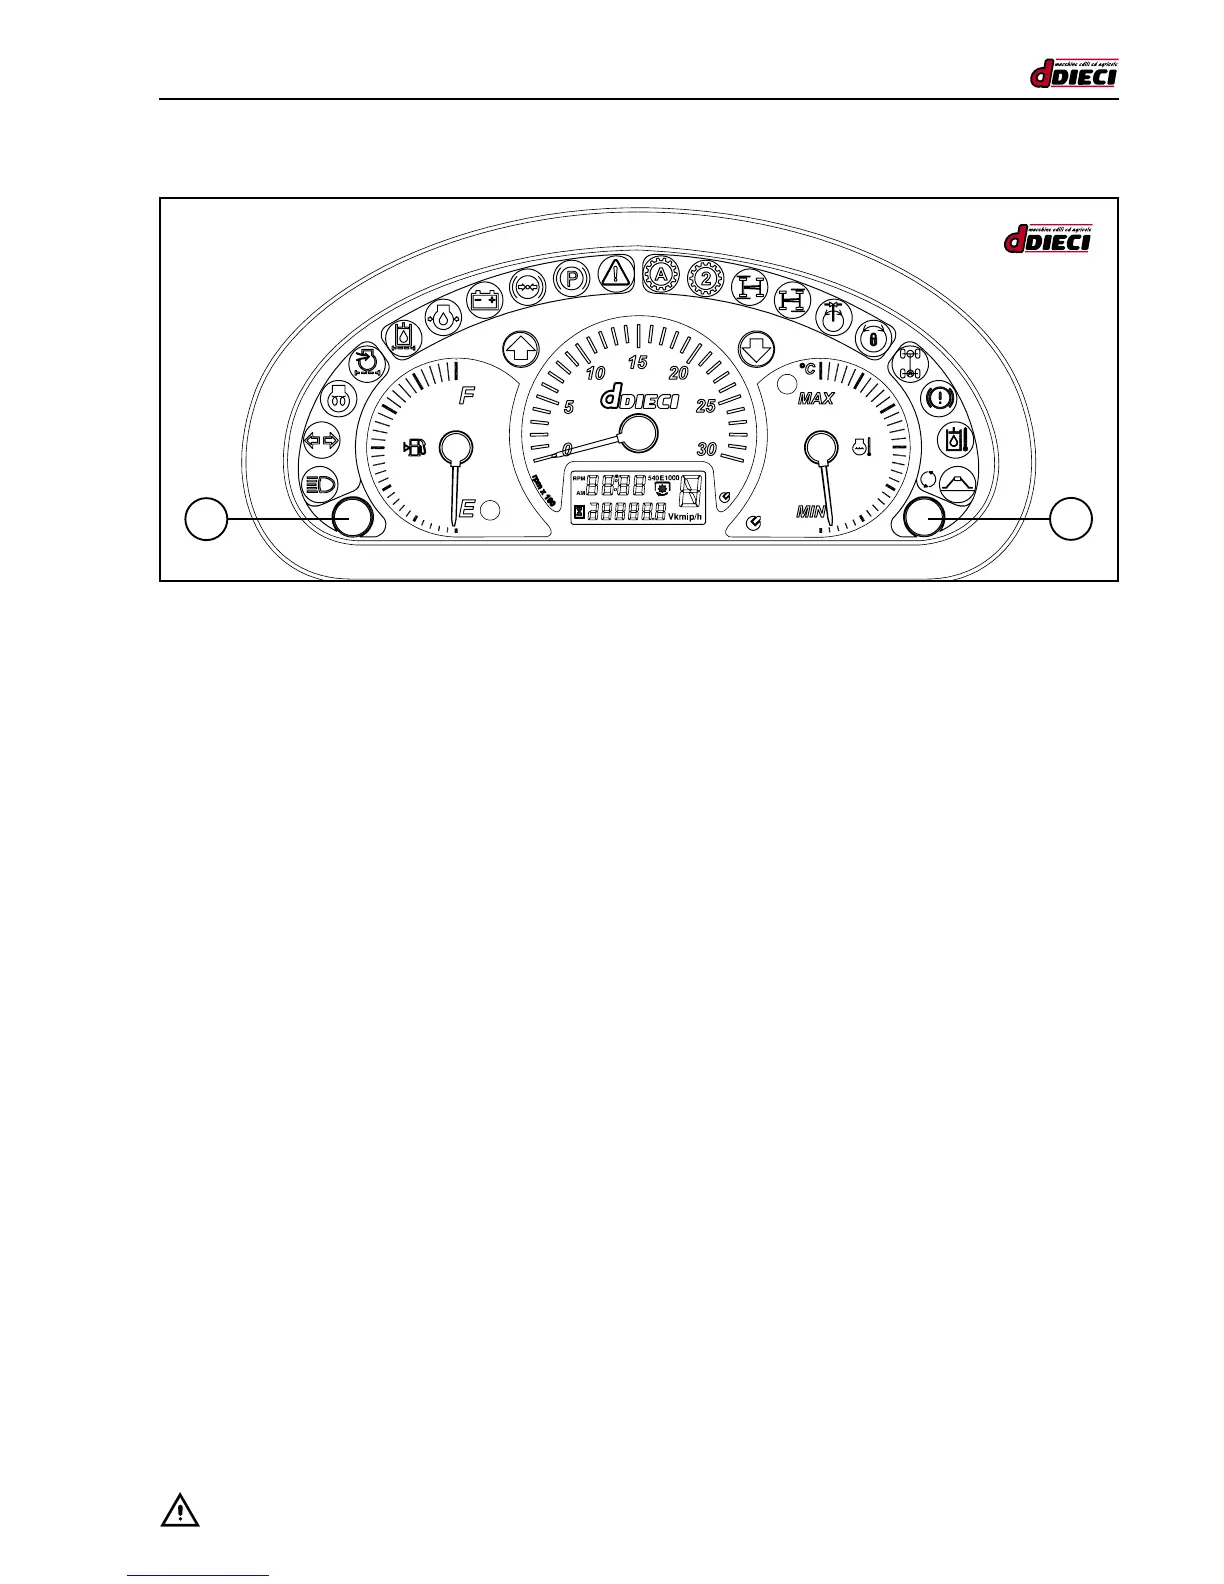
There are two integrated push buttons on the panel. During normal use the two push buttons have the same function.
- Pushbutton “1” (g.102/C) to change the information on the display.
- Pushbutton “2” (g.102/C) to change the information on the display.
Changing the information on the display
Press button “1” (g.102/C) or “2” (g.102/C) to change the information displayed as follows:
1. Hour counter and Clock.
2. Speed and Clock.
3. Odometer and Clock.
4. Hour counter and Clock.
The information normally displayed is the Clock and Hour Counter, if the tachymeter is installed, the Clock and Speed will auto-
matically be displayed.
Clock adjustment
To adjust the clock:
- Switch off the dashboard.
- Press and hold down button “2” (g. 102/C).
- Switch on the dashboard.
- Press and hold down button “2” (g.102/C) for 1.5 seconds during the “check up time”.
- You are now in “Adjustment” mode
When the minutes are ashing, press:
- Push button “1” (g.102/C) to increase.
- Push button “2” (g.102/C) to conrm.
When the hours are ashing, press:
- Push button “1” (g.102/C) to increase.
- Push button “2” (g.102/C) to conrm.
The adjustment phase will then nish and the instrument will start to work normally (the initial check up is excluded).
1
2