MightyMo/MiniMo User’s Guide 2-25
Part # 400030-C
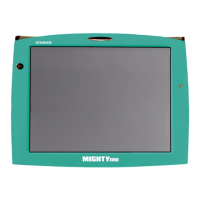
Resetting the Device Chapter 2: Hardware
changes may not be saved to the storage card. A power button reset
should only be performed as a last resort.
To perform a power button reset, follow these steps:
1. Select and hold down on the power button on the front of the
device. After approximately 10 seconds, the touch screen will go
dark.
2. The rest of the power button reset will take a few minutes. A splash
screen will be presented as the device restarts automatically (you
will not need to select the power button). When the reset is
complete, the device will start on the page that was active before
you performed the reset.
Perform a Hard Reset Performing a hard reset on a MightyMo/MiniMo device will shut down
the software and reload all information from the storage card. This
type of reset will completely clear any RAM memory that was not
saved to the storage card. A hard reset should only be performed as
a last resort if a power button reset does not work.
1. Turn your device face down (bottom side up) and locate the hole
in the plastic that covers the reset button. There is a raised R
printed above the reset hole (see Back View of Device
(MightyMo) on page 2-4).
2. Insert a straightened paper clip into the hole until you select the
reset button. You will hear a soft click.
3. Turn the device right side up. The touch screen will be dark.
4. After a moment, a white screen will be presented and you will be
asked to recalibrate the touch screen. A small target will be
presented in the top left corner. Use your finger or a stylus to touch
the center of the target. Follow the target as it moves to the
remaining corners and the center of the touch screen. Select the
center of the target whenever it comes to a stop.
5. Select any area of the touch screen to save the new calibration.
2 Note: If there is no data storage card present, or if the data storage card
is not properly inserted into the slot, you will receive an error
message that reads, “Please insert a card into Slot 1.” Refer to the
steps in Install a Secondary Storage Card on page 2-18 to insert
a data storage card or to make sure the data storage card is
inserted properly.
 Loading...