Epson Artisan 810/835/837/710/725/730/Epson Stylus Photo PX810FW/TX810FW/PX820FWD/TX820FWD/PX830FWD/PX710W/TX710W/PX720WD/TX720WD/PX730WD/TX730WD
Revision G
DISASSEMBLY/ASSEMBLY Disassembly/reassembly procedures specific to Artisan 710/PX710W/TX710W 183
Confidential
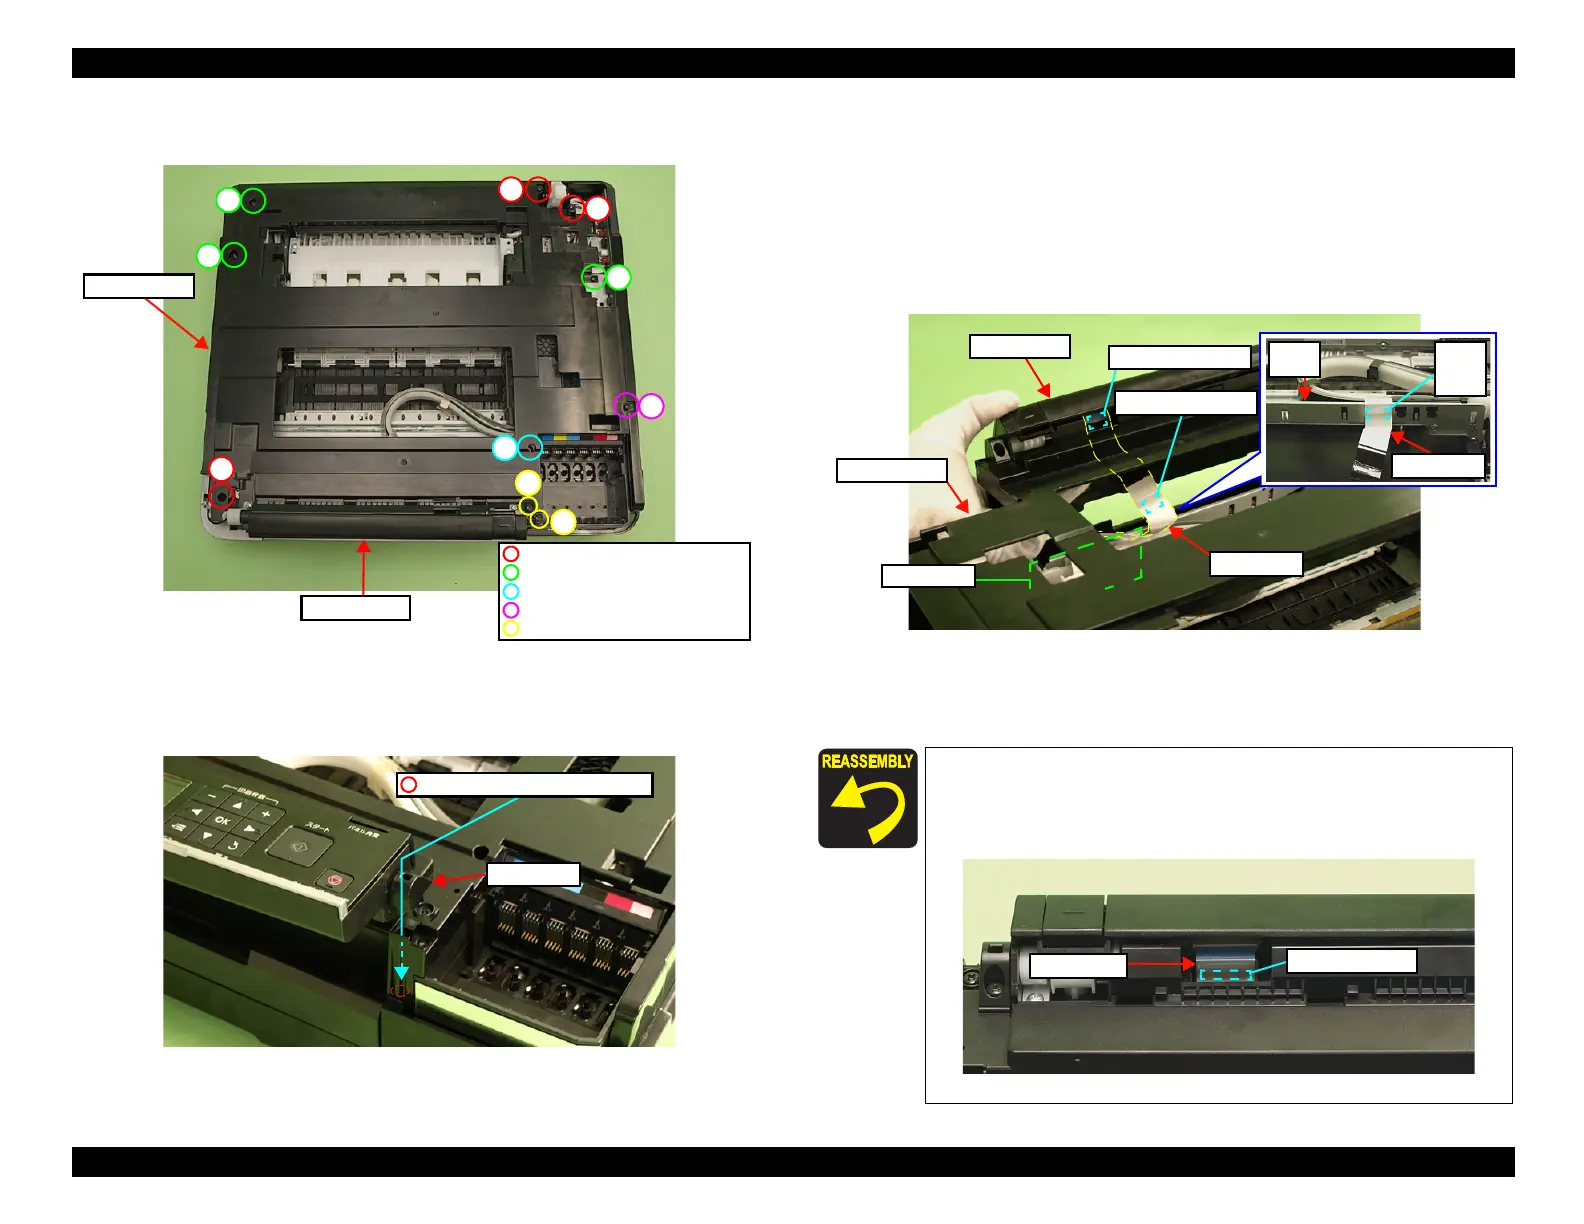
4. Remove the screws (x10) that secure the Upper Housing.
Figure 4-164. Removing the Upper Housing (2)
5. Open the Panel Unit, and lift the Panel Unit until the screw (x1) can be seen
from under the Right Hinge, and then remove the screw (x1).
Figure 4-165. Removing the Upper Housing (3)
6. Peel off the double-sided tape A that secures the Panel FFC to the Front
Frame, and lift the Upper Housing until the Panel FFC becomes detached
from the FFC Holder. (See
Fig. 4-166.)
7. Peel off the double-sided tape B that secures the Panel FFC to the Panel Unit.
(See
Fig. 4-166.)
8. Disconnect the Panel FFC from the connector on the Panel Unit, and remove
the Upper Housing together with the Panel Unit.
Figure 4-166. Removing the Upper Housing (4)
9. Remove the Panel Unit from the Upper Housing. (See 4.3.2.1 Panel Unit
(p188).)
1
2
3
4
5
7
8
C.B.S. 3x6 (8±1Kgfcm)
C.B.S. 3x8 (black) (8±1Kgfcm)
C.B.P. 3x10 (6±1Kgfcm)
C.B.A. 3x6 (black) (6±1Kgfcm)
6
C.B.P. 3x10 (black) (6±1Kgfcm)
Upper Housing
Panel Unit
9
10
Right Hinge
C.B.P. 3x12 (black) (6+1Kgfcm)
Tighten the screws in the order indicated in Fig. 4-164.
Secure the Panel FFC with double-sided tape to the Front
Frame. (See
Fig. 4-166.)
Secure the Panel FFC to the Panel Unit with double-sided tape.
Figure 4-167. Installing the Upper Housing
Panel FFC
Front
Frame
Double
-sided
tape A
Panel Unit
Upper Housing
FFC Holder
Panel FFC
Double-sided tape A
Double-sided tape B
Panel FFC
Double-sided tape

 Loading...


