Epson Artisan 810/835/837/710/725/730/Epson Stylus Photo PX810FW/TX810FW/PX820FWD/TX820FWD/PX830FWD/PX710W/TX710W/PX720WD/TX720WD/PX730WD/TX730WD
Revision G
ADJUSTMENT Adjustment Using Adjustment Program 225
Confidential
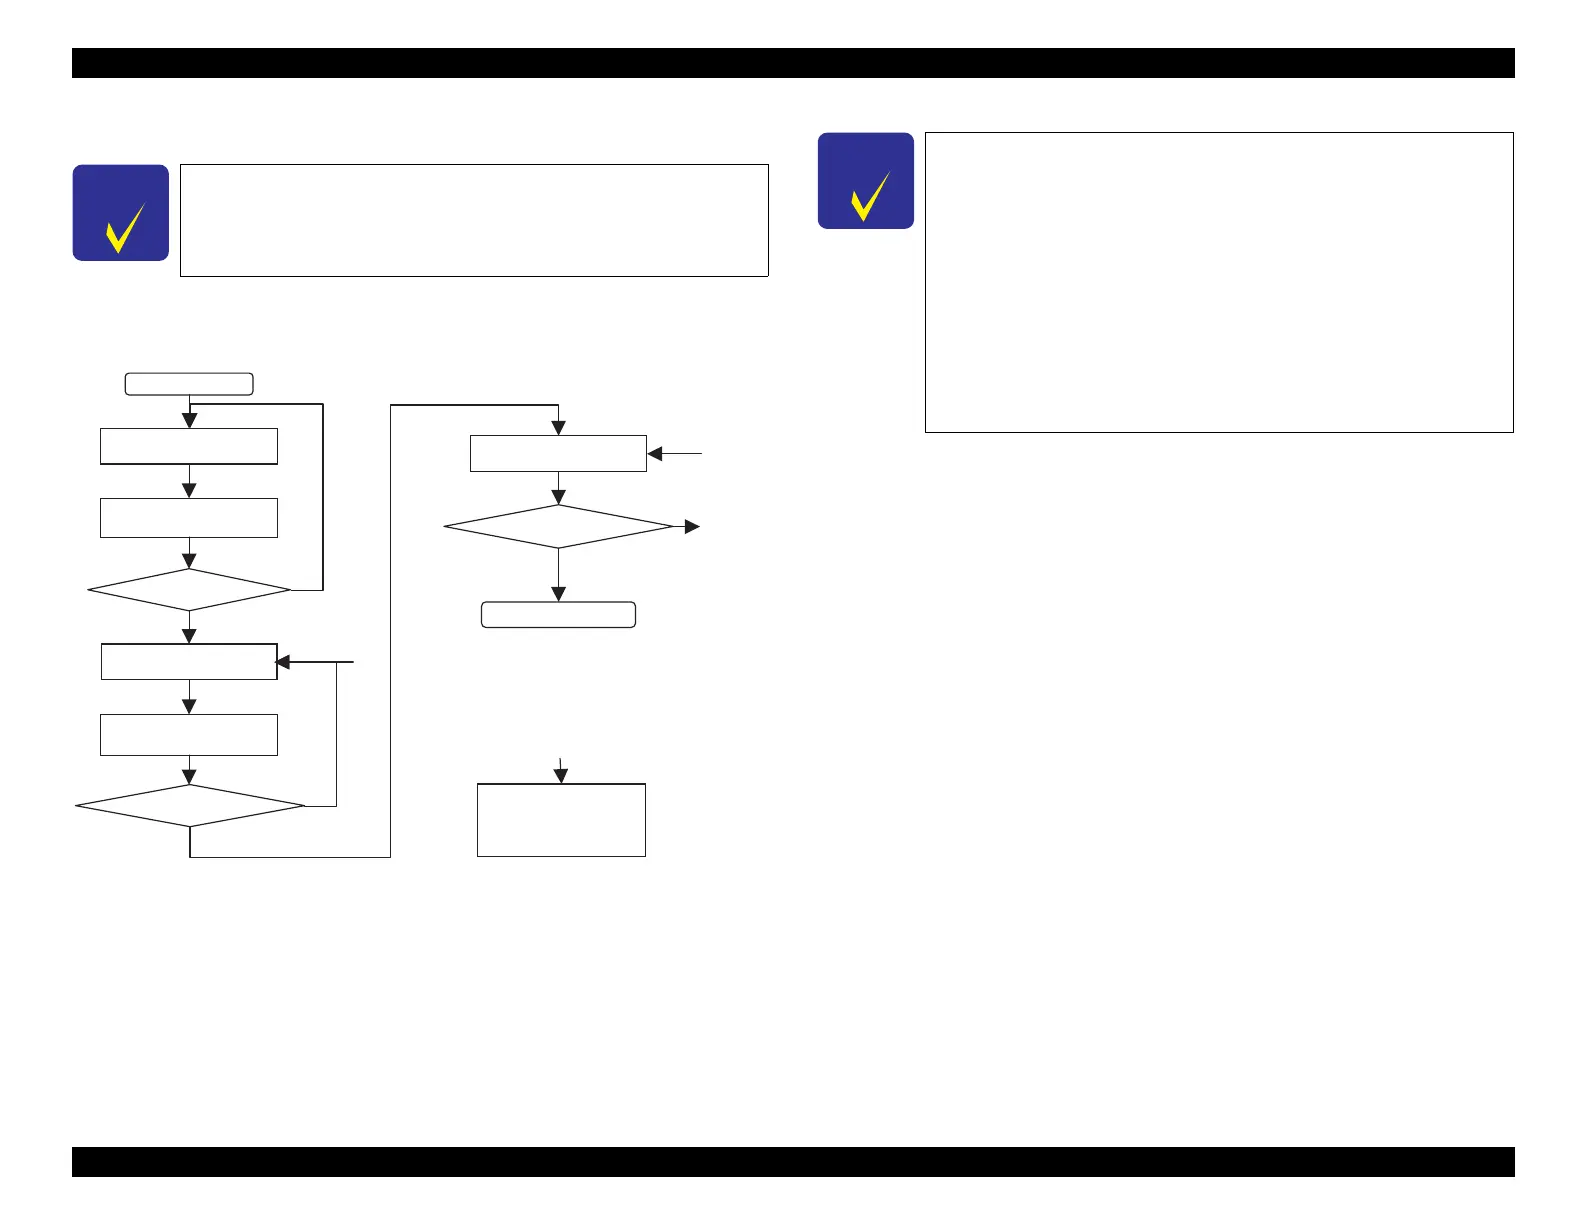
Adjustment Flow
Carry out the adjustment following the adjustment flow below.
Figure 5-24. BRS/PFP Adjustment Flow
Note*: When a PFP pattern is judged as NG, repeat the steps as described below.
First NG: retry from step (1)
Second NG: retry from step (2)
Third NG: perform step (3)
When performing PFP adjustment only without BRS adjustment,
start adjustment from step (2) in
Figure 5-24.
START
Error?
(1)
Judged as mechanism’s
fault. Remove to check
the defective, replace
and reassemble it.
NG
NG
OK
OK
Printing the BRS
Adjustment Pattern
Scanning the BRS
Adjustment Pattern
Printing the PFP
Adjustment Pattern
Judging the Pattern
Scanning the BRS
Adjustment Pattern
Error?
NG
Printing the PFP
Check Pattern
OK
End
(3)
(1)(2)(3)*
(1)
When an error is displayed in the adjustment program, check the
points below, then carry out the adjustment again. If an error
occurs even after checking the points below, change the scanner
with a different one and carry out the adjustment again.
1. Check that the printer that printed the pattern and the printer
to register the adjustment value is the same.
2. Check that the printed pattern is placed on the document table
of the scanner correctly.
3. Check that there is no gap between the PFP Base Scale and the
pattern printed sheet.
4. Check that the scanner glass surface and the PFP Base Scale is
free from any dirt or dust.

 Loading...


