Epson Artisan 810/835/837/710/725/730/Epson Stylus Photo PX810FW/TX810FW/PX820FWD/TX820FWD/PX830FWD/PX710W/TX710W/PX720WD/TX720WD/PX730WD/TX730WD
Revision G
ADJUSTMENT Adjustment Using Adjustment Program 228
Confidential
Printing the PFP Check Pattern
6. Set 4 x 6 Premium Glossy Photo Paper on the paper support and click the [Print]
button on the “4. Print Check Pattern” column.
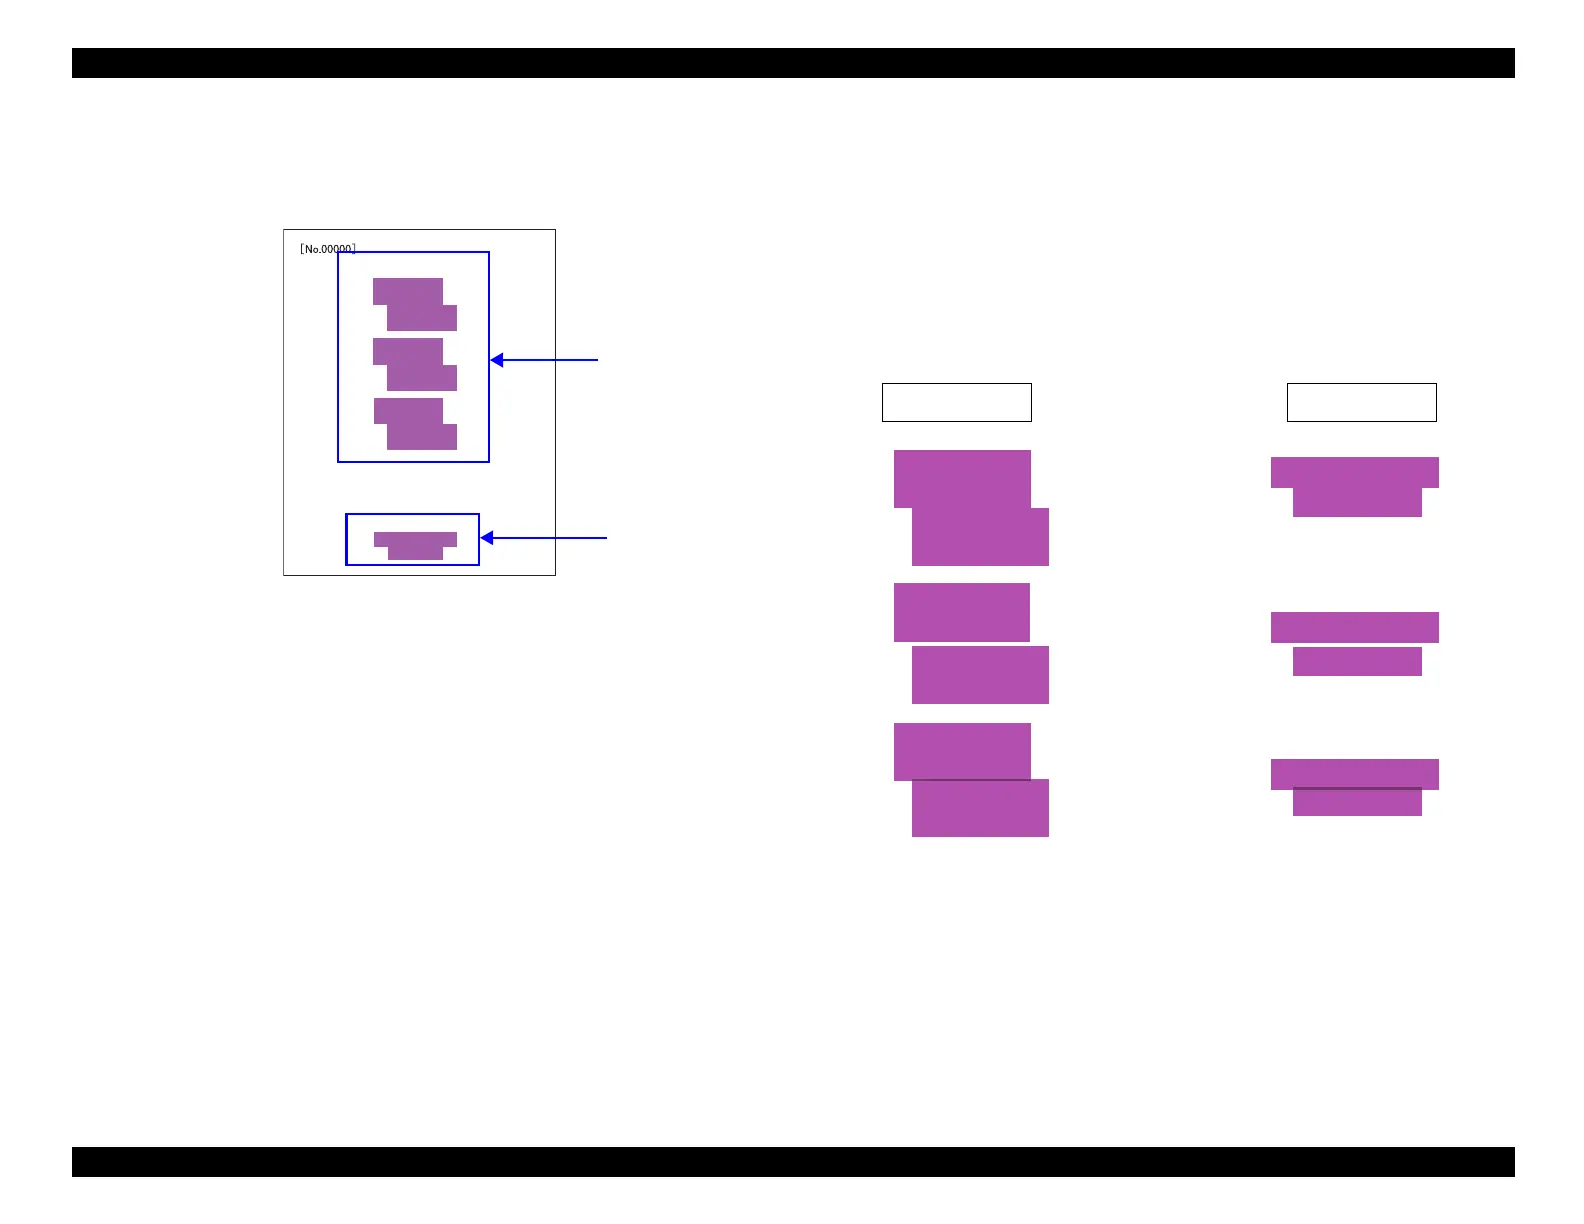
Figure 5-29. PFP Check Pattern
Judging the Check Pattern
7. Referring to Figure 5-30 check that there is no white or overlapped bands in all the
check patterns. If any bands are found, carry out the steps below.
1. Re-print the check pattern to see if the bands appear again.
2. When bands appear in Step 1, try the PFP adjustment again from the
beginning.
3. When bands appear even after the re- adjustment in step 2, determine that it is
the mechanism failure and carry out check/reassemble of the parts that was
removed/replaced.
Figure 5-30. PFP Check Pattern Judging Standard
Normal Area Check
Pattern
Bottom Edge Area
Check Pattern
OK
no bands
Normal Area Check
Pattern
Bottom Edge Area
Check Pattern
NG
white band
NG
overlapped band

 Loading...


