Epson Artisan 810/835/837/710/725/730/Epson Stylus Photo PX810FW/TX810FW/PX820FWD/TX820FWD/PX830FWD/PX710W/TX710W/PX720WD/TX720WD/PX730WD/TX730WD
Revision G
Artisan 835/725/PX820FWD/TX820FWD/PX720WD/TX720WD
Disassembly/assembly 271
Confidential
4. Move the Carriage Unit to the center.
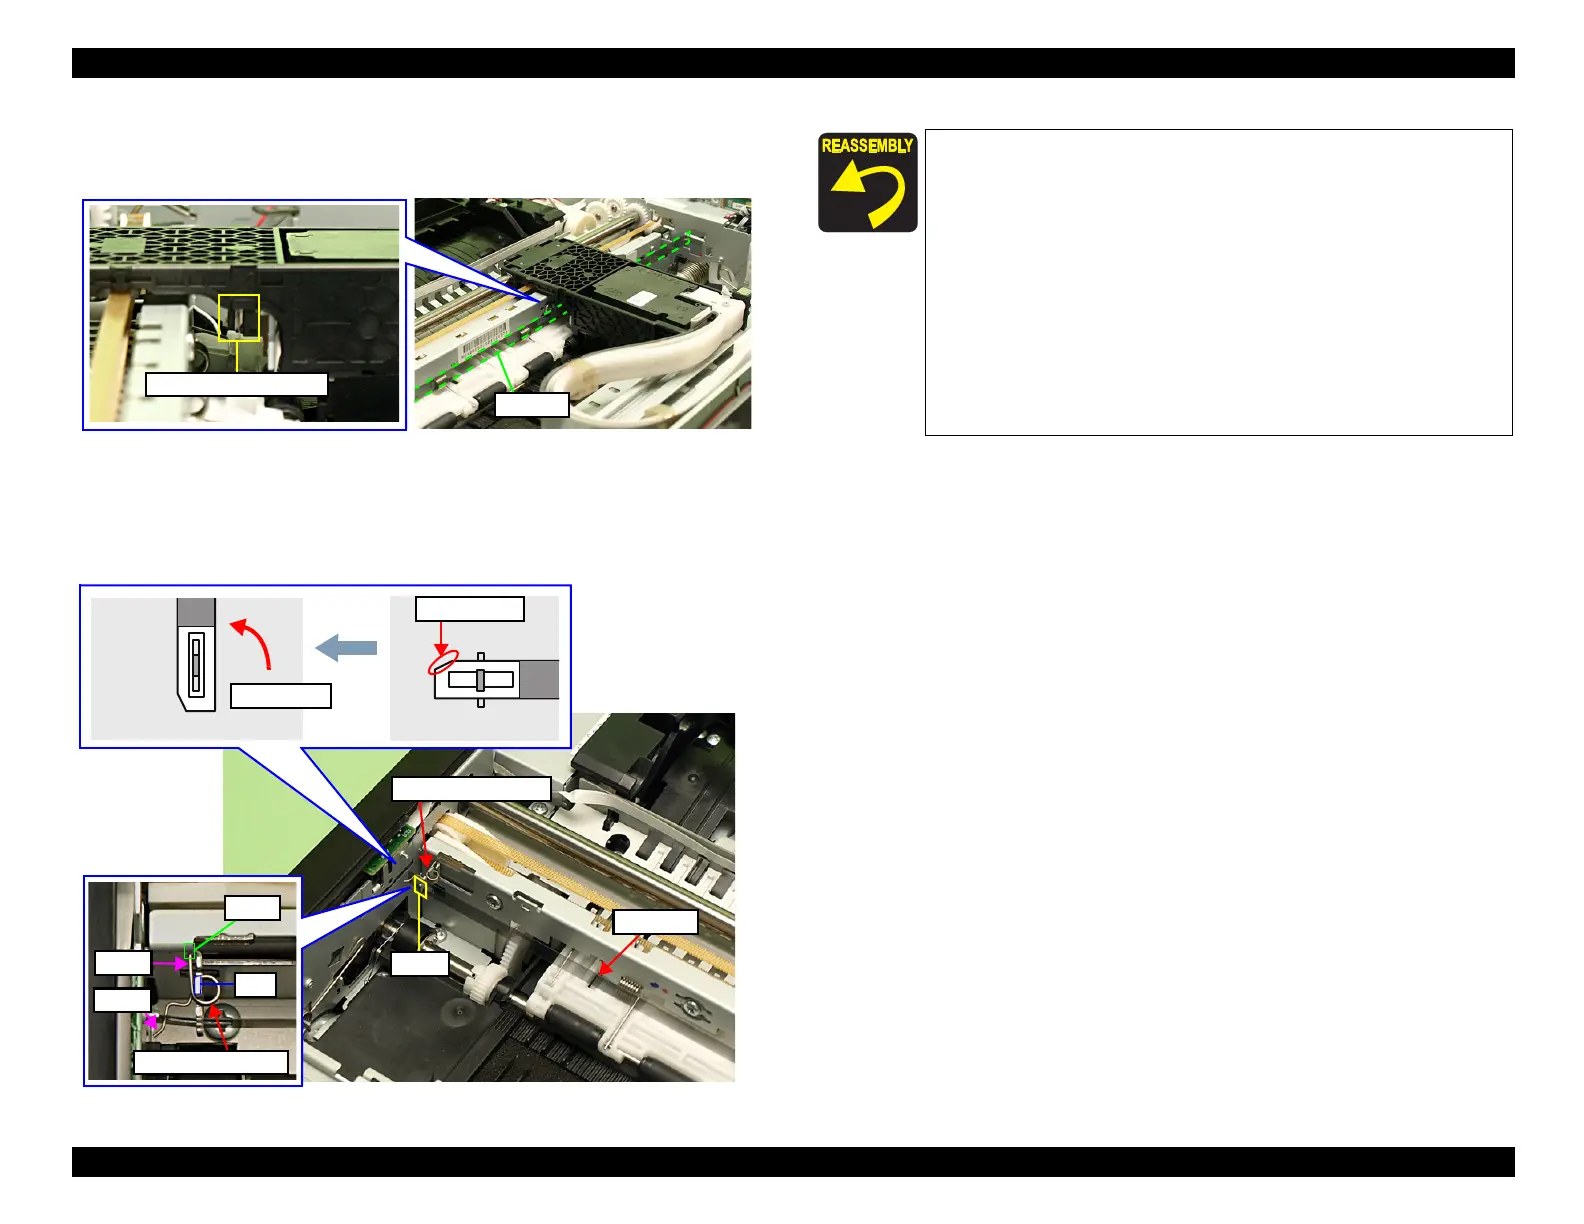
5. Pull out the CR Scale from the slit of the CR Encoder Sensor.
Figure 8-20. Removing the CR Scale (2)
6. Detach the Torsion Spring 16.43 from the hook of the Main Frame.
7. Rotate the CR Scale 90 degrees as shown below, and remove it from the Main
Frame.
Figure 8-21. Removing the CR Scale (3)
Slit of CR Encoder Sensor
Rib
Torsion Spring 16.43
Leg A
Leg B
Cutout
Hook
CR Scale
Torsion Spring 16.43
Attach the CR Scale to the hook on the left of the printer with
the chipped part upward. (See
Fig. 8-21.)
When installing the Torsion Spring 16.43, follow the procedure
below. (See
Fig. 8-21.)
1. Attach the leg A to the hole of the CR Scale.
2. Attach the Torsion Spring 16.43 to the rib on the Main
Frame.
3. Attach the leg B to the cutout of the Main Frame.
Make sure to put the CR Scale through the slit of the CR
Encoder Sensor. (See
Fig. 8-20.)
Be sure to install the CR Scale on to the hooks (x2). (See Fig.
8-19.)

 Loading...


