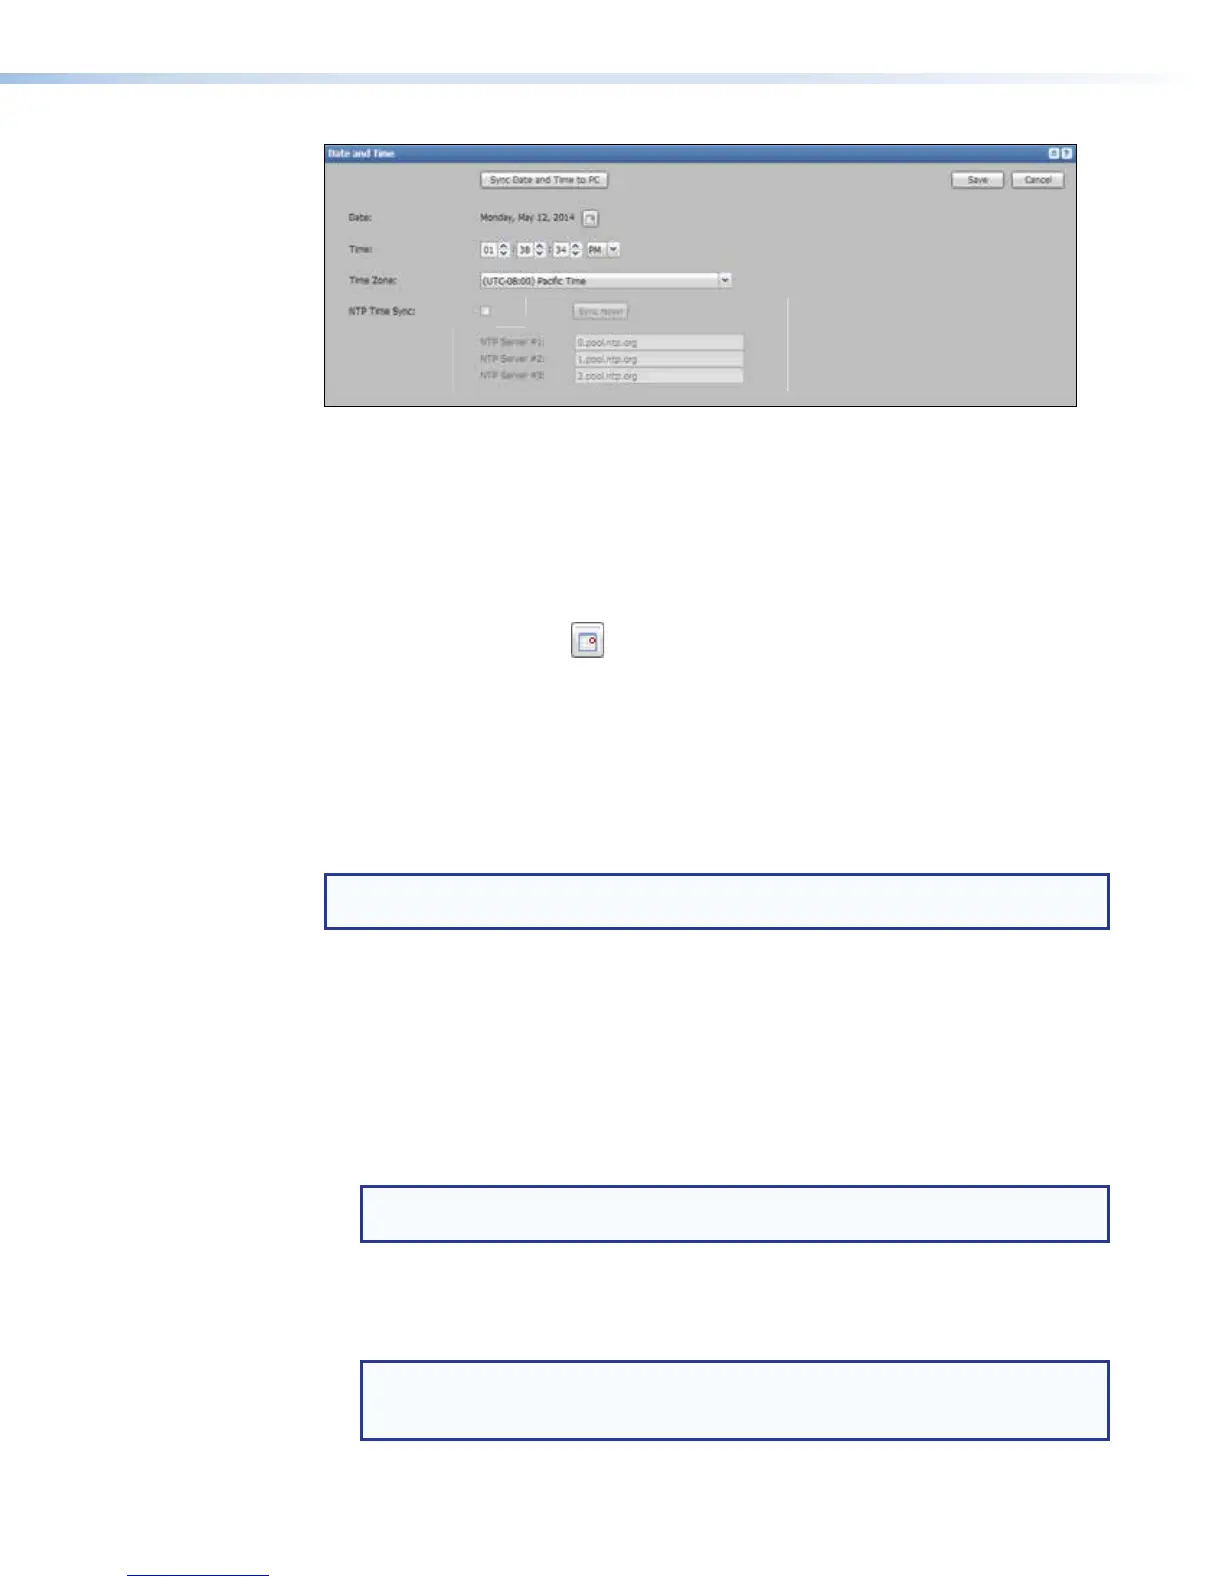
Figure 73. Date and Time Panel
To sync the unit with the connected computer:
1. Click Sync Date and Time to PC. This sets the date, time, and time zone for the
SMP351 automatically, based on the date and time of the connected computer. The
date and time settings are automatically updated.
2. Click Save.
To manually set the date, time, and time zone:
1. Click the calendar icon (
) beside the date line to open a pop-up calendar. Select a
specific date or click Today to select the current date.
2. Click anywhere outside the calendar to exit the calendar. The new date is in the text
adjacent to the calendar button.
3. In the Time: fields, type in numbers for the hour, minutes, and seconds or use the Up
and Down arrows to change the values. Select AM or PM from the drop-down list.
4. Select the appropriate zone from the Time Zone drop-down list.
5. Click Save.
NOTE: It is recommended to reboot the device after manually adjusting the system
time (see System Resets on page148).
To sync the unit with an NTP server:
1. Select (check) the NTP Time Sync check box. The controls are now accessible
(no longer grayed out). At the same time the options for manual settings and PC
synchronization become inaccessible.
2. Type the URLs of the NTP servers used for time reference into one or more of the
NTPServer fields. A resource for NTP servers is http://pool.ntp.org/, which lists pools
of NTP servers, grouped by region, to which you can link computers or devices to
synchronize time.
NOTE: A valid DNS server must be configured in order to resolve an NTP server by
its domain name. Alternatively, an IP address can be used.
3. Click Sync Now!. The unit checks one or more of the specified servers or server pools
and updates the date and time settings.
4. Click Save.
NOTE: After the unit is configured to sync with NTP servers, the
Troubleshooting Status page displays the configured NTP server URLs and
the date and time when the unit was last synced to the servers.
SMP351 • Web-Based User Interface 114