An mz-24 Pro HoTT TEACH transmitter can be con-
nected to any suitable PUPIL transmitter, including
transmitters with a classic 35/40 MHz range. Use the
DSCport on the back of the transmitter to establish a
cable-linked trainer system.
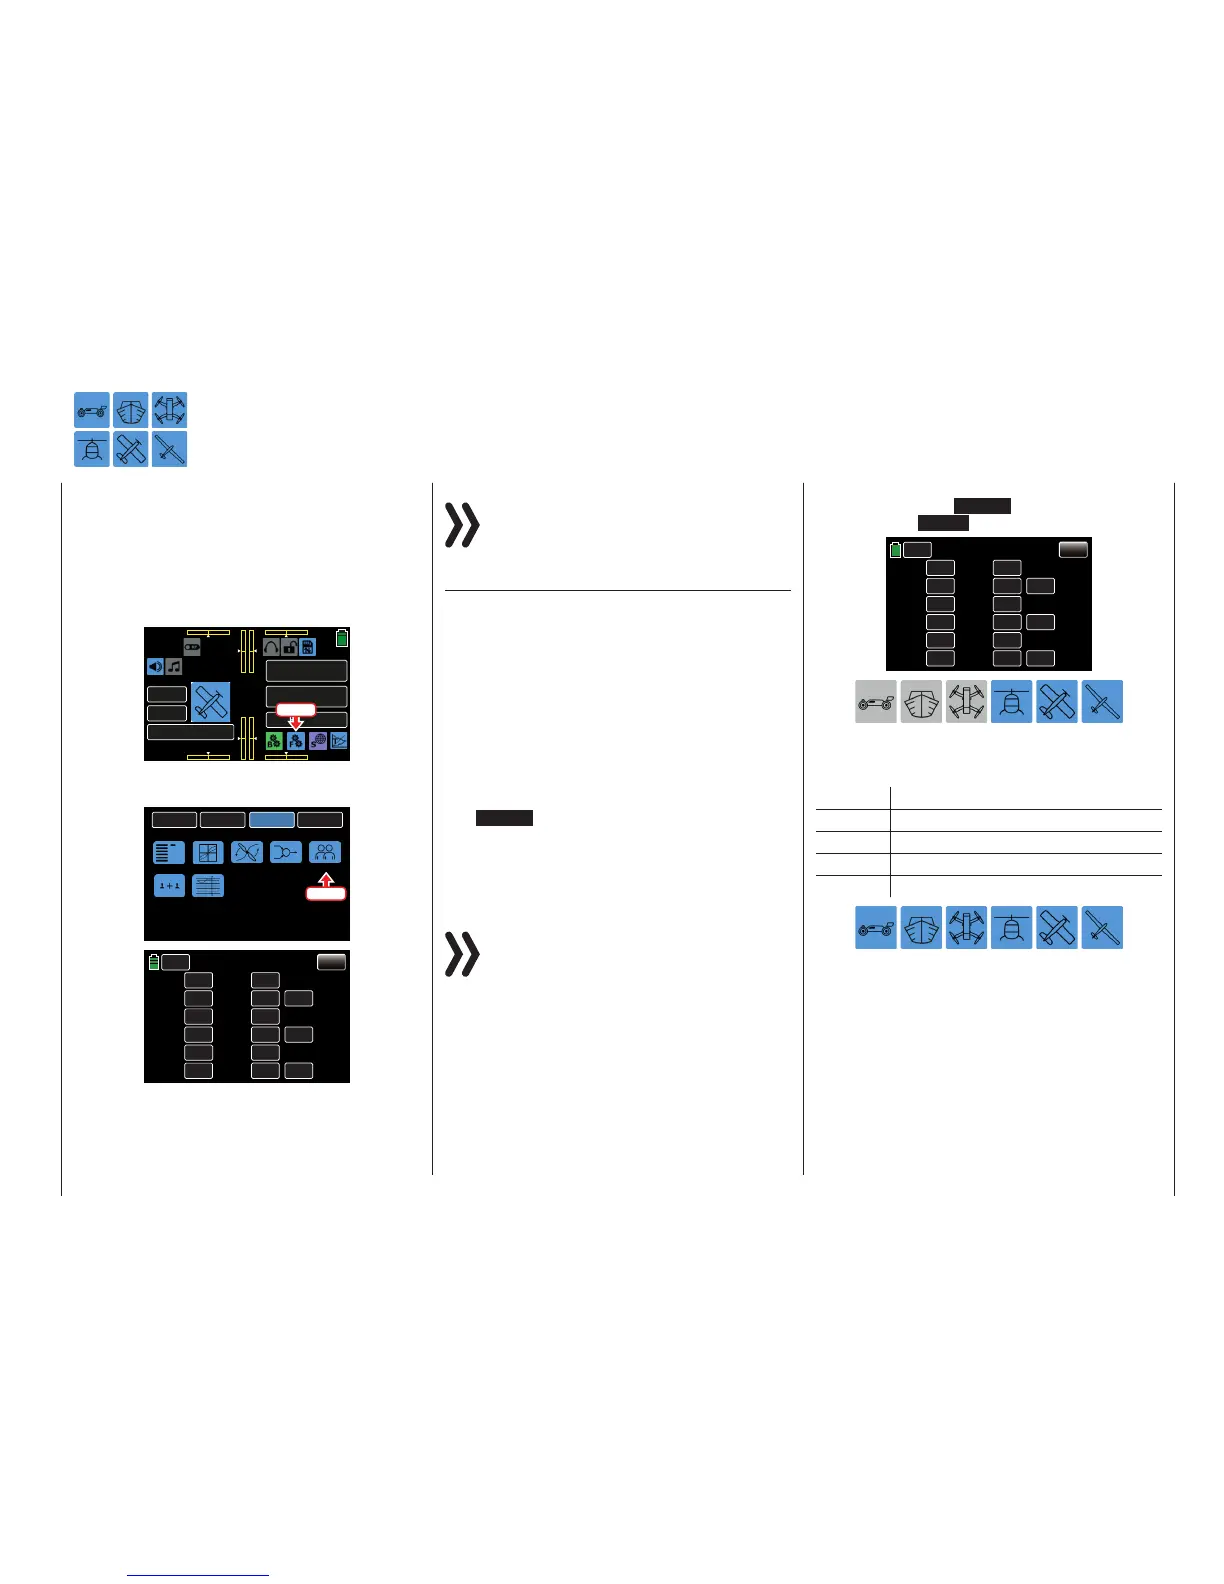
To establish these settings, from the main display
press the FUNCTION menu gear icon (blue “F”) to
bring up the FUNCTION submenu screen:
000
000
000
000
mz
BATT TIME 00: 01: 23
MODELLNAME 1
M - 1
PHASE 1
000:00.0
000:00.0
4.2V
0:01:23
Press
From the FUNCTION submenu display, press the
Trainer icon:
BACK
SYSTEM
BASE
FUNCTION
Phase
D/R,EXP
THR.CRV
Prog.MIX
Trainer
Sequence
Logical sw
Press
BACK
SERVO
CH 1.
CH 2.
CH 3.
CH 4.
CH 5.
CH 6.
TEACH
TEACH
TEACH
TEACH
TEACH
TEACH
CH 7.
CH 8.
CH 9.
CH 10.
CH 11.
CH 12.
TEACH
TEACH
TEACH
TEACH
TEACH
TEACH
NULL
OFF
RF
CTL
BIND
TYPE
Trainer
Trainer
Dual Transmitter Connection With DSC Cable
Notice
The previous graphic shows the default status of
this submenu. PUPIL control has not been re-
leased; neither has a switch been assigned.
Transmitter Settings - TEACH
The PUPIL-controlled model must be programmed
with all its functions including trimming and any mix-
er functions in a model memory of the TEACH trans-
mitter. The receiver of the pupil-model must also be
bound to the TEACH transmitter since that receiver
is responsible for controlling the model even in PUPIL
mode.
Transfer up to 12 function inputs (see Definition of
Terms, page 24) of the TEACH transmitter to the PU-
PIL transmitter, either individually or in any desired
combination.
The TEACH labeling value field or button follows the
standard control stick function assignment for func-
tion inputs 1 - 4 found in all model types. Function
inputs 5 - 12 are typically free, or open, inputs. Refer
to the BASE submenu CTL Set (page 90).
Notice
It does not matter which specific controls are as-
signed to the control function inputs to be trans-
ferred to the PUPIL. Inputs can only be assigned
in the BASE submenu CTL Set (page 90) when the
trainer connection is turned OFF.
To transfer any of the control function inputs 1 - 12 to
the PUPIL, press the TEACH button. The inputs will
be assigned as PUPIL:
BACK
SERVO
CH 1.
CH 2.
CH 3.
CH 4.
CH 5.
CH 6.
PUPIL
PUPIL
PUPIL
PUPIL
TEACH
TEACH
CH 7.
CH 8.
CH 9.
CH 10.
CH 11.
CH 12.
TEACH
TEACH
TEACH
TEACH
TEACH
TEACH
NONE
OFF
RF
CTL
BIND
TYPE
Trainer
Following the standard conventions for model types
Airplane, Glider and Helicopter when assigningcon-
trol functions.
Channel Function
1 Motor/airbrake or pitch
2 Aileron or Roll
3 Elevator or Nick
4 Rudder or Yaw
To change between teacher and pupil, a train-
er-switch must be assigned in the value field in the
CTL column, as described in section Control and
Switch Assignment (page 26).
141
Function menu | general - Trainer

 Loading...


