Wireless HoTT System
The mz-24 HoTT Pro transmitter trainer system can
be operated remotely. Configuration two available
transmitters in the FUNCTION submenu Trainer dis-
play via the BIND option. Refer to the Binding PUPIL
Transmitter to TEACH Transmitter section (page
146) for more information.
Preparing for Training Mode
TEACH Transmitter
The training model functions must be programmed
entirely including trimming and any mixers in a model
memory of the TEACH transmitter.
Attention
The model provided for training must be com-
pletely controllable bytheTEACH transmitter and
remain connected to the teacher transmitter for
the duration of the training phase.
Notice
If the PUPIL transmitter is a mx-10 with firmware
version V 1a20, regardless of the teacher trans-
mitter firmware version, the training model MUST
ALWAYS be linked to the pupil transmitter. In addition,
for correct functionality, in the model memory of the
teacher transmitter, both option buttons in the BIND
ON/OFF line of the BASE submenu TX ctl be set
to OFF . In other words, there should be no link to a
receiver in this model memory under either RX1 or RX2.
PUPIL Transmitter
With Graupner transmitter series mc, mx, or mz it is
recommended that student models be named “PU-
PIL” in the model memory line. Assign the correct
model type and adapt the control arrangement (mode
1 - 4) and throttle/pitch to the PUPIL preferences. All
other settings, including mixing and coupling func-
tions, are made in the TEACH transmitter and are
transmitted by the TEACH transmitter to the receiver.
Following the standard conventions for model types
Airplane, Glider and Helicopter when assigningcon-
trol functions.
Channel Function
1 Motor/airbrake or pitch
2 Aileron or Roll
3 Elevator or Nick
4 Rudder or Yaw
To assign control functions other than the two con-
trol sticks functions (1 - 4) to the TEACH transmitter,
assign control elements to the inputs in the BASE
submenu CTL Set of the PUPIL transmitter that cor-
respond to the released function inputs 5 - 12 in the
Trainer submenu of the TEACH transmitter.
Notice
Failure to assign a control in the PUPIL transmit-
ter will result in the relevant servo(s) remaining in
middle position after transferring control func-
tions to the PUPIL transmitter.
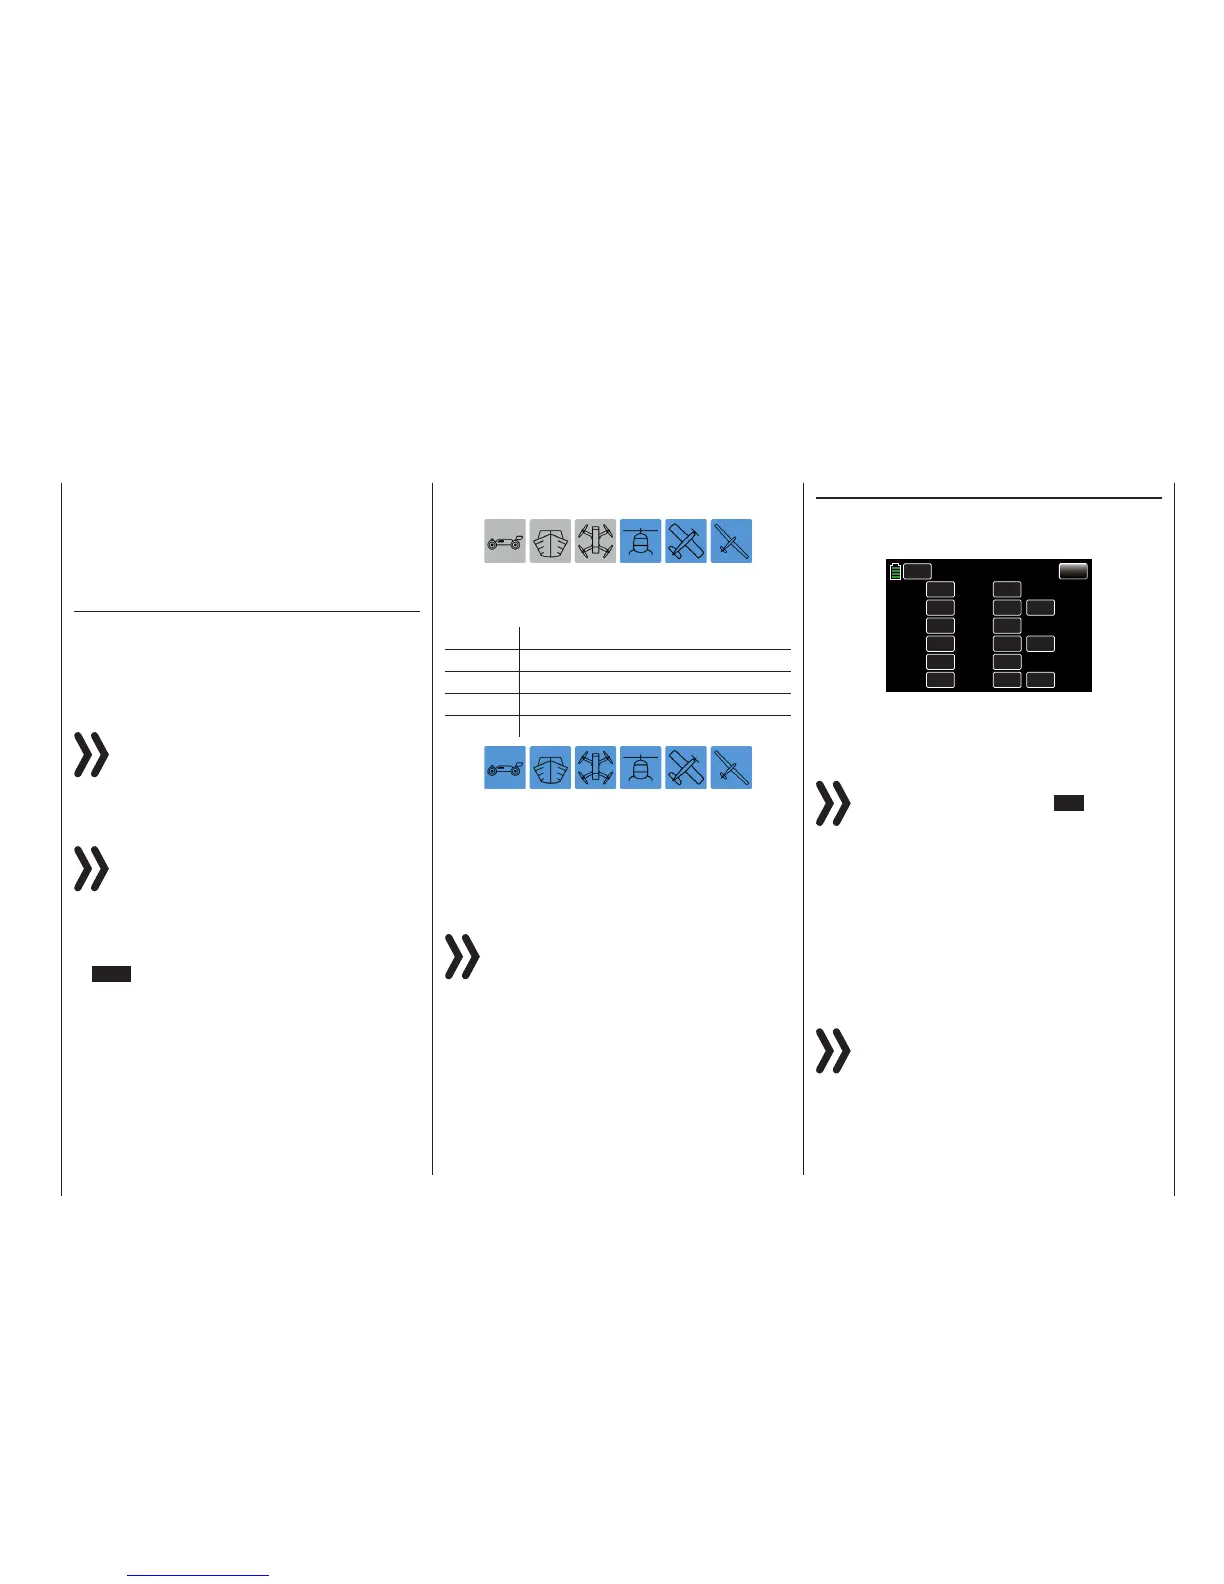
Preparing TEACH and PUPIL Transmitters
Bind the training model to the PUPIL transmitter, then
turn on the TEACH transmitter and open the FUNC-
TION submenu Trainer display on both transmitters:
BACK
SERVO
CH 1.
CH 2.
CH 3.
CH 4.
CH 5.
CH 6.
TEACH
TEACH
TEACH
TEACH
TEACH
TEACH
CH 7.
CH 8.
CH 9.
CH 10.
CH 11.
CH 12.
TEACH
TEACH
TEACH
TEACH
TEACH
TEACH
NULL
OFF
RF
CTL
BIND
TYPE
Trainer
The above graphic shows the default layout of the sub-
menu.
Notice
Note the value fieldunder TYPE column at the
bottom of the display is set to RF in both the
PUPIL and TEACH transmitter.
PUPIL Transmitter
Verify that the display is configured identically with the
above screen-shot graphic.
TEACH Transmitter
Transfer up to twelve function inputs of an mz-24 Pro
TEACH transmitter to the PUPIL transmitter,either in-
dividually or in any desired combination.
Notice
It does not matter which specific controls are as-
signed to the control function inputs to be trans-
ferred to the PUPIL. Inputs can only be assigned
in the BASE submenu CTL Set (page 90) when the
trainer connection is turned OFF.
145
Function menu | general - Trainer

 Loading...


