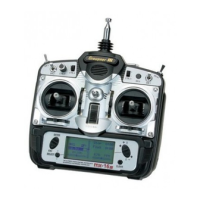
Press the SEL button on the right side of the display
to Select the model:
BACK
NEXT
01
STARLET
02
03
04
05
06
SEL
NEW
IMP.M
EXP.M
RES
CPY
STARLET
BEAVER
GRAUBELE
MODEL NAME 4
MODEL NAME 5
MODEL NAME 6
Press
Press NO to terminate the process or YES to
change the model:
BACK
NEXT
01
STARLET
02
03
04
05
06
SEL
NEW
IMP.M
EXP.M
RES
CPY
STARLET
BEAVER
GRAUBELE
MODEL NAME 4
MODEL NAME 5
MODEL NAME 6
CHANGE
MODEL
YES
NO
Press
After pressing YES, the message "Please wait!!" will
appear as the transmitter searches for bound receiv-
ers:
BACK
NEXT
01
STARLET
02
03
04
05
06
SEL
NEW
IMP.M
EXP.M
RES
CPY
STARLET
BEAVER
GRAUBELE
MODEL NAME 4
MODEL NAME 5
MODEL NAME 6
MODELL
WECHSEL
J
N
Please
wait!!
• If a receiver is already bound to the selected mod-
el memory and if the Thr.POS warning is inactive,
the RF module of the transmitter will automatically
turn on and the following active warning display
appears:
NEW (Create New Model)
Tips
• To view model memory lines 07 and higher, press
the NEXT button.
• Change previously saved model memories by press-
ing SEL .
To set up a new model, select an open model memory
line or an existing memory line to be reassigned. Press
the NEW button on the right side of the display:
BACK
NEXT
01
STARLET
02
03
04
05
06
SEL
NEW
IMP.M
EXP.M
RES
CPY
STARLET
BEAVER
GRAUBELE
MODEL NAME 4
MODEL NAME 5
MODEL NAME 6
Press
A selection window will appear with the option to pro-
gram manually, use the setup wizard or press NO to
exit:
BACK
NEXT
01
STARLET
02
03
04
05
06
SEL
NEW
IMP.M
EXP.M
RES
CPY
STARLET
BEAVER
GRAUBELE
MODEL NAME 4
MODEL NAME 5
MODEL NAME 6
MAN.
WIZ.
NO
Select
The next section, New Model Basic Settings - MAN-
UAL, will focus on programming a fixed-wing model.
Refer to the New Model Basic Settings - WIZARD
section (page 44) for an example of programming a
helicopter.
000
000
000
000
mz
000%
000%
BATT TIME 00: 01: 23
MODEL NAME 1
M - 1
PHASE 1
000:00.0
000:00.0
4.2V
0:01:23
Warning
Thr.HOLD
Thr.POS
Thr.CUT
PHASE
Please select RF ON/OFF
RC Signal
ON
OFF
Fail Safe not set
Maintain the RF transmissions by pressing ON
button, or switch them off by pressing OFF. If no
action is taken the warning display will automati-
cally disappear after a few seconds.
• If no receiver is bound to the selected model mem-
ory the message "No receiver bound to TX!" with-
in the following active warning display appears:
000
000
000
000
mz
000
000
BATT TIME 00: 01: 23
MODEL NAME 1
M - 1
PHASE 1
000:00.0
000:00.0
4.2V
0:01:23
Warning
Thr.HOLD
Thr.POS
Thr.CUT
PHASE
No receiver bound to TX!
SET
Fail Safe not set
Pressing the SET button opens the BASE sub-
menu TX ctl, where you can bind your receiver in
the Bind ON/OFF line:
BACK
TX OUT SET
RF ON/OFF
RANGE TEST
BIND ON/OFF
SET
OFF
OFF
OFF
RX1
RX2
DSC OUTPUT
SET
OFF
PPM10
NORMAL
RF TYPE
99sec
OFF
AUTOLOG
TX ctl
Press the BACK button to return to the main
menu.
41
Base menu - Model selection
 Loading...

