NOTE: Do not use a heparin tube (green cap).
NOTE: As reference fluid evaporates gradually, dispose of remaining liquid after the tests.
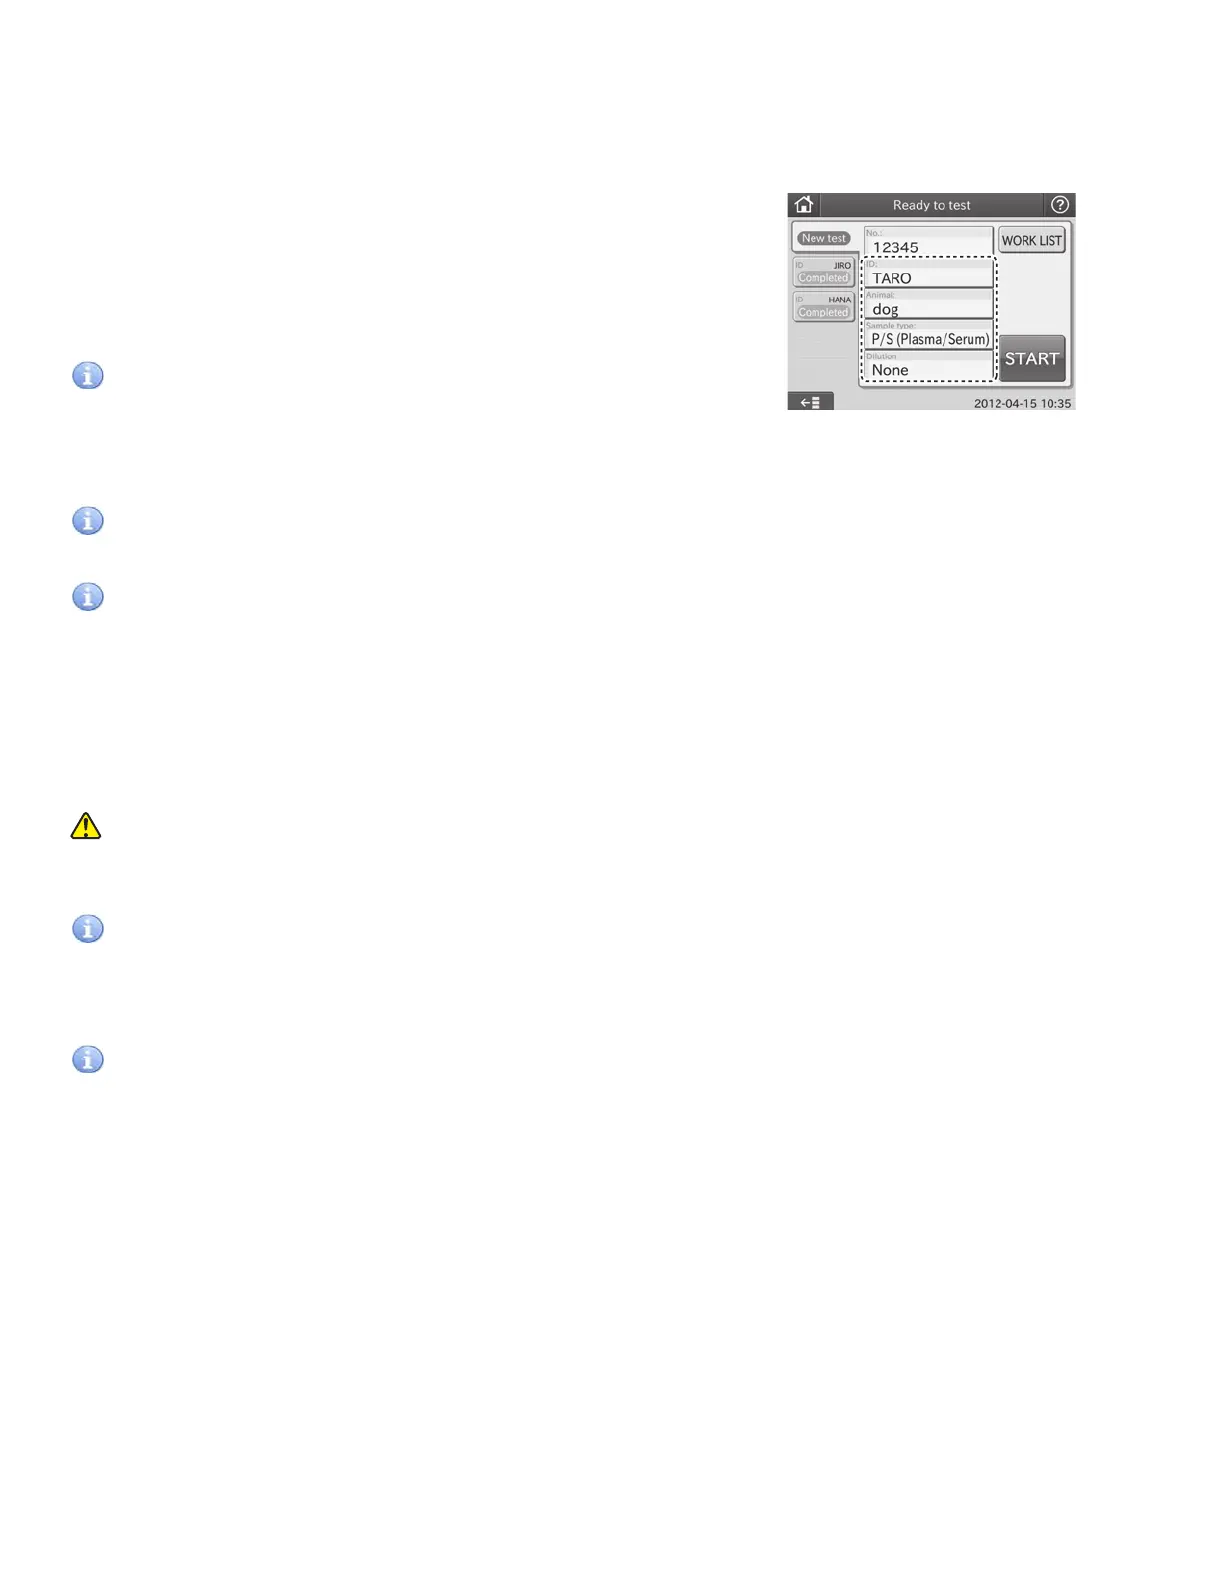
10. Input or select sample information.
Input or select sample information (No., ID, Animal, Sample
type and Dilution) at the test preparation dialogue.
For further information of the settings of the test preparation
dialogue, refer to Section 2.2.2.
Refer to Section 2.3 for input at the screen keyboard dialogue.
IMPORTANT
The sample type and the sample type setting of the Element DC must be same. Otherwise, the wrong test result will
be obtained.
IMPORTANT
For further information of the reference interval settings, refer to the Reference interval settings of MODE FUNCTION.
IMPORTANT
Be careful not to input wrong No. or ID.
11. Close the sampler cover.
12. Lock the sampler cover with the key.
13. Start the test.
14. After the tests are completed, dispose of the remaining reference fluid and remove the remaining sample.
WARNING
During sample processing, ensure the LCD under cover and sampler cover are closed to prevent injuries and
biohazard. When the display reads [Ready to test], the sampler cover can be opened.
IMPORTANT
When discarding reference fluid, always follow chemical procedures (e.g., wearing gloves, lab coat, and safety
goggles), referring to the chemical handling rules at your facility. If any part of the body comes in contact with
reference fluid, immediately rinse the contaminated body part thoroughly under running water.
IMPORTANT
Dispose of reference fluid in compliance with chemical handling rules at your facility and any applicable regulations in
your country.
3.8.4 Tests That Require Dilution
There are 2 ways to perform tests that require dilution. One is using the dilution buttons to set a dilution factor. Another is
using the [Dilution factor] in the MODE FUNCTION to preset dilution factors for each test name and its sample type. Using
the dilution buttons is explained in this section.
NOTE: When setting a dilution factor using the dilution buttons in the test preparation dialogue, the dilution factor setting
by the [Dilution factor] of MODE FUNCTION is ignored.
NOTE: In case of tests that require dilution, the test results are multiplied by the dilution factor before printing; no
recalculation will be necessary. The printed result values can be reported to the doctors directly.
NOTE: One dilution factor can be set for one sample.
NOTE: Maximum number of dilution tests for one mixing cup is 3.
39