2.2.2 Test Preparation Dialogue
The test preparation dialogue is for preparing and setting a test.
The dialogue is displayed after the power is turned on and the
analyzer starts up.
IMPORTANT
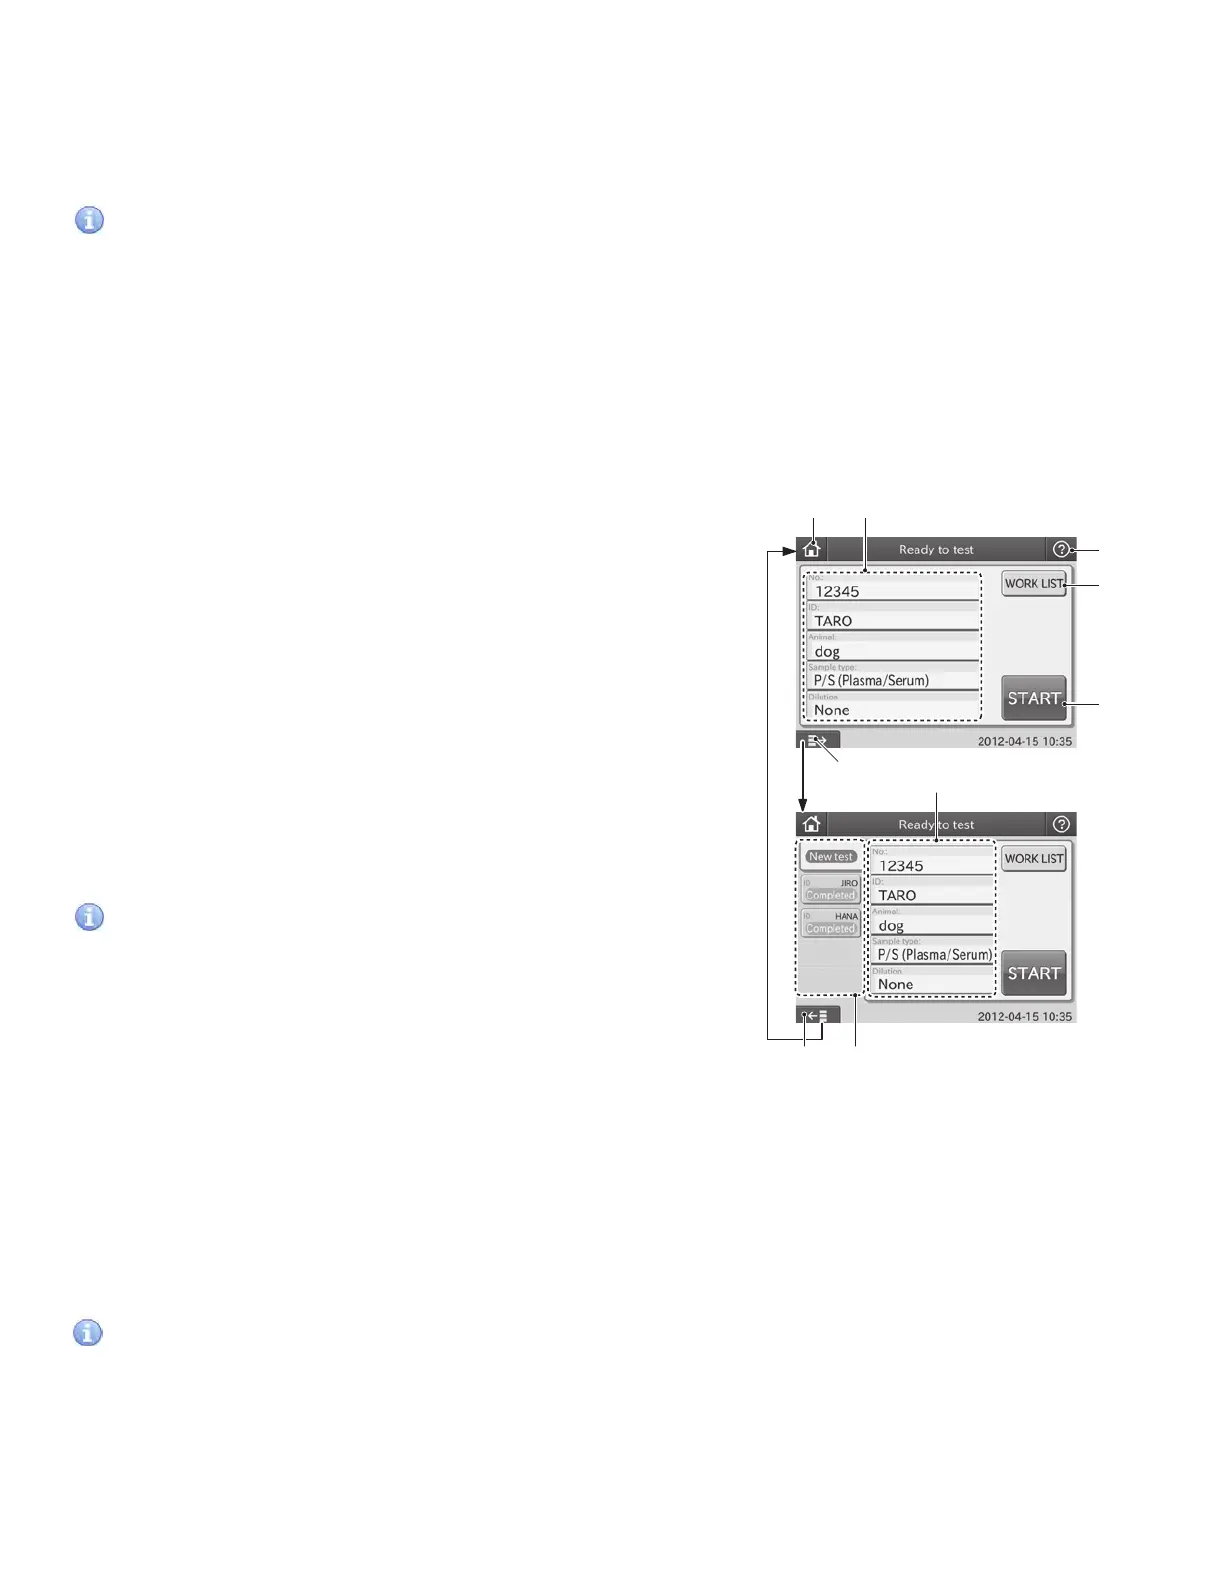
In dialogues (including test preparation dialogue) displayed
when performing tests, there are 2 kinds of dialogue: one is the
basic dialogue, which does not display the sample state display
area; another is the advanced dialogue, which displays the
sample state display area. By using the Display/Hide Sample
State Display button, operators can display/hide the area.
This manual gives operating instructions taking the advanced
dialogue (with the sample state display area) as an example.
1. The TOP Dialogue button
The TOP DIALOGUE is used for returning to the TOP dialogue.
2. Sample Information Setting Area
The sample information setting area displays sample
information (No., ID, Animal, Sample type and Dilution).
Touch each field in the area, input sample information and
change the input contents.
a. [No.]: Sequence No. (In the work list test preparation
dialogue, sample No. is displayed.)
By touching NO. FIELD, the screen keyboard is displayed
and you can change numbers. Up to 9 digits can be entered.
If more than 9 digits are entered or the field is blank, the
content in the field is not confirmed even after touching OK.
IMPORTANT
Change the displayed information with the Sample No./ID
settings of MODE FUNCTION.
[No. display:]: Select YES or NO. When touching NO, the
sample No. field is grayed out and you cannot enter or change
numbers.
[Keep sequence No.]: Select YES or NO. When touching NO, the
sequence No. is reset and starts with “1” when power is cycled.
When touching YES, the sequence No. is incremented (the
latest No. + 1).
b. [ID]: Sample ID or patient name (in the work list test preparation dialogue, patient ID is displayed).
When touching ID field, the screen keyboard dialogue appears. Enter alphanumeric characters (up to
13 characters), and touch OK.
IMPORTANT
Sample ID can be input with the sample barcode reader. (Refer to Section 3.9)
③
④
⑤
①
⑦ ⑥
②
②
Basic
Advanced
⑦
13