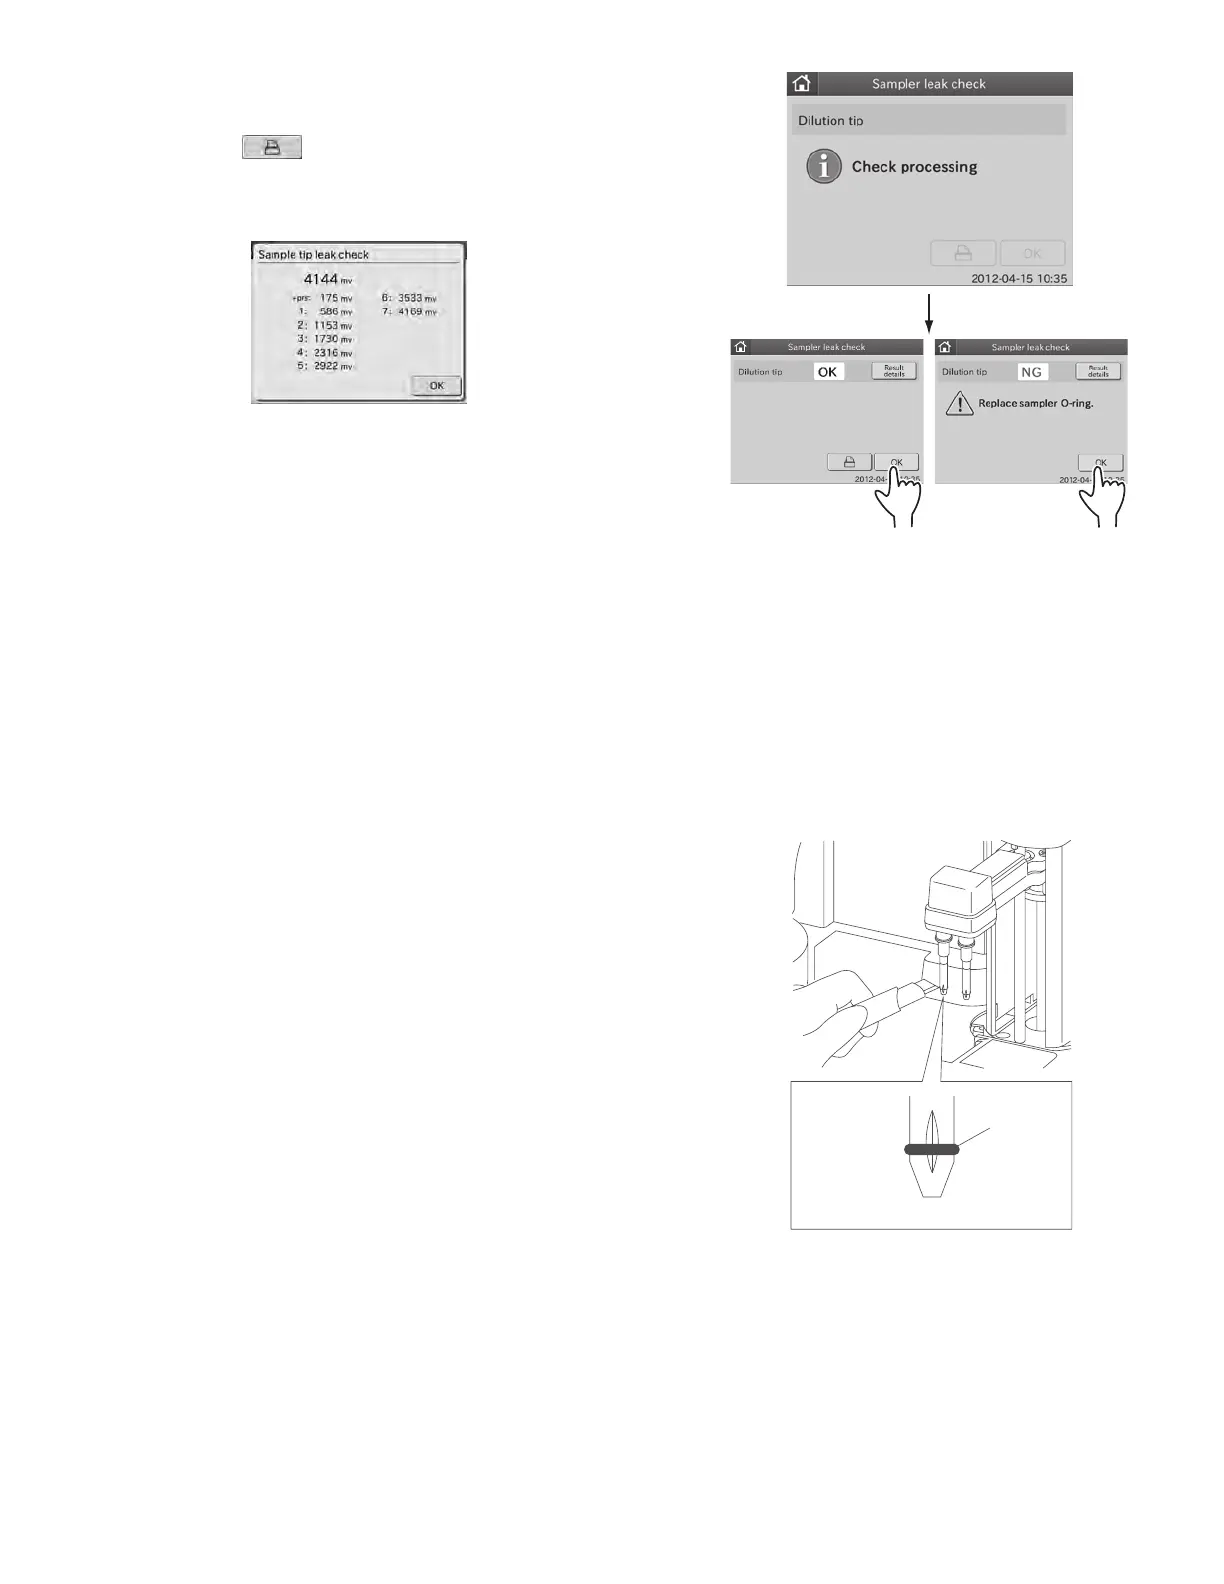
After the leak check is complete, the leak check result dialogue is
displayed.
NOTE: By touching
, the check results are printed out.
NOTE: When touching RESULT DETAILS, the check result details
dialogue is displayed.
By touching OK, the check result details dialogue disappears.
f. Remove the leak check tool from the nozzle by hand.
Open the sampler cover and remove the leak check tool
from the nozzle by hand.
NOTE: Touch OK to return to sampler leak check dialogue.
4. Replace the sampler O-ring when an error occurs.
4.7.2 Replacing the Sampler O-ring
Replace the sampler O-ring once a year.
Replacement procedure:
1. Open the sampler cover.
2. Turn the sampler nozzle toward you.
3. Cut off the used O-ring to remove.
Cut off the used O-ring (bring the razor blade knife into
contact with the vertical notch on the end of the nozzle).
4. Mount a new O-ring.
Mount a new O-ring in the groove around the nozzle by
sliding it from the end of the nozzle.
5. Perform leak check for O-ring.
After completing the replacement, perform leak check.
(Refer to Section 4.7.1)
O-ring
End of nozzle
60