1. Make sure [Ready to Test] is displayed.
2. Open the sampler cover.
3. Set a sample rack.
Set a specified sample rack for the test tube to be used at the
1 SET POSITION (indicated by the label) on the analyzer.
NOTE: Be sure to set the sample rack down to the bottom.
4. Obtain test information from PMS (If the device is connected
to PMS).
If the device is connected to PMS, you can obtain patient IDs
and test requests from PMS by using the WORK LIST button.
(For details, refer to Section 3.8.2.)
5. Load slides in a slide cartridge.
Place slides to be tested, printed test name facing up, in a
slide cartridge. Be sure to put a slide weight on top of the
slide cartridge.
NOTE: A maximum of 20 slides can be loaded in the slide
cartridge.
NOTE: When performing dilution or ISE tests for one sample, there
are rules for slide stacking orders. (Refer to Section 3.8.3 and 3.8.4.)
6. Place the slide cartridge in the analyzer.
Place the slide cartridge properly with the label side facing the
2 SET POSITION (indicated by the label) in the analyzer.
NOTE: Be sure to set the slide cartridge firmly in place so that it is
not lifted. Otherwise, a reading error may occur.
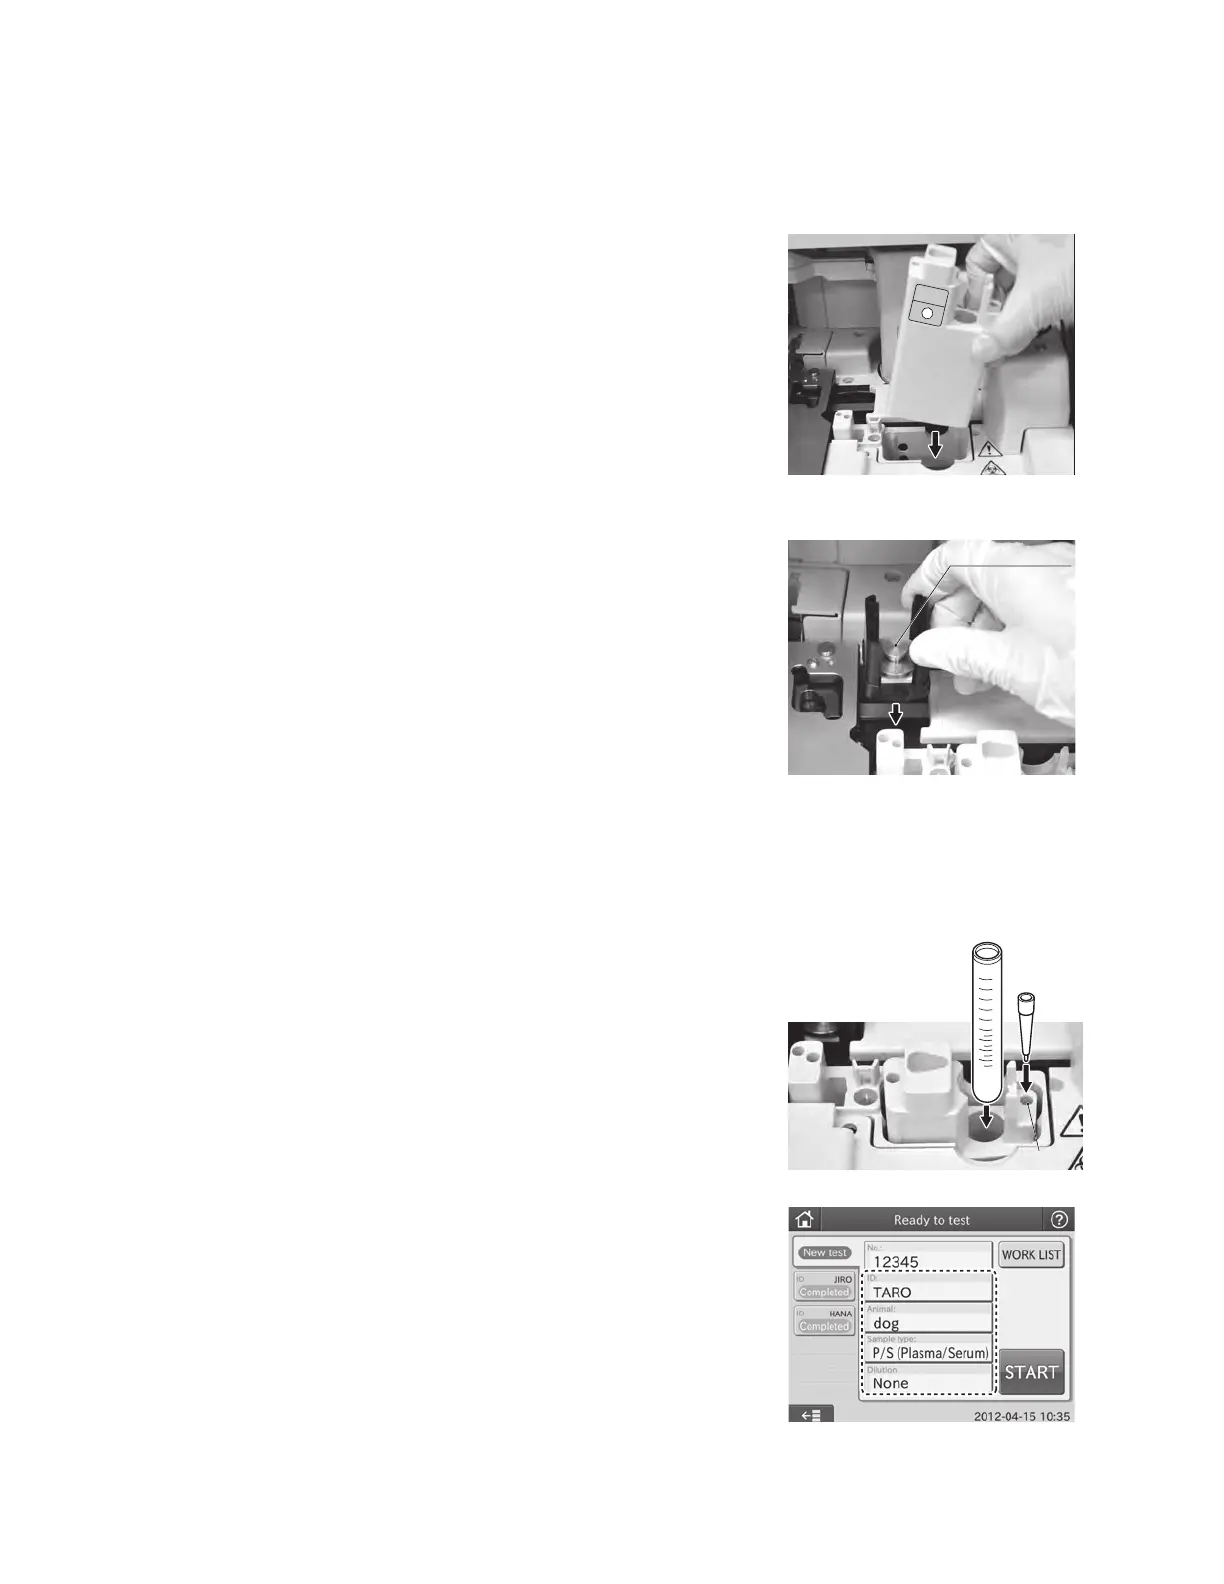
7. Put DRI-CHEM AUTO TIPS (henceforth, “tip”) into hole “a” on the
sample rack.
8. Set a sample tube in the sample rack.
Remove the cap from the blood collection tube or sample
tube which contains sample. Put the tube in the sample rack.
To avoid an error, make sure there are no bubbles in the
sample. Use a centrifuge to remove bubbles.
9. Input or select sample information.
Input or select sample information (No., ID, Animal, Sample
type and Dilution) at the test preparation dialogue.
For further information of the settings of the test preparation
dialogue, refer to Section 2.2.2. Refer to Section 2.3 for input at
the screen keyboard dialogue.
Slide weight
3.8 Measurements
3.8.1 Basic Measurements (excluding ISE tests and tests that require dilution)
1
Hole a
33