4.7 Inspecting and Replacing the Sampler O-ring
The sampler nozzle O-ring wears with use. Periodic inspection (once a month) and replacement (once a year) is necessary.
IMPORTANT
If the analyzer is used without inspecting and replacing the sampler O-ring, spotting volume may be inaccurate to
cause adverse effects on test results.
4.7.1 Inspecting the Sampler O-ring
Inspecting procedures
1. Execute the Sampler Leak Check.
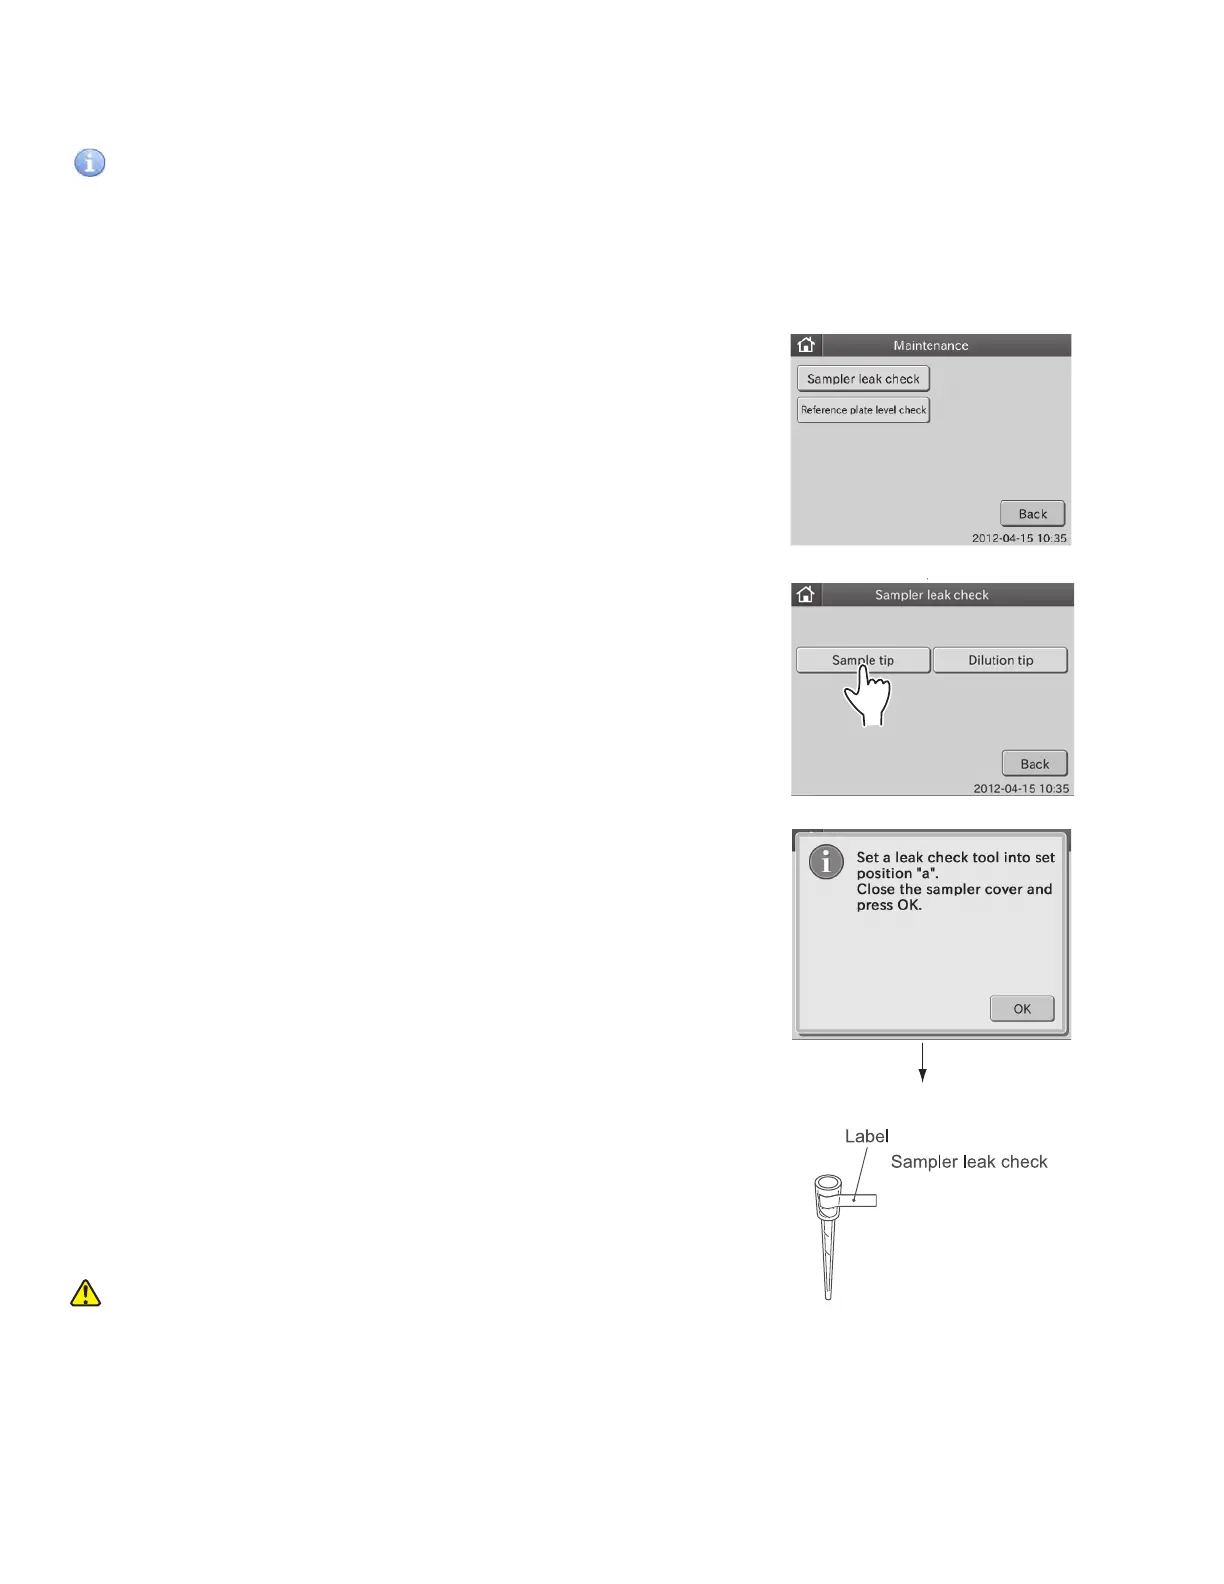
a. Touch MAINTENANCE in the MODE FUNCTION menu
dialogue. The maintenance menu dialogue is displayed.
b. Touch SAMPLER LEAK CHECK in the MAINTENANCE
menu dialogue.
The sampler leak check dialogue is displayed.
2. Perform the leak check for the sample tip.
a. Touch SAMPLE TIP.
The dialogue that prompts the setting of a leak check
tool appears.
b. Put the sampler leak check tool into hole “a” on the
sample rack.
c. Close the sampler cover.
d. Lock the sampler cover with the key.
WARNING
During sample processing, ensure the LCD under cover and
sampler cover are closed to prevent injuries and biohazard.
When the display reads [Ready to test], the sampler cover can
be opened.
58