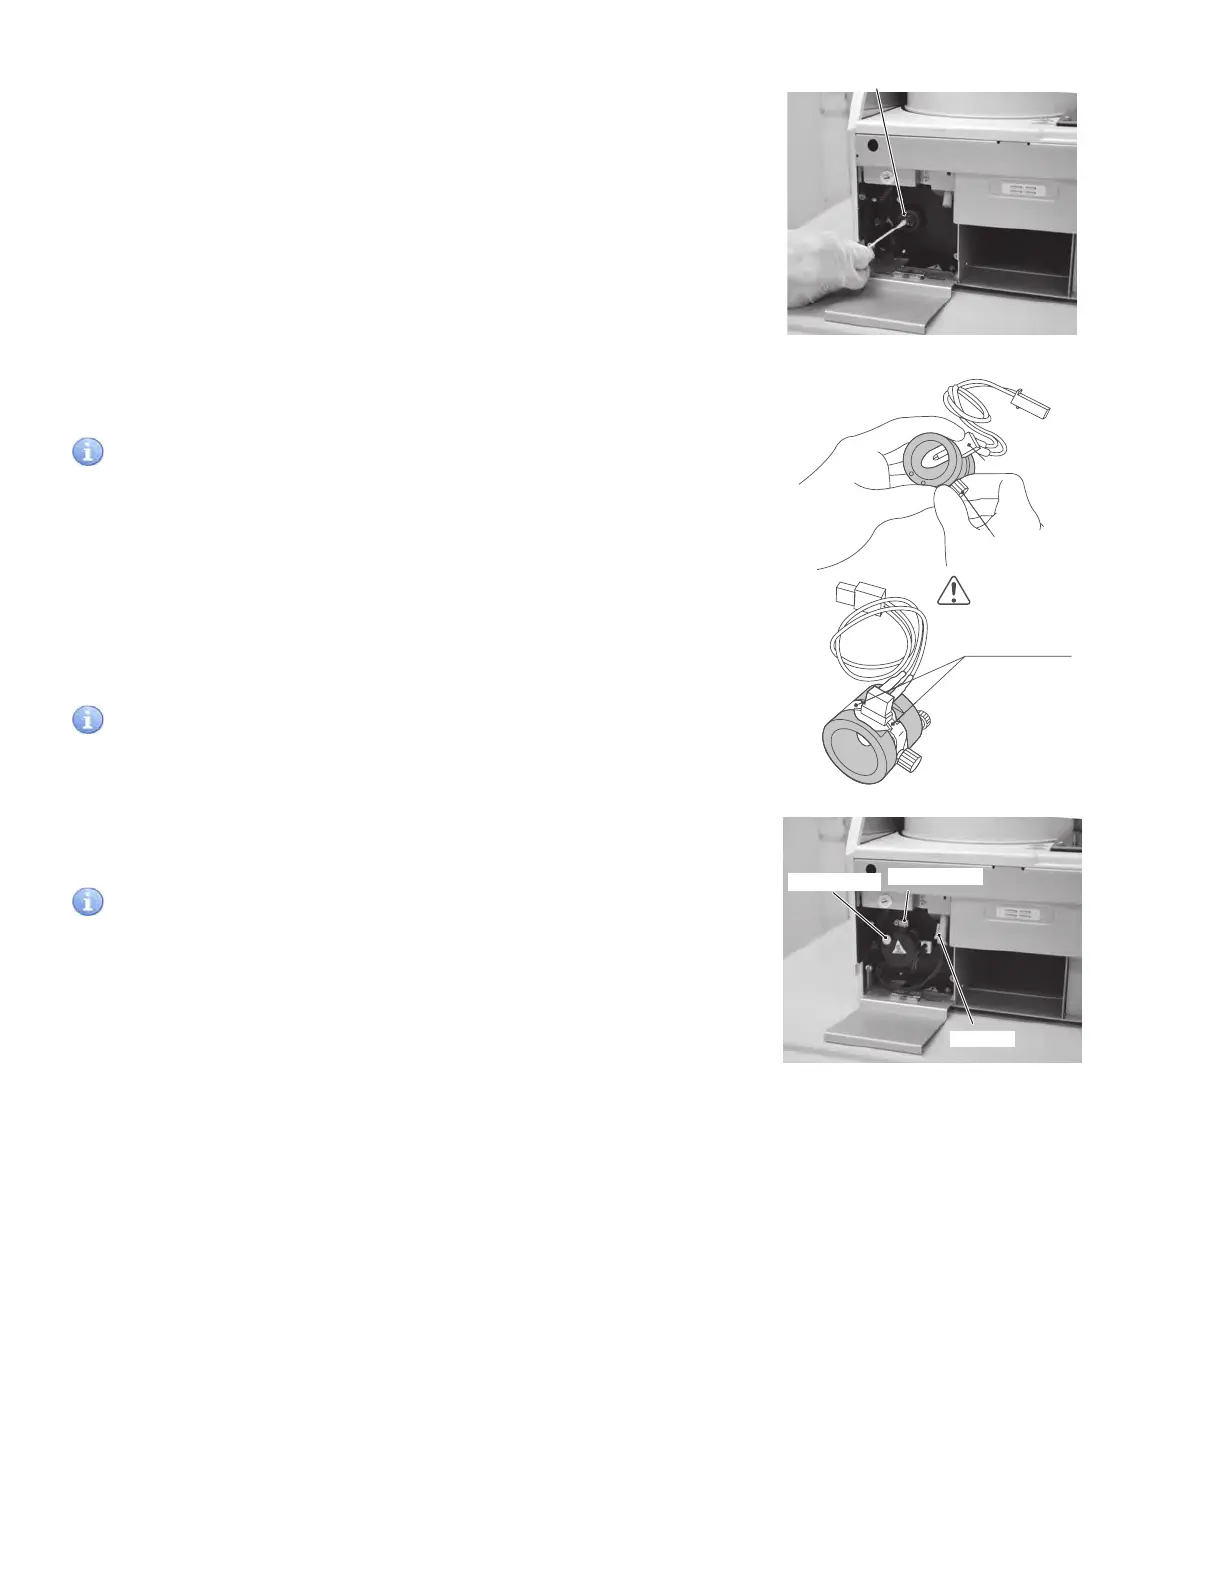
4. Wipe off the light source unit lens in the analyzer using a dry
cotton swab.
NOTE: If cleaning with alcohol, always wipe off the lens using a dry
cotton swab to dry it well.
5. Unscrew the thumbscrew of the lamp unit and replace the lamp
with a new one.
IMPORTANT
Tighten the thumbscrew securely. Otherwise, adverse effects on
test results may occur.
NOTE: When replacing the lamp, hold it by its base. Do not touch the
glass surface with bare hands.
6. Remount the lamp connector and insert the lamp unit into the
analyzer with thumbscrew facing up. Screw in thumbscrew
securely.
IMPORTANT
Tighten the thumbscrew securely. Otherwise, adverse effects on
test results may occur.
7. Close the lamp source unit cover, replace the front under cover
and the disposal box. Then turn on the analyzer.
IMPORTANT
Be sure to set the disposal box. Otherwise, adverse effects on test
results will occur.
8. After the analyzer has started up, reset the lamp’s cumulative
illumination time to 0 using the Lamp configuration of MODE
FUNCTION. (Refer to Section 6.6)
Lens
Lamp base
Thumbscrew
IMPORTANT:
Make sure to fix the lamp
housing by attachments of
the unit so as not to move.
Connector
Thumbscrew “B”
Thumbscrew “A”
57