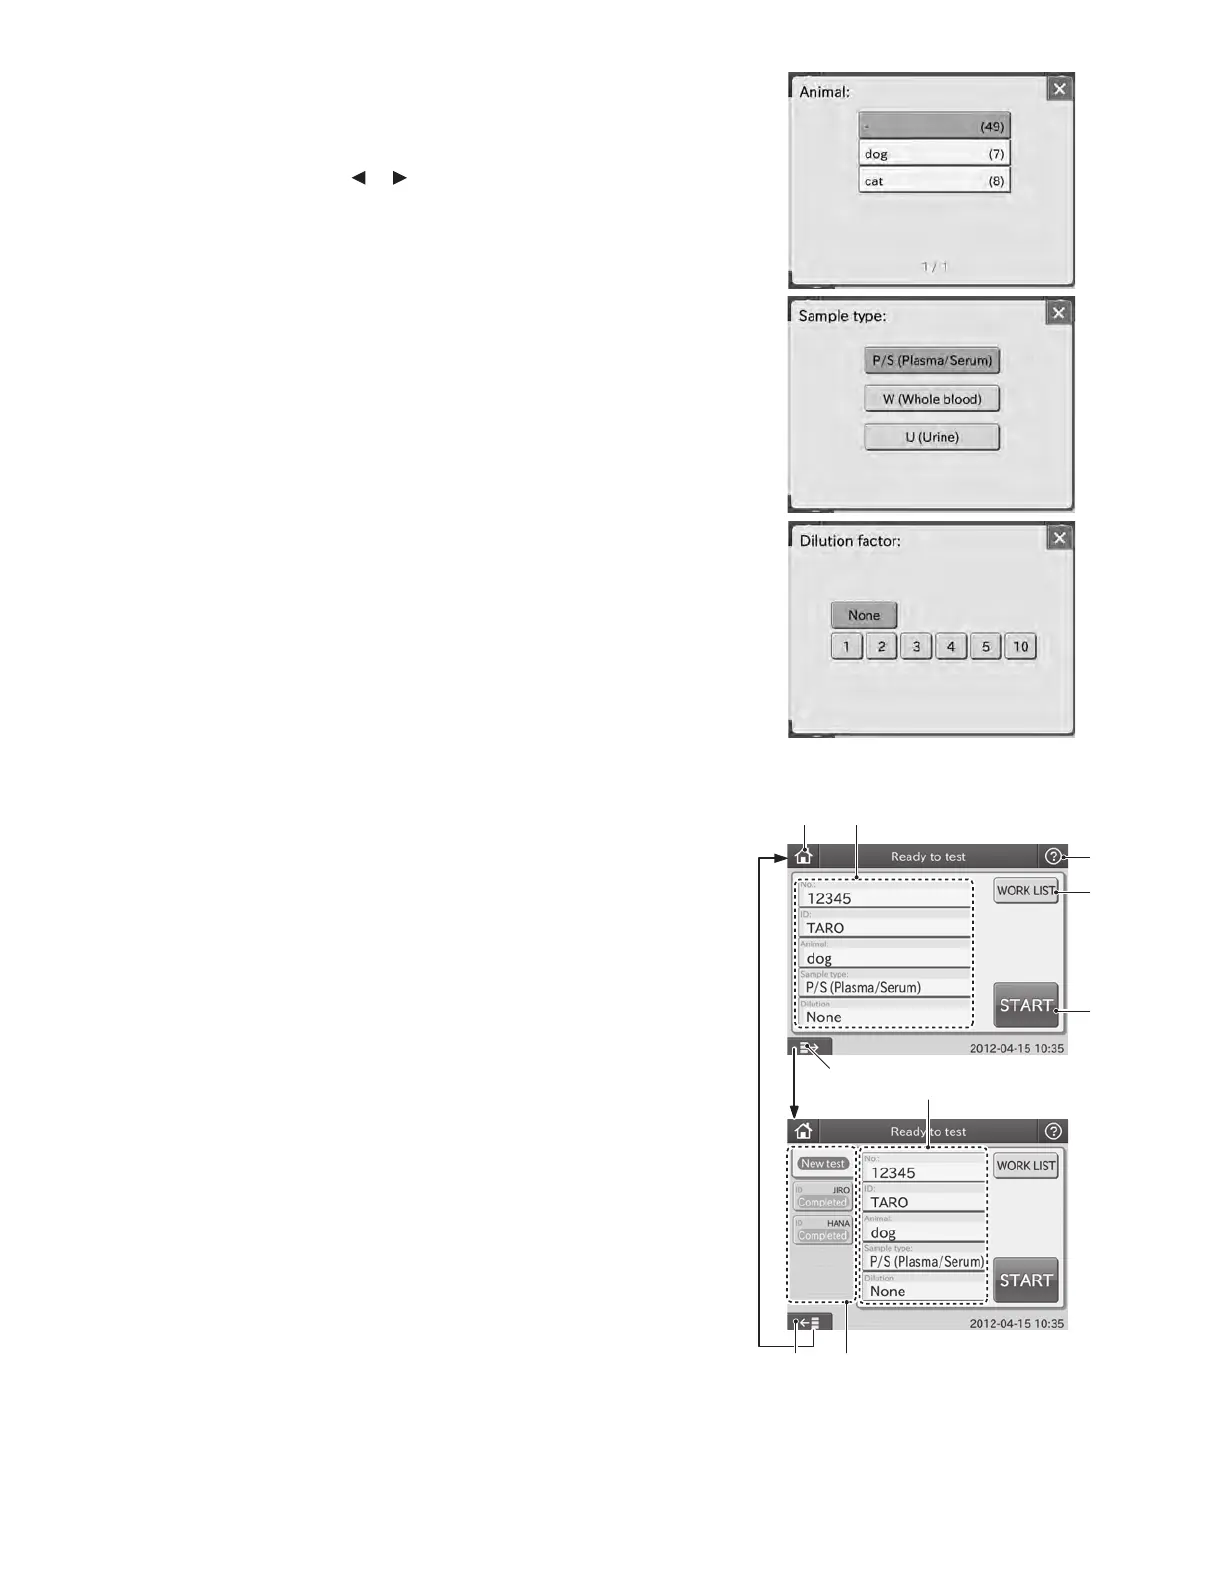
c. [Animal]: Reference interval settings
When touching ANIMAL FIELD, the animal dialogue is
displayed. Select the animal. If there is more than one
animal page, touch the
or button to switch page.
NOTE: To cancel the reference interval settings, touch X.
d. [Sample type]: Sample type Plasma/Serum (P/S)
When touching SAMPLE TYPE FIELD, the sample type
dialogue is displayed. Select the sample type to be tested.
NOTE: To cancel the sample type setting, touch X.
e. [Dilution]: Dilution factor (None, 1, 2, 3, 4, 5 and 10)
When touching DILUTION FIELD, the dilution factor
selection dialogue is displayed. Select the dilution factor
to be used for the test.
NOTE: To cancel the dilution factor setting, touch X.
3. HELP button
The help button is used for displaying the help dialogue.
(Refer to Section 2.2.5)
4. WORK LIST button
The WORK LIST button is used for obtaining test requests
from a host PC by connecting the analyzer to PMS (Practice
Management Software). (Refer to Section 3.8.2)
5. START button
The START button is used for starting tests.
6. Sample State Display Area
The latest 20 samples’ histories can be displayed. If the
number of sample histories reaches 21, the oldest one
is deleted. When touching New test, the default test
preparation dialogue is displayed.
7. DISPLAY/HIDE SAMPLE STATE DISPLAY button
The display/hide sample state display area button is used
for displaying or hiding the sample state display area.
The dialogue with the sample state display area is called
“advanced” and without the area is called “basic”.
③
④
⑤
①
⑦ ⑥
②
②
Basic
Advanced
⑦
14