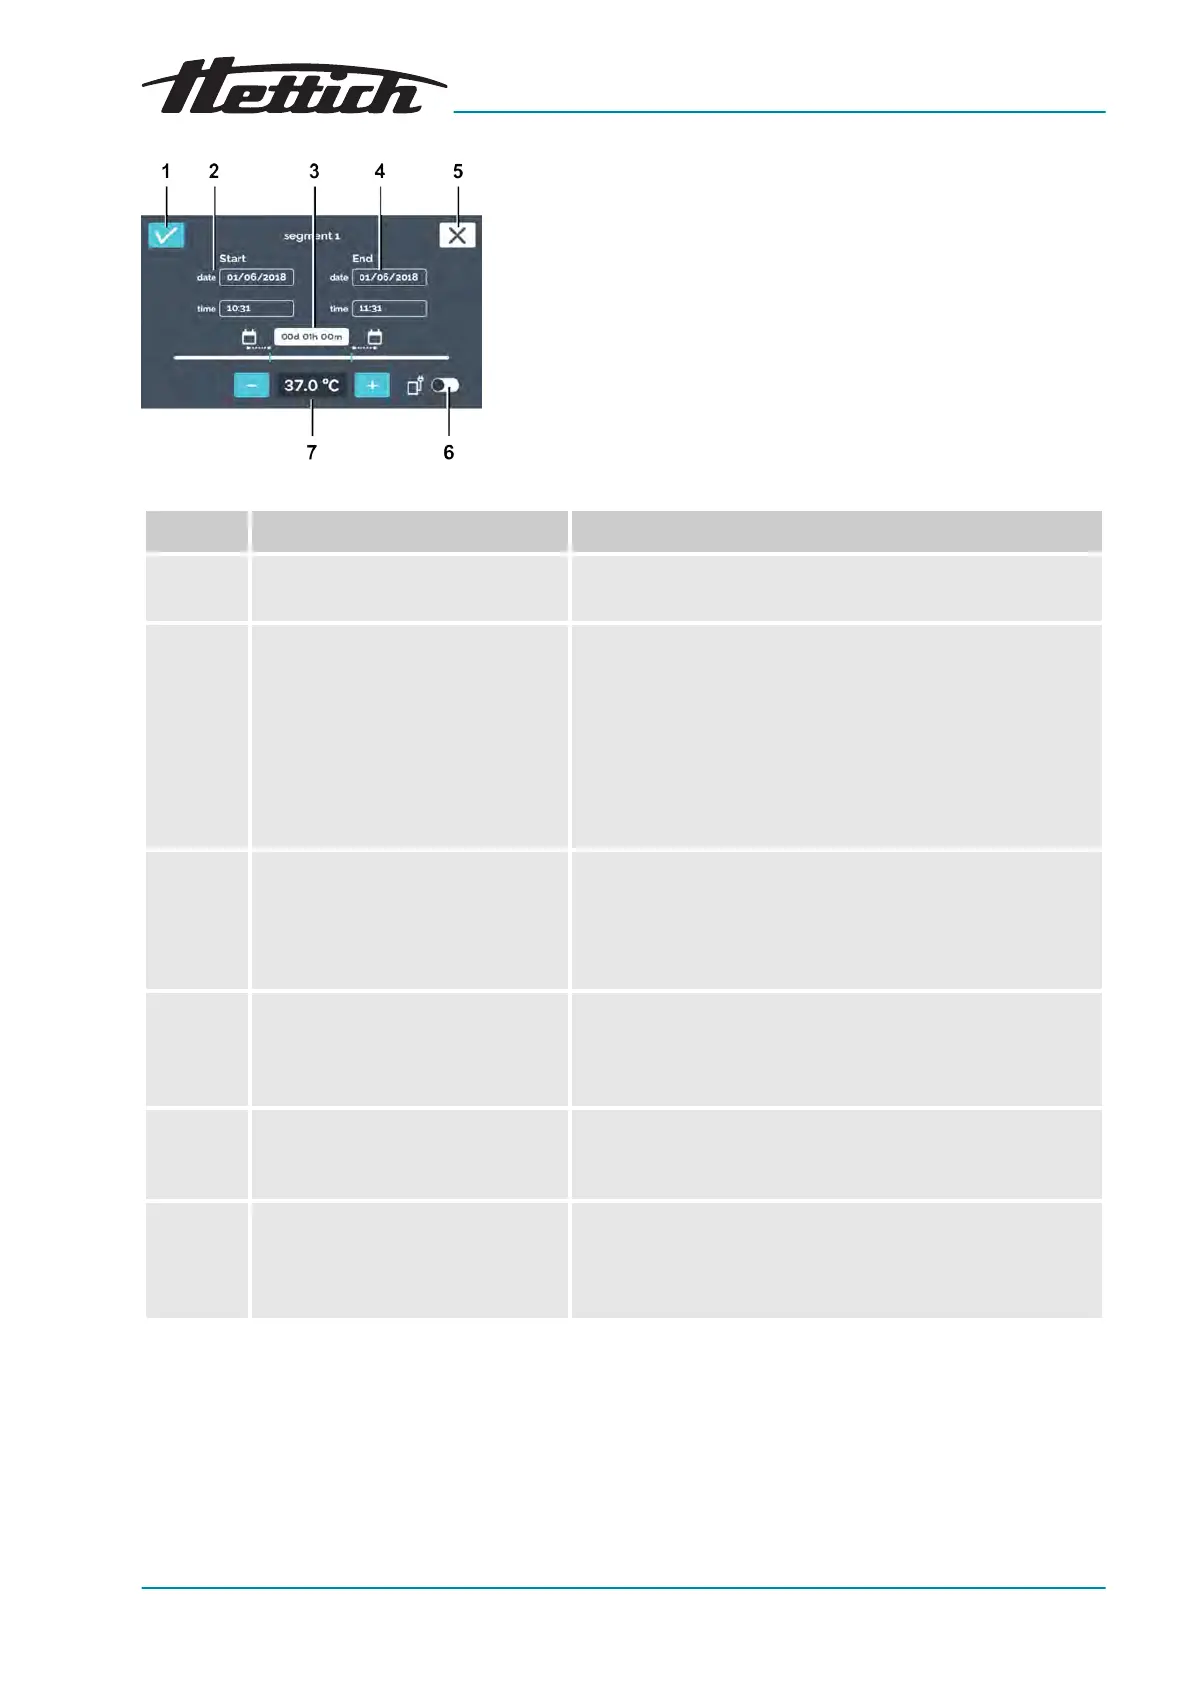
Fig. 101: Program segment settings
Item Designation Description/function
1
[Conrmation]
button After you have made all settings, you can conrm this with
this button.
2 Starting time Enter the starting time (date and time). The start time can
only be dened for the rst segment. Starting fr
om the
second segment, the start time is the end time of the pre-
vious segment.
The start time specied her is only for calculating the dura-
tion. The actual start time results from the immediate start
after creating the program, or when the timer is activated
Further information on page 84
.
3 Duration You can dene the pr
ogram segment duration via a start
and end time or via the start time and specifying the dura-
tion of the program segment here. The end time is then cal-
culated automatically. Starting from the second segment,
the start time is the end time of the previous segment.
4 End time Specify the end time of the program segment. The duration
is then adjusted accor
dingly. Starting from the second seg-
ment, the end time of the segment is dened via the end
time or duration.
5
[Cancel]
button If the
[Cancel]
button is pressed, the dialogue is closed and
you will go back to the previous dialogue. All changes will
be discarded.
6
[Activate/deactivate control con-
tact]
switch
Here, you can activate/deactivate the control contact for
the current program segment. This option only exists if the
control contact is activated in the device settings
Chapter 6.13.6 ‘Control contact (option)’ on page 101
.