4 Individual remote controls
PC-LH3(A/B)
TCGB0106 rev.0 - 12/2014
185
4
Secondary receiver kit setting for a wireless remote control
1. Remove the back cover of the receiver kit.
2. Set pin no. 1 of DIP switch to the ON position.
1 2 3 4 5 6
NOTE
Refer to the optional functions of the receiver kit for more information.
Wiring procedure between indoor units
DANGER
• Turn OFF the power source completely before performing the dip switch setting and electrical wiring work for receiver kit.
If not, it may cause an electric shock.
• Perform securely the electrical wiring work. If the electrical work is not completed, heat generation at the connection, a
re or an electric shock may occur.
• Make sure that the electrical wires are securely xed in order not to apply an external force to the terminal
connections of the wirings. If xing is not completed, it may cause heat generation or a re.
1 Lay the wiring between the indoor units after reading the re-
ceiver installation manual. The total cable length should not
exceed 500 metres.
References on the 2P extension cables (accessory) are indicated be-
low:
2P extension
cable
PRC-10E1 PRC-15E1 PRC-20E1 PRC-30E1
Cable length 10 m 15 m 20 m 30 m
2 Fix the connection control cable between the indoor units
at certain points with exible anges ensuring that it does
not run in parallel with the power supply cable inside the in-
door unit. Keep a distance of more than 30 cm between the
control cable and the power supply cable. Earth one end of
the conduit after inserting the control cable inside the metal
conduit.
NOTE
Do not run the connecting cable for receiver kit and the power source
cable (220-240V) in parallel. It may cause malfunction of receiver kit by
noise.
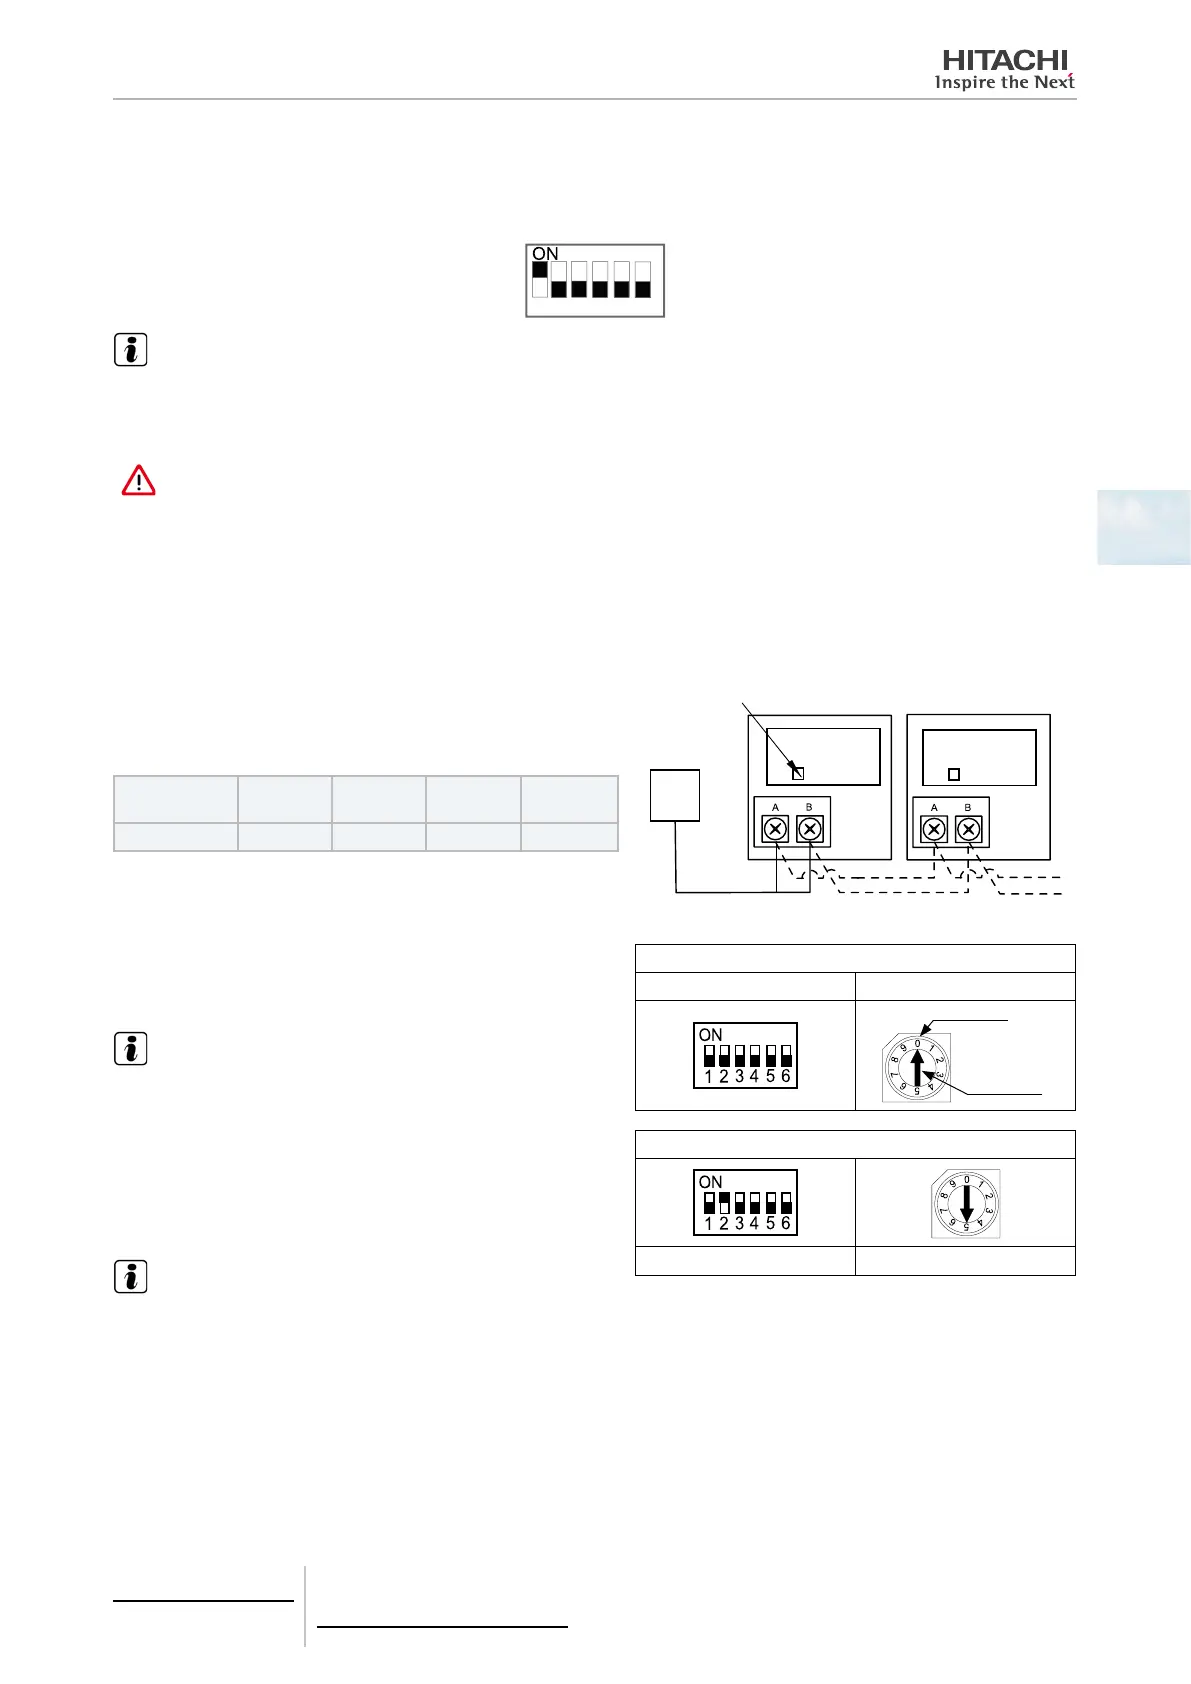
3 Fit the setting switches on the printed circuit boards of each
indoor unit's electrical box as shown in the gure on the right.
4 Check the number of indoor units connected using test
mode.
NOTE
The 7-segment display of the wireless remote control will show the num-
ber of indoor units connected when the operation test is carried out with
the remote control.
However, this number cannot be indicated on some models. In these
cases, check the number with the wired remote control.
Setting switch
Receiver
Setting Switch
10 digit 1 digit
Setting position
Set by inserting slot-
ted screwdriver into
the groove
Ex: In case of setting unit Number 25
Turn ON pin number 2
Set Dial to number 5
Dip Switch and Rotary Switch setting before shipment
is "00".
Maximum unit number is 63
 Loading...


