4 Individual remote controls
Receiver kit for wireless remote control
TCGB0106 rev.0 - 12/2014
193
4
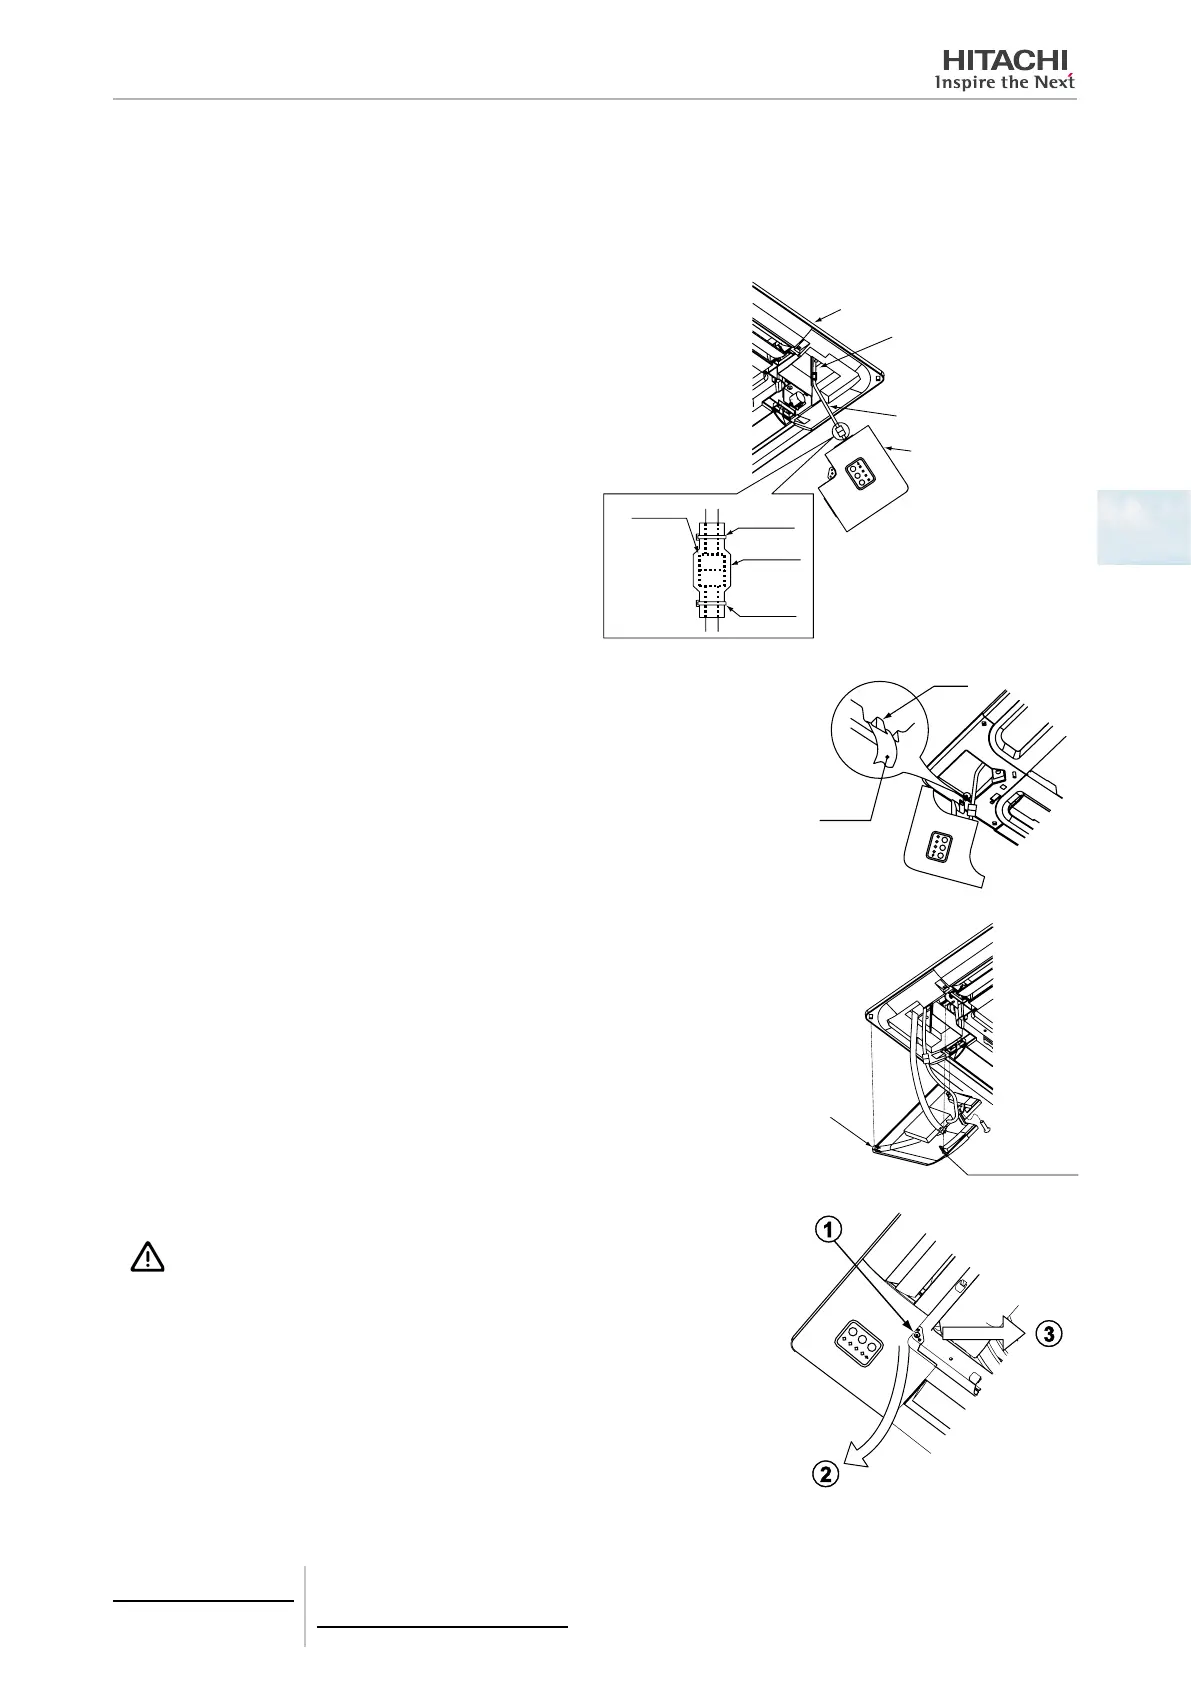
5 Draw the connection cable through the wiring hole of the indoor unit and run it across to the receiver kit installation
position.
6 Install the air panel (optional) on the indoor unit.
7 Connect the receiver kit using the following procedure:
a. Pass the cable through the corner hole and connect
the connection cable and receiver kit wire. Once the
cable is connected, cover the connector with the
cover and secure it using a cable tie.
Air panel
Corner access
Connection cable
Connection cable
Cover
Cable tie
Receiver kit
Cable tie
b. b. Hook the tab on the back of the receiver kit to the pin of the air panel, as
shown below.
Pin
Cable tie
c. c. Hook the L-shaped tab on the back of the receiver kit into the square hole
on the air panel and secure it with a screw.
Screw
Tabs (2 positions)
L-shaped tab
8 Hook the other xing tabs (3 positions) into the square holes of the air panel.
CAUTION
To remove the receiver kit after mounting the air panel:
• Remove the screws (4 positions) from the front of the air panel.
• Move the receiver kit by hand in the direction indicated by the arrow and remove the
tabs (2 positions) from the corner cover, then slide the receiver in the direction indicated
by the arrow .
 Loading...


