4 Individual remote controls
Receiver kit for wireless remote control
TCGB0106 rev.0 - 12/2014
195
4
Installation procedure
CAUTION
Follow these installation procedures carefully. Failure to do so may cause the receiver to become detached from the panel causing a
serious accident.
1 Install the wireless receiver kit, the indoor unit and the air panel at the same time.
2 In case that the wireless receiver kit is installed after installing the indoor unit, turn off the power source of the indoor
unit and remove the air inlet grille.
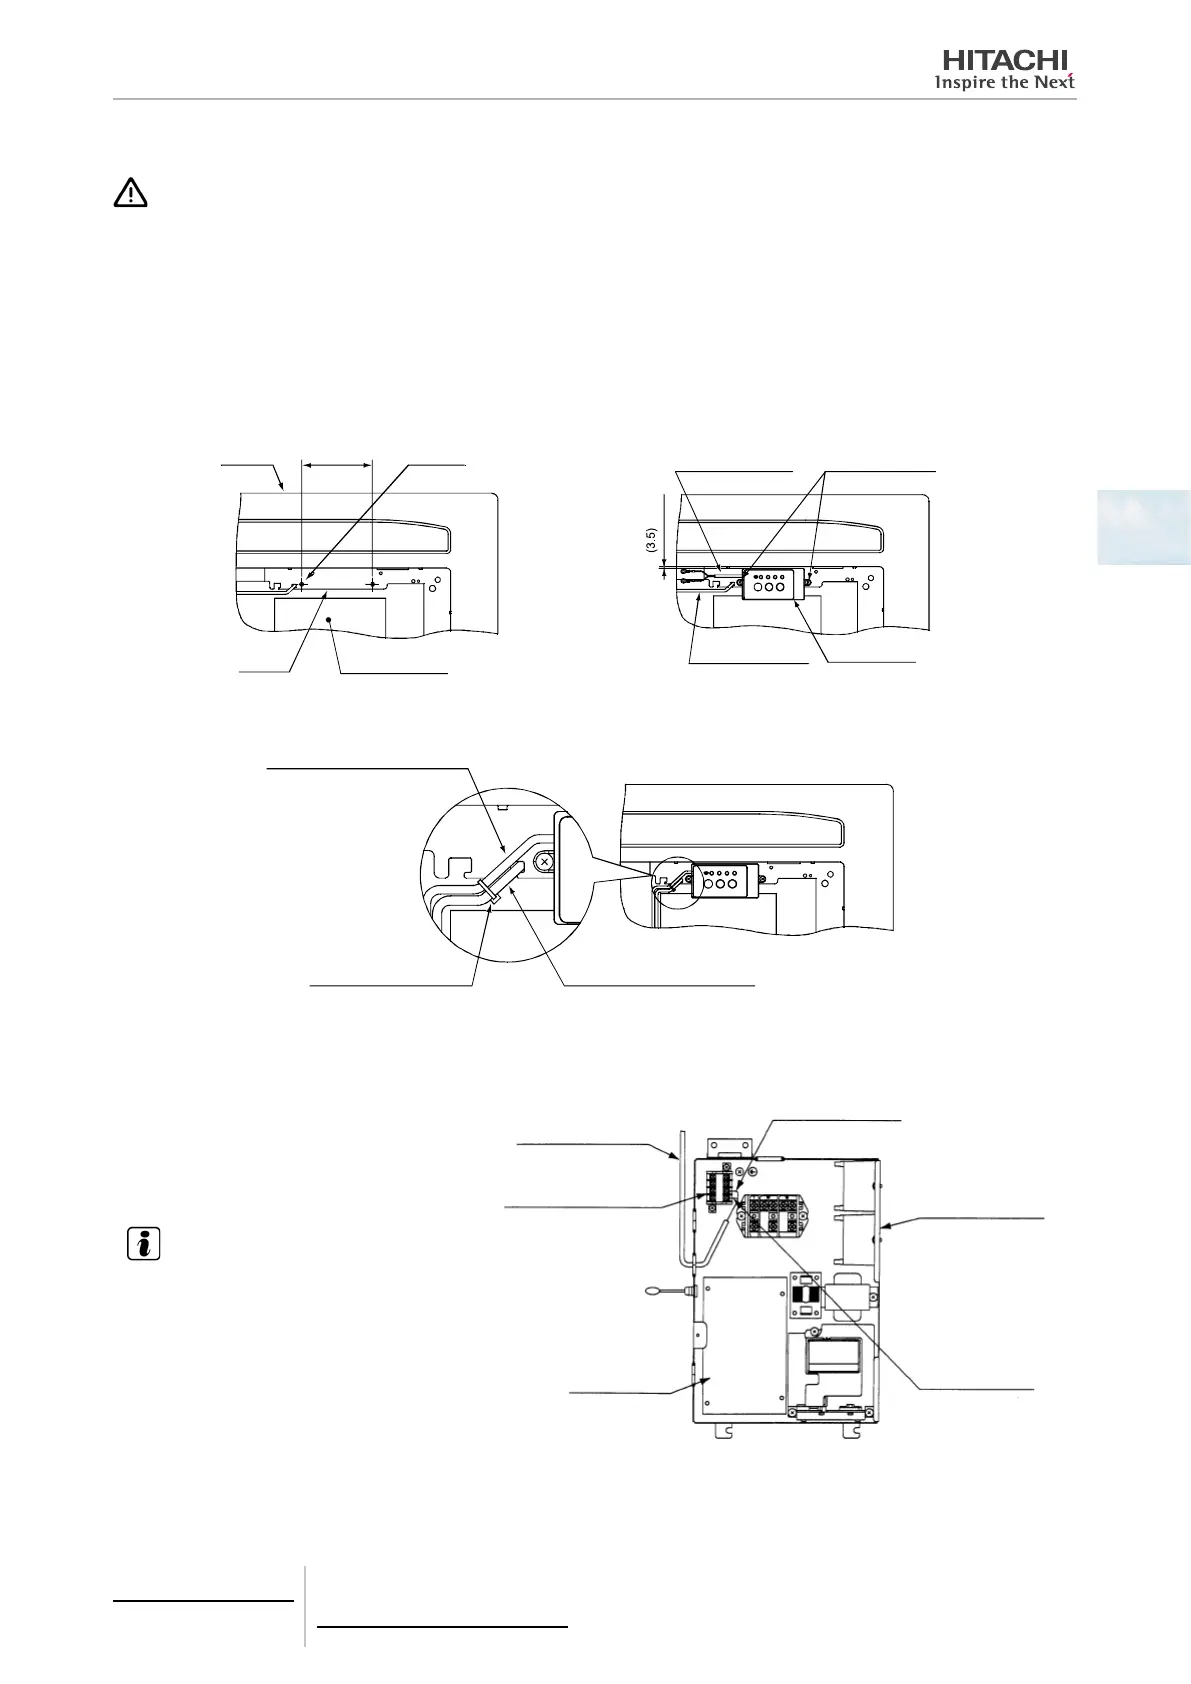
3 Fix the wireless receiver kit to the air panel by screws.
(The tightening torque must be 0.8 Nm.)
Air panel
(135)
Ø7 Boss
Flange
Electrical box
for Indoor unit
Cable for wireless
Receiver kit
Screw
(Factory-Supplied)
Cable for
Auto-swing motor
Wireless Receiver kit
4 Lead the cable along the cable for the auto-swing motor and tie them by the band.
Cable for wireless Receiver kit
Band (Factory Supplied)
Cable for Auto-Swing Motor
5 Remove the cover of indoor unit electrical control box and connect the cable to the terminals A and B of the terminal board.
(No polarity in terminals A and B).
NOTE
After connecting the cable, bind up the remaining
cable length portion by cable tie (Factory-supplied)
and put them in the electrical control box.
Cable for Receiver kit
Terminal Board
(White)
PCB
Mark Band (B)
Indoor unit electrical
box
Mark Band (A)

 Loading...


