Demand setting procedure
1 Changing to Check Mode.
Depress the “CHECK” switch for more than 3 seconds, and the central station is changed to the check mode.
* When there is any group in operation (with “RUN” indicator ON), the “CHECK” mode is not available.
2 Changing to Demand Setting Mode.
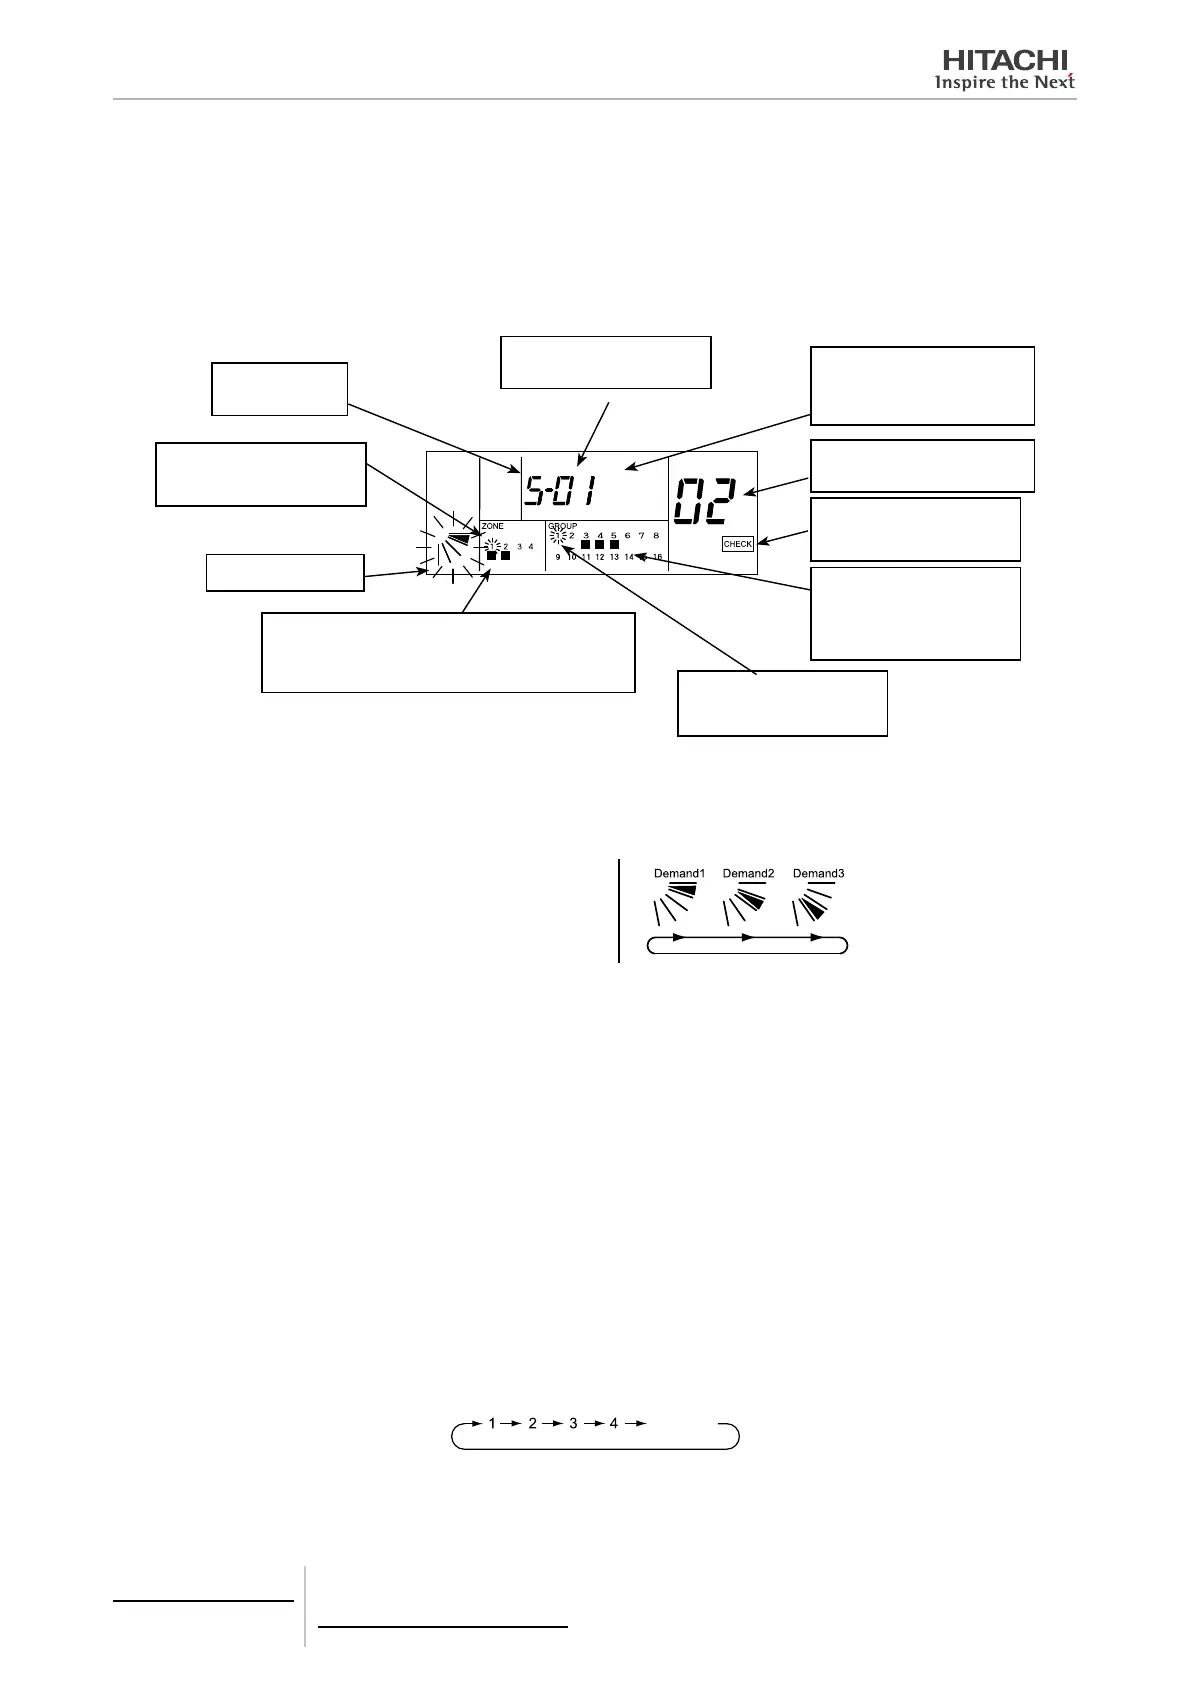
Depress the “CHECK” switch and change the 7-segment indication for check to “5” (Demand Setting Mode). The LCD
indication of the central station is as shown below.
“5” shows the de-
mand setting mode.
Ref. Nº. of Indoor Unit Set as Mas-
ter Unit of Group To Be Set
Demand function
The state of demand setting of each zone is indicated.
ON: There is one or more group with demand setting in the
zone.
OFF: There is no group with demand setting in the zone.
Only the group with the master
unit already set is indicated. The
group to be set is ickered.
The state of demand setting of
each group is indicated.
ON: Demand is set.
OFF: Demand is not set.
The state of demand setting of the
indicated indoor unit is indicated.
“DEMAND” ON: Demand is set.
“DEMAND” OFF: Demand is not set.
When the “CHECK” indication ap-
pears, the central station is in the
check mode.
Address of Indoor Unit Set as Master
Unit of Group To Be Set
Only the group with the master
unit already set is indicated. The
group to be set is ickered.
3 Selection of Demand Function.
a. Select the demand function by depressing the “LOUVER” switch.
b. Depress the “RUN/STOP” switch, and the ickering indication of louver angle turns ON.
By depressing the “LOUVER” switch,
the indication of louver angle is changed
as shown in right gure.
4 Selection of Group To Be Set
The demand function can be set for all the indoor units, each zone or each group.
The “” indication of “GROUP”, for which the demand setting is already set, turns ON.
In the case where there is one or more group with demand setting in the zone, the “” indication of “ZONE” section
turns ON.
• Simultaneous Setting for all Indoor Units
a. Depress the “ZONE” switch to make all the zone Nº. icker. Then, the minimum refrigerant system address and
the minimum indoor unit address of the indoor unit, which is set as the master unit, in all groups are indicated.
• Setting for each Zone
a. Depress the “ZONE” switch and select the zone to set.
b. Depress the “GROUP” switch to make the group Nº to set icker. Then, the minimum Ref. Nº and the mini-
mum I.U. Add. of the indoor unit set as the master unit of all groups are indicated.
[Zone Selection]
Depress the “ZONE” switch, and the ickering indication of zone Nº is changed in order as shown below.
All
ickering
* Only the zone Nº to set is indicated.
* When selecting the all ickering state (Simultaneous Operation for all Indoor Units), the groups to set are automati-
cally xed at the all ickering state. For selecting the group, select the indication state except all ickering.
5 Centralised remote controls
PSC-A64S
TCGB0106 rev.0 - 12/2014
390

 Loading...


