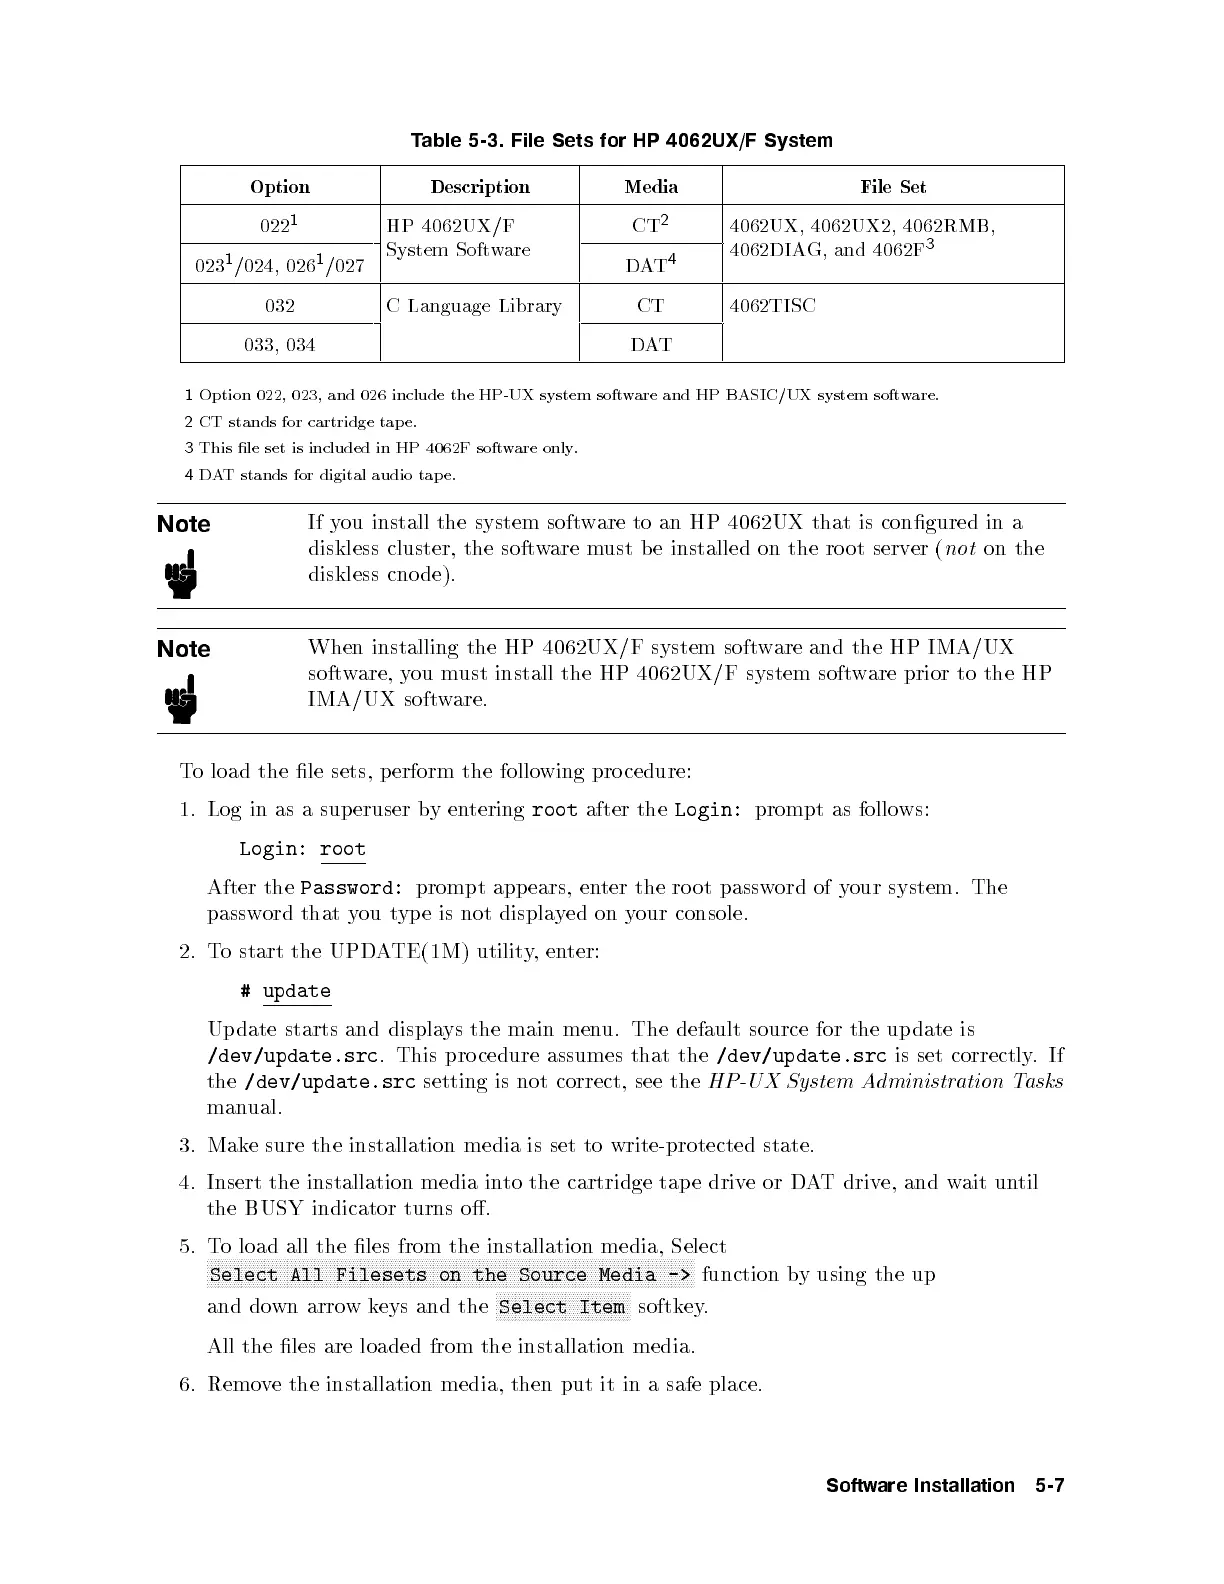
Table 5-3. File Sets for HP 4062UX/F System
Option Description Media File Set
022
1
HP 4062UX/F
System Software
CT
2
4062UX, 4062UX2, 4062RMB,
4062DIAG, and 4062F
3
023
1
/024, 026
1
/027 DAT
4
032 C Language Library CT 4062TISC
033, 034 DAT
1
Option 022, 023, and 026 include the HP-UX system software and HP BASIC/UX system software.
2
CT stands for cartridge tap e.
3
This le set is included in HP 4062F software only.
4
DAT stands for digital audio tap e.
Note
If you install the system software to an HP 4062UX that is congured in a
diskless cluster, the software must b e installed on the ro ot server (
not
on the
diskless cnode).
Note
When installing the HP 4062UX/F system software and the HP IMA/UX
software, you must install the HP 4062UX/F system software prior to the HP
IMA/UX software.
To load the le sets, p erform the follo
wing procedure:
1. Log in as a sup eruser byentering
root
after the
Login:
prompt as follows:
Login: root
After the
Password:
prompt app ears, enter the ro ot password of your system. The
password that you type is not displayed on your console.
2. To start the UPDATE(1M) utility,enter:
# update
Update starts and displays the main menu. The default source for the update is
/dev/update.src
. This pro cedure assumes that the
/dev/update.src
is set correctly.If
the
/dev/update.src
setting is not correct, see the
HP-UX System Administration Tasks
manual.
3. Make sure the installation media is set to write-protected state.
4. Insert the installation media into the cartridge tap e driveorDAT drive, and wait until
the BUSY indicator turns o.
5. To load all the les from the installation media, Select
NNNNNNNNNNNNNNNNNNNNNNNNNNNNNNNNNNNNNNNNNNNNNNNNNNNNNNNNNNNNNNNNNNNNNNNNNNNNNNNNNNNNNNNNNNNNNNNNNNNNNNNNNNNNNNNNNNNNNNNNNNNNNNN
Select All Filesets on the Source Media ->
function by using the up
and down arrow keys and the
NNNNNNNNNNNNNNNNNNNNNNNNNNNNNNNNNNN
Select Item
softkey.
All the les are loaded from the installation media.
6. Remove the installation media, then put it in a safe place.
Software Installation 5-7