Installing a DC power supplyInstalling a DC power supply
WARNING: WARNING: To reduce the risk of electric shock, be sure that the cable grounding kit is properly
installed and connected to a suitable protective earth terminal before connecting the power
source to the frame.
Two lugs ship in the kit with the -48V DC power supply. The two-hole lug specification is as follows:
Width – 0.41 in (10.41 mm)
Bolt hole size – 0.20 in (5.08 mm)
Hole spacing – 0.63 in (16.00 mm)
PrerequisitesPrerequisites
Be sure the -48V DC power cables are installed. For more information, see the HPE Synergy 12000 Frame -48V DC Power Cable
Installation Instructions.
Be sure that a ground connection to the HPE Synergy 12000 Frame has been properly installed. See Installing the DC power
grounding kit or the document that ships with the kit.
Gather the following tools:
Torx T-25 screwdriver
Crimper
ProcedureProcedure
1. Place the power supply on a flat, level surface.
2. Open the input connector on the new power supply by lifting the input connector cover.
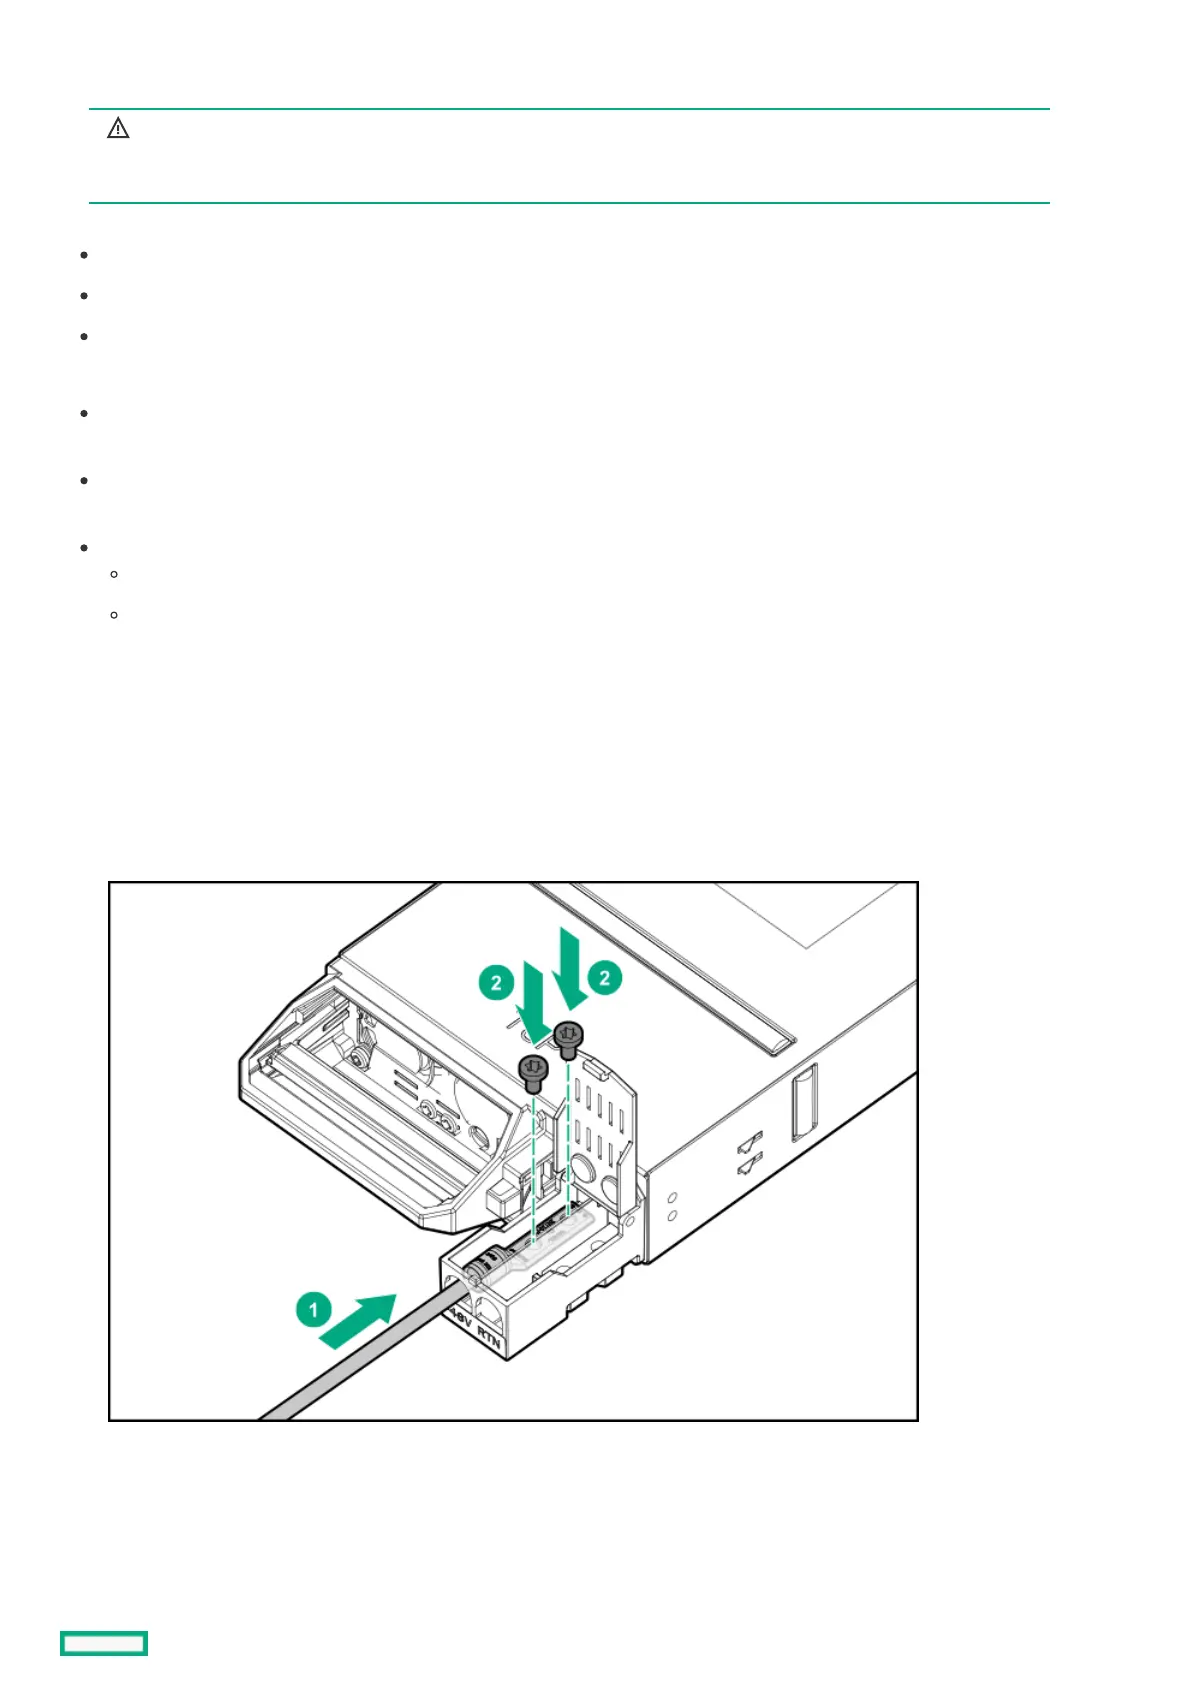
3. Crimp a two-hole lug onto the -48V DC cable.
4. Insert the two-hole lug through the aperture labeled "-48V" on the power supply input connector.
5. Secure the two-hole lug to the -48V DC input connector terminal with two screws.
6. Using a torque-controlled T-25 screwdriver, tighten both screws to 15 lb-in of torque.
7. Crimp a two-hole lug onto the return cable.
8. Insert the two-hole lug through the aperture labeled "RTN" on the power supply input connector.
9. Secure the two-hole lug to the RTN input connector terminal with two screws.
 Loading...