Page 108 PoE Port Schedule
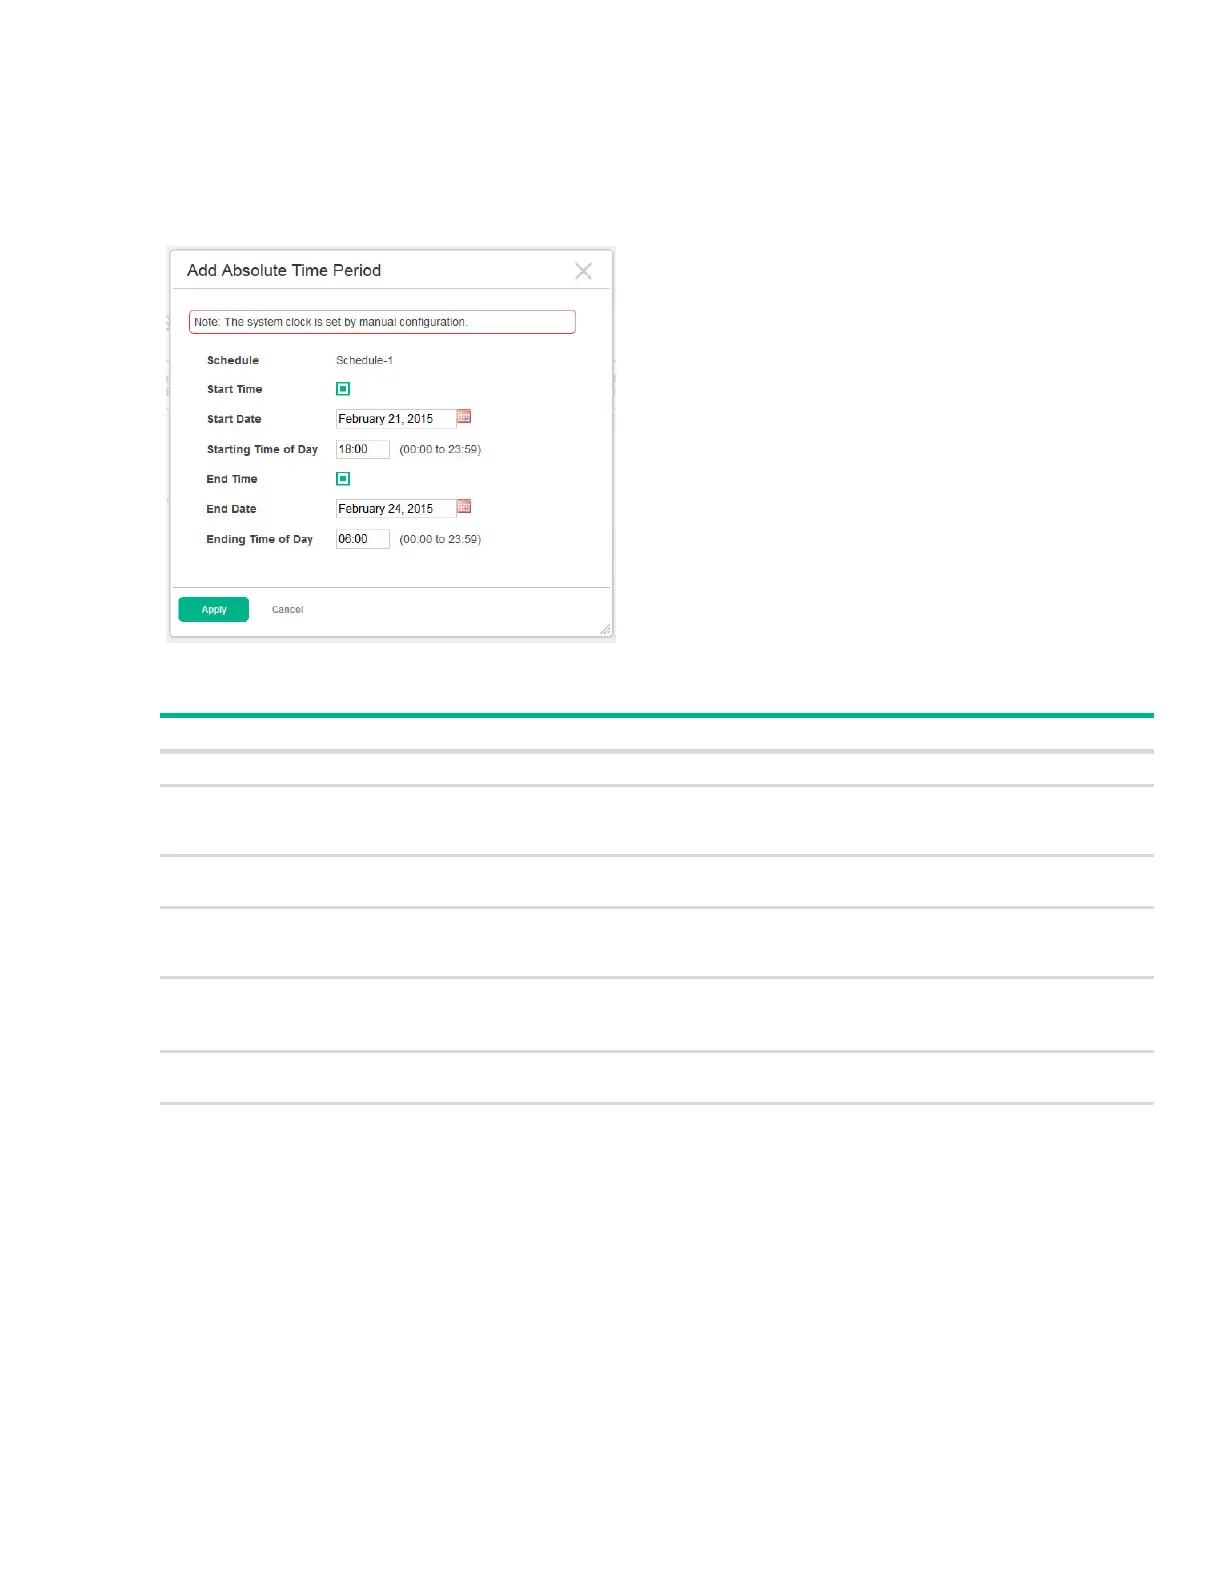
Configuring an Absolute Time Period
To configure an absolute schedule, select the schedule from the Schedule list and click Add Abso-
lute.
Figure 76. Add Absolute Time Period Page
Table 56. Add Absolute Time Period Fields
Click Apply to save any changes for the current boot session. The changes take effect immediately but
are not retained across a switch reset unless you click Save Configuration.
Field Description
Schedule The schedule to be configured.
Start Time Select this option to configure values for the Start Date and the Starting Time of Day fields.
If this option is not selected, the entry becomes active immediately. It is not selected by
default.
Start Date Click the calendar icon to select the day, month, and year when this entry becomes active.
This field can be configured only when the Start Time option is selected.
Starting Time of Day Specify the time of day that the entry becomes active by entering the information in the field
or by using the scroll bar in the Choose Time window, which displays when you click the field.
You can click Now to use the current time of day. Click Done to close the window.
End Time Select this option to configure values for the End Date and Ending Time of Day fields.
If this option is not selected, the entry does not have an end time; after the time period starts,
it will remain active indefinitely.
End Date Click the calendar icon to select the day, month, and year when this entry should no longer
be active.
Ending Time of Day Specify the time of day that the entry becomes inactive by entering the information in the field
or by using the scroll bar in the Choose Time window, which displays when you click the field.
Click Now to use the current time of day. Click Done to close the window.
 Loading...