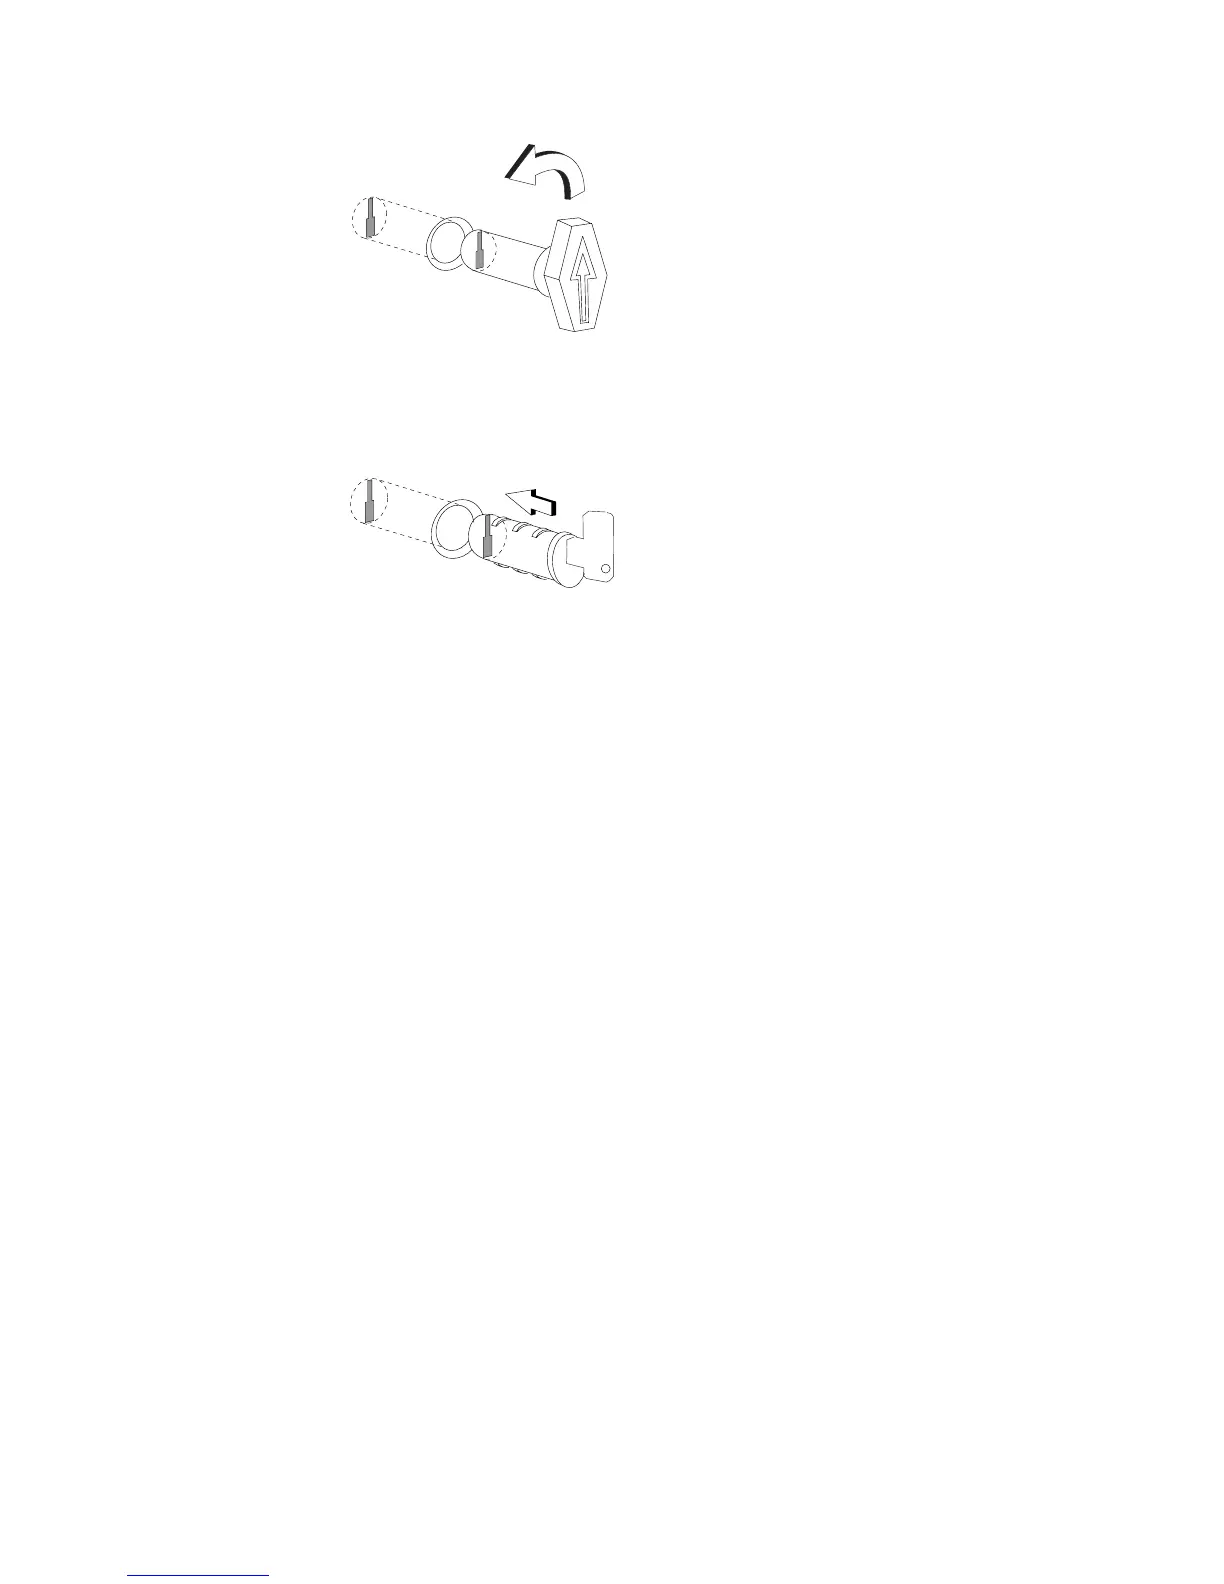
1. See Figure 83. Put the aligner into the empty lock cylinder.
2. Gently turn the aligner until you feel it insert into the slot at the bottom of the
lock cylinder.
3. Turn the aligner so that the arrow points in the correct direction for this device.
4. Remove the aligner.
Note:
Some cash drawers may have a different style lock. If the lock for your cash
drawer is different than the one described here, refer to the instructions that
came with the lock.
Be sure that each lock insert and its keys have matching numbers. To install the
lock insert, perform the following steps:
1. Remove the keys from the lock insert.
2. Push the brass installation and removal key completely into the lock insert.
3. Hold the lock and brass key so that the key points in the same direction as did
the aligner.
4. Push brass key and lock insert lock insert and brass key completely into the
empty lock cylinder.
5. Hold the lock insert in place with your finger and remove the brass key. The lock
insert is now installed.
6. Test the lock to be sure it operates correctly with the keys.
7. Return the brass installation/removal key, the aligner, and blank lock installation
handle to your supervisor for safekeeping.
Removing a lock insert
Follow these steps to remove a lock insert:
Figure 83. Install a lock insert
Updated October 31, 2007
Chapter 4. Installing external options 83
 Loading...