Installing the printer
The SurePOS 700 can support several models of the IBM SureMark printer. The
removal procedures and the installation are the same for all models of the printer.
Attention: If you are installing a non-USB printer, turn the power OFF for the
SurePOS 700 system unit.
Note:
For the SurePOS Models 721/741/781 and 722/742/782, the 4689 DBCS
SurePOS Receipt Journal (RS-485) printer requires the voltage to be set at
24 V. All other RS-485 printers will work correctly at 38 V. See “Voltage
setting for the 4689 DBCS SurePOS Receipt Journal printer” on page 19 for
additional information.
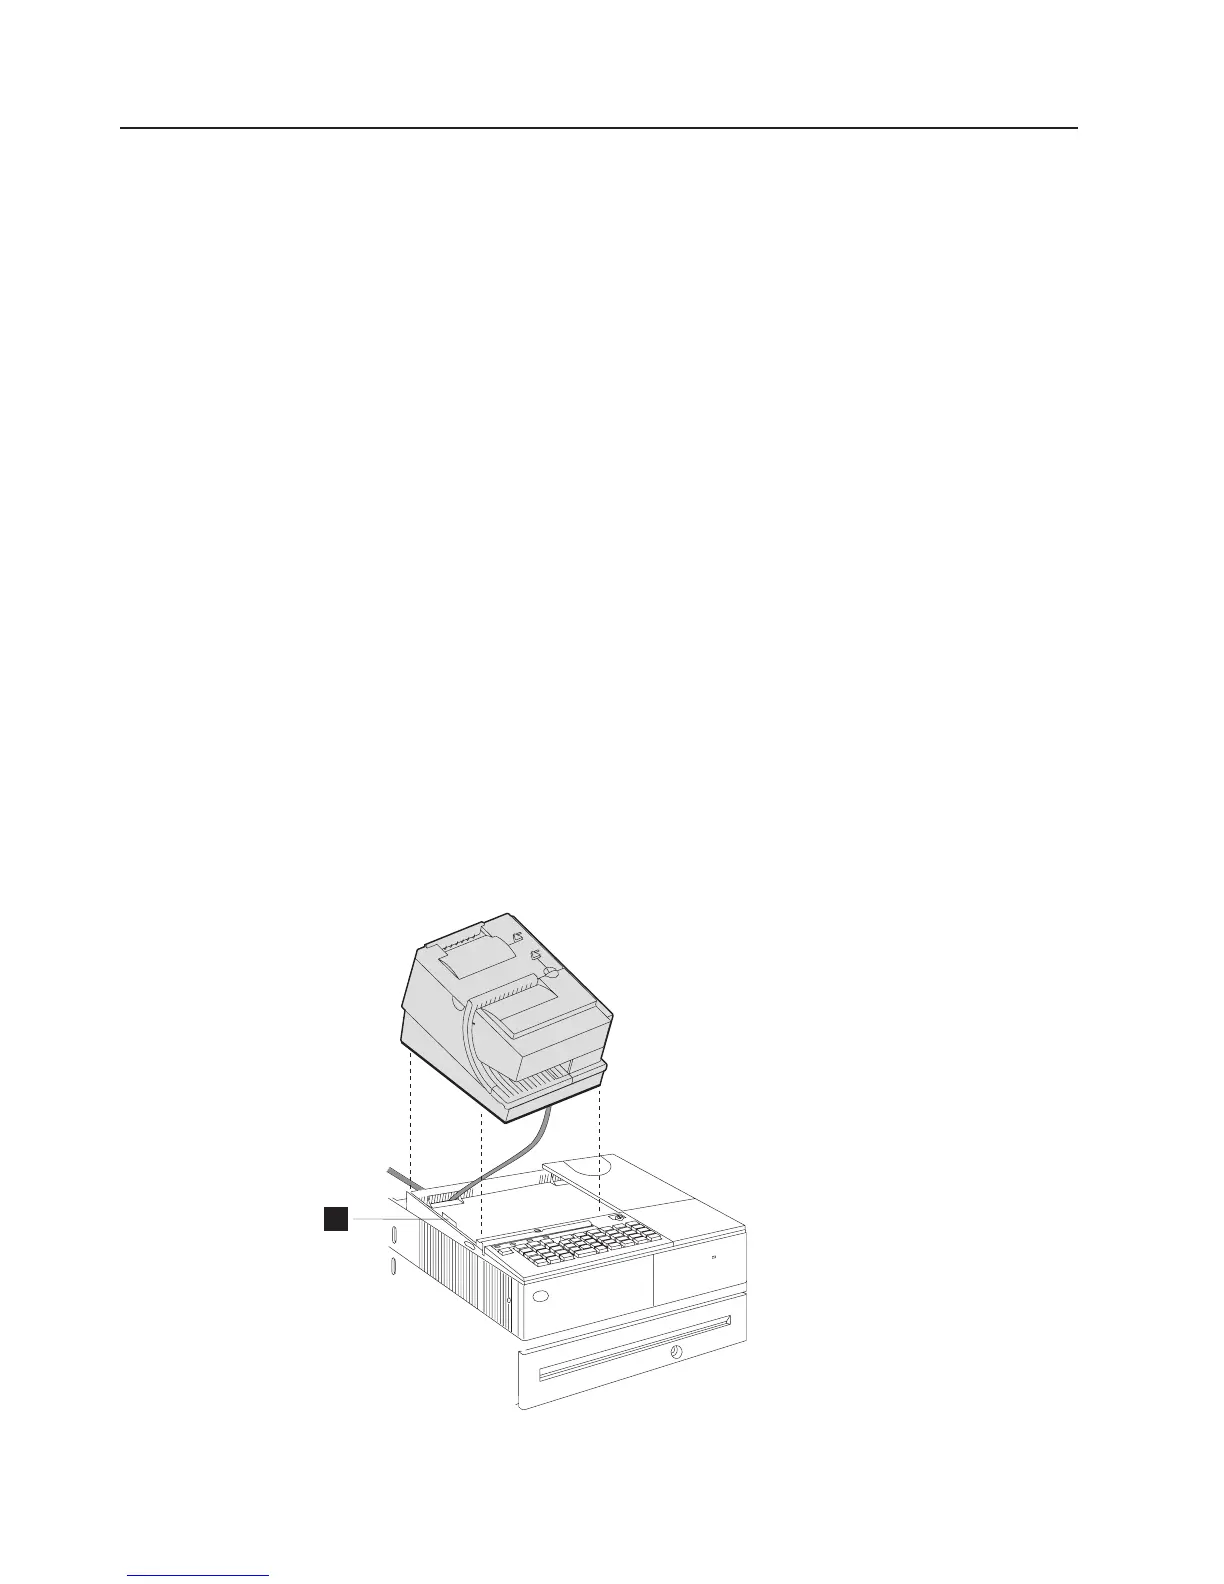
To install the printer, follow these steps:
1. Remove any packing material from inside or under the printer.
2. Connect the printer cable to the bottom of the printer.
3. If an I/O tray is installed, route the cable through the nearest opening at the rear
of the I/O tray. Place the printer on the system unit.
4. If your model has a slanted I/O tray, be sure the side of the printer overlaps the
tab (A in Figure 53) on the side of the slanted I/O tray.
5. If you are installing a printer on an integrated wide-footprint model and are not
using a wedge-mounted CRT as the display, you must also install a
credit-card-holder filler panel.
6. For a non-USB printer, connect the printer cable to the EIA-232 (RS-232) port or
to the number 7 RS-485 port.
7. For a non-USB printer, IPL the application so that the application recognizes the
attachment of the printer.
8. Install any other external options as required.
A
Figure 53. Install the printer
Updated October 31, 2007
62 SurePOS 700 Series: SurePOS 700-721/741/781, 722/742/782 Planning, Installation, and Operation Guide
 Loading...