Adjusting The End Of Forms Distance
379
8. The display will show “SERVICE / PRINTER MECHANISM TESTS”, the first menu item. Press Enter to enter the
mechanism tests menu.
9. Press SCROLL↑ or SCROLL↓ until “PRINTER MECHANISM TESTS / END OF FORMS ADJUST” is on the display.
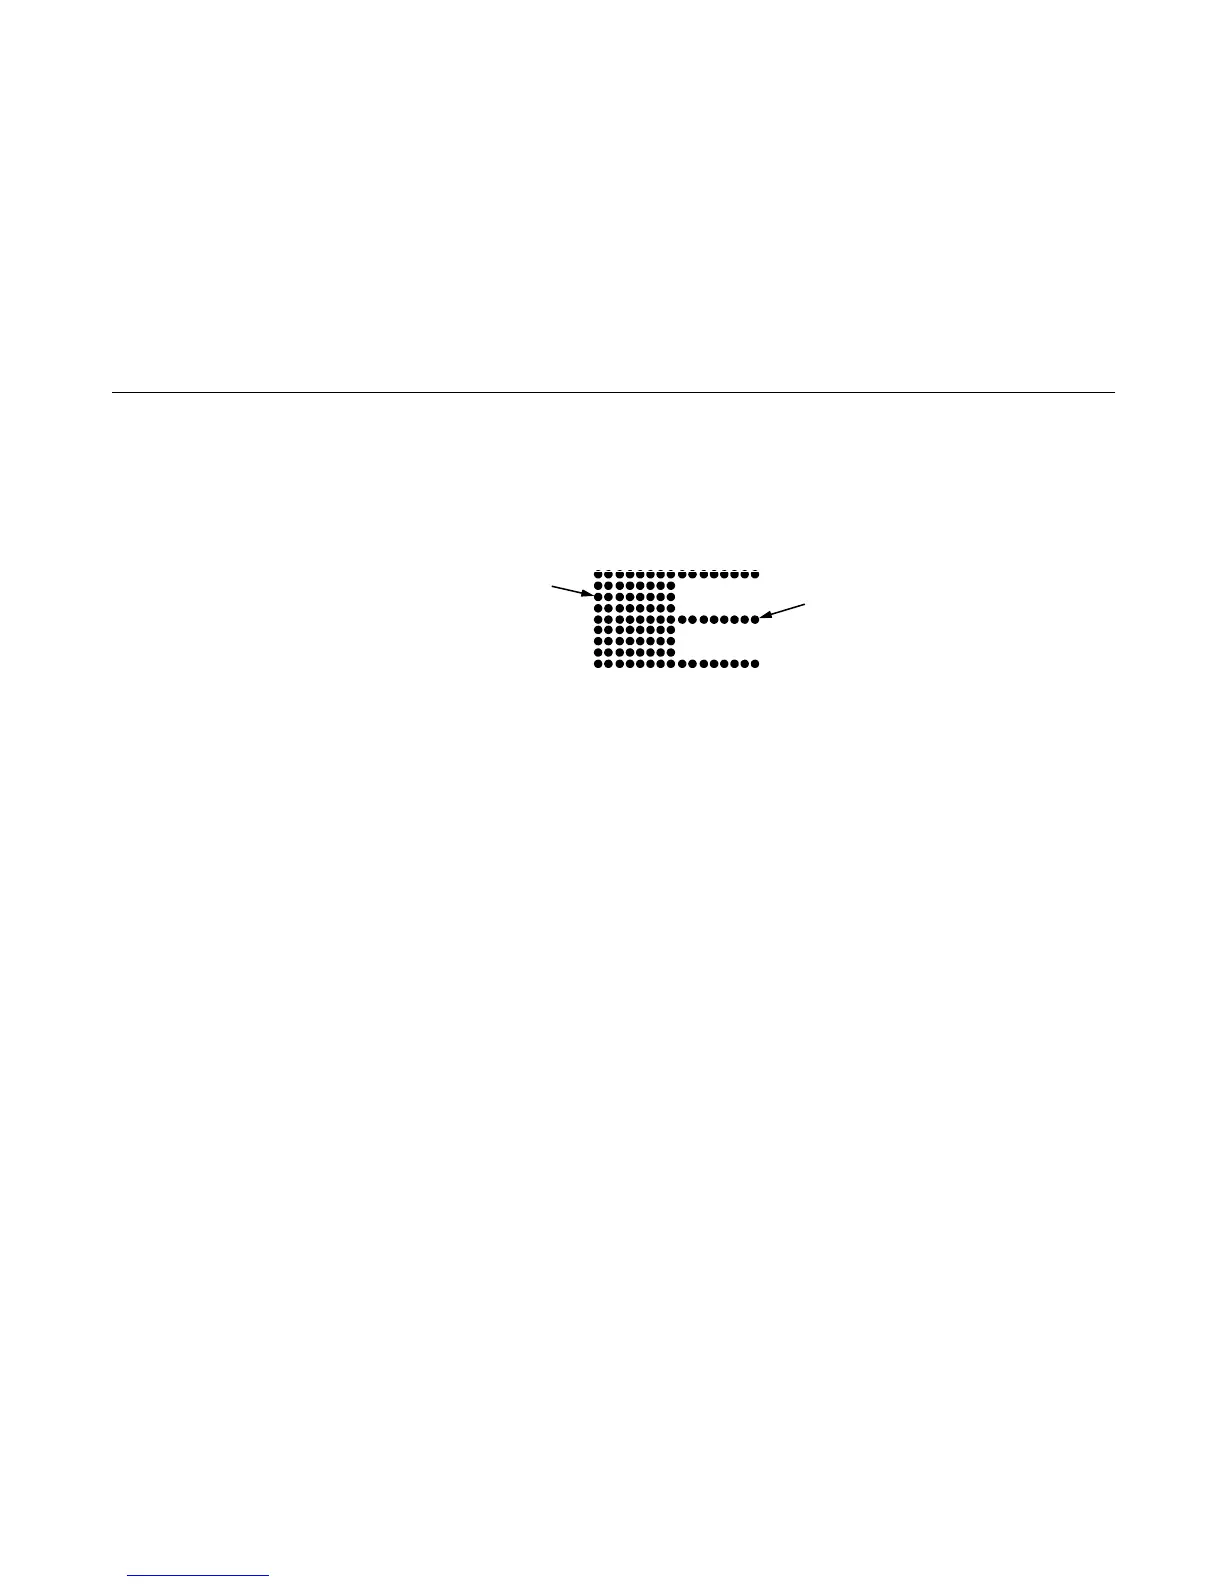
This test will print a vertical “comb” pattern at around column 70, each long bar separated by three shorter bars. An
enlarged example of the comb pattern is shown below.
Figure 30. This figure shows the long and short bars on the vertical comb pattern that prints for the forms adjustment
test.
10. Press ENTER until the END OF FORMS ADJUST test starts.
The comb pattern will print until the display shows “001 END OF FORMS / LOAD FORMS.”
11. Remove the paper from the tractors and examine the area of the page perforation.
If a bar from the comb pattern just meets the perforation, the end of forms adjustment distance is correct. (A bar exactly on
perforation is ideal; 1 or 2 dot rows off is OK; 5 to 7 dot rows off is too much.) Unless you wish to restart the procedure with
6-part paper, you may stop the test here, and skip to step 22. (See the note at the beginning of this procedure.)
If the comb pattern stopped short of the perforation or printed beyond the perforation, go to step 12.
12. Measure how short or long the comb pattern printed by counting the number of dot rows needed to reach the perforation, or
the number of dot rows that printed beyond the perforation.
NOTE: You can use the long bars to count the dot rows quickly. There are three dot rows between each long bar, so each long
bar increases the number of dot rows by four. You can also tear off a small piece of the comb pattern from the
beginning of the pattern and use it as a ruler to help you measure the dot rows required either to reach the perforation
or back up to it.
13. Reload the paper and set the top of form.
14. Press MENU + CONFIG + SCROLL ↑ + SCROLL ↓ to enter the CE Tests menu. (Press all four keys at the same time.)
15. The display will show “SERVICE / PRINTER MECHANISM TESTS,” the first menu item. Press SCROLL↑ or SCROLL↓
until “SERVICE / END OF FORMS ADJUSTMENT VALUE” is on the display.
16. Press ENTER. The top line of the display will show “END OF FORMS ADJUSTMENT VALUE” and the bottom line will
show the current setting for the number of dots.
Short Bar
Long Bar
 Loading...
