SECTION 9—BACK
ProSPIN™ X4™ 58 Part No 1125104
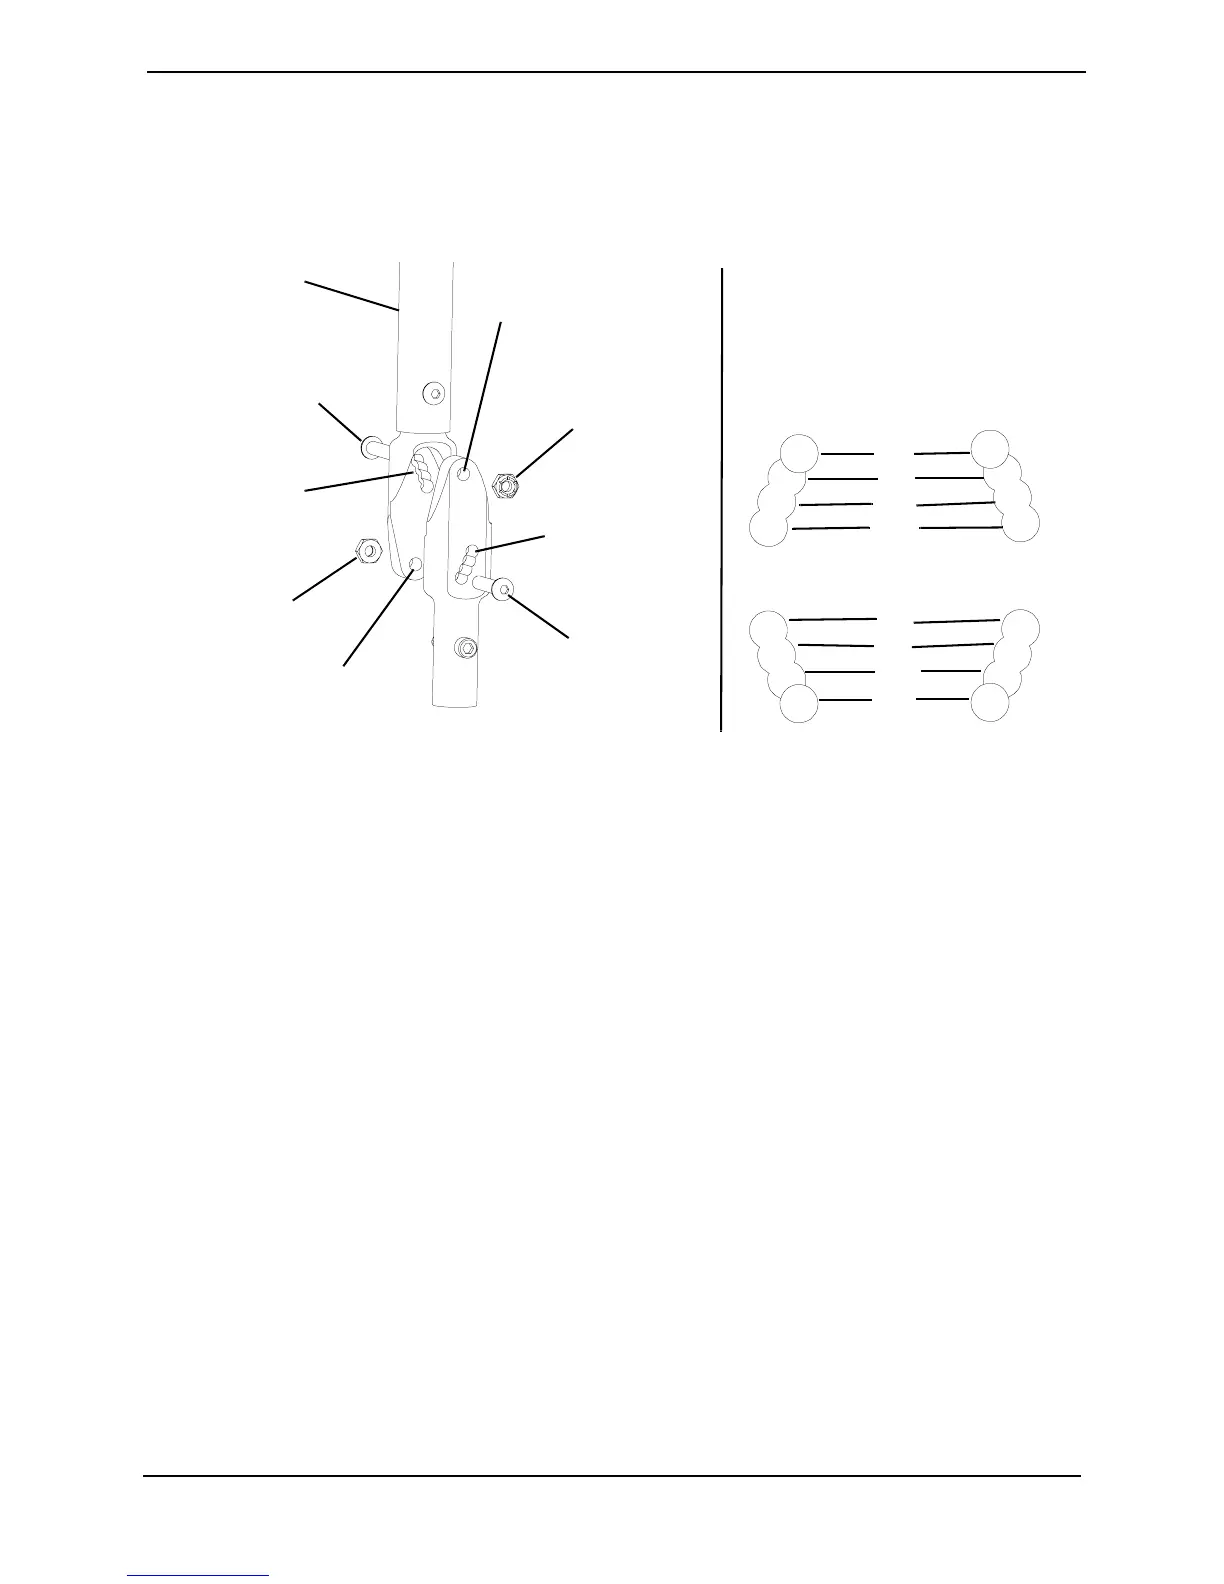
5. Installtheremainingbackangleadjustmentscrewthroughthelowerbackangle
mountingholeandthedesiredlowerangleadjustmenthole.
6. Secureeachbackangleadjustmentscrewwithalocknut.Torquelocknutto
80‐100in/lbs.
FIGURE 9.3 Adjusting the Back Angle
Installing/Removing the Chest Positioning Strap
NOTE:Forthisprocedure,refertoFIGURE9.4onpage59.
1. Removethetwomountingscrewsandwasherssecuringthebackupholsterytothe
backcane.
2. Dooneofthefollowing:
•Toinstallthechestpositioningstrap,proceedtoSTEP3.
•Removethetwoexistingchestpositioningstraphalvesfromtheback
upholstery.
3. Securethetwohalvesofthenewchestpositioningstraptogether.
4. Alignthemountingholeononeendofthenewchestpositioningstrapwiththe
mountingholeonthebackupholsteryandbackcane.
5. Securethenewchestpositioningstrapandbackupholsterytothebackcanewithone
mounting
screwandwasher.Torqueto20‐25in/lbs.
NOTE:Ensurestrapisorientedproperlyandnottwistedwheninstalling.
6. RepeatSTEPS4‐5foroppositesideofnewchestpositioningstrap.
Back Cane
Locknut
Lower Back Angle
Mounting Hole
Back Angle
Adjustment
Screw
Upper Back Angle
Mounting Hole
DETAIL "A" - BACK
ANGLE MOUNTING
HOLES
Upper
0°
5°
10°
15°
Lower
0°
5°
10°
15°
Back Angle
Adjustment Screw
Locknut
Upper Angle
Adjustment Hole
Lower Angle
Adjustment Hole