SECTION 11—WHEELS
ProSPIN™ X4™ 74 Part No 1125104
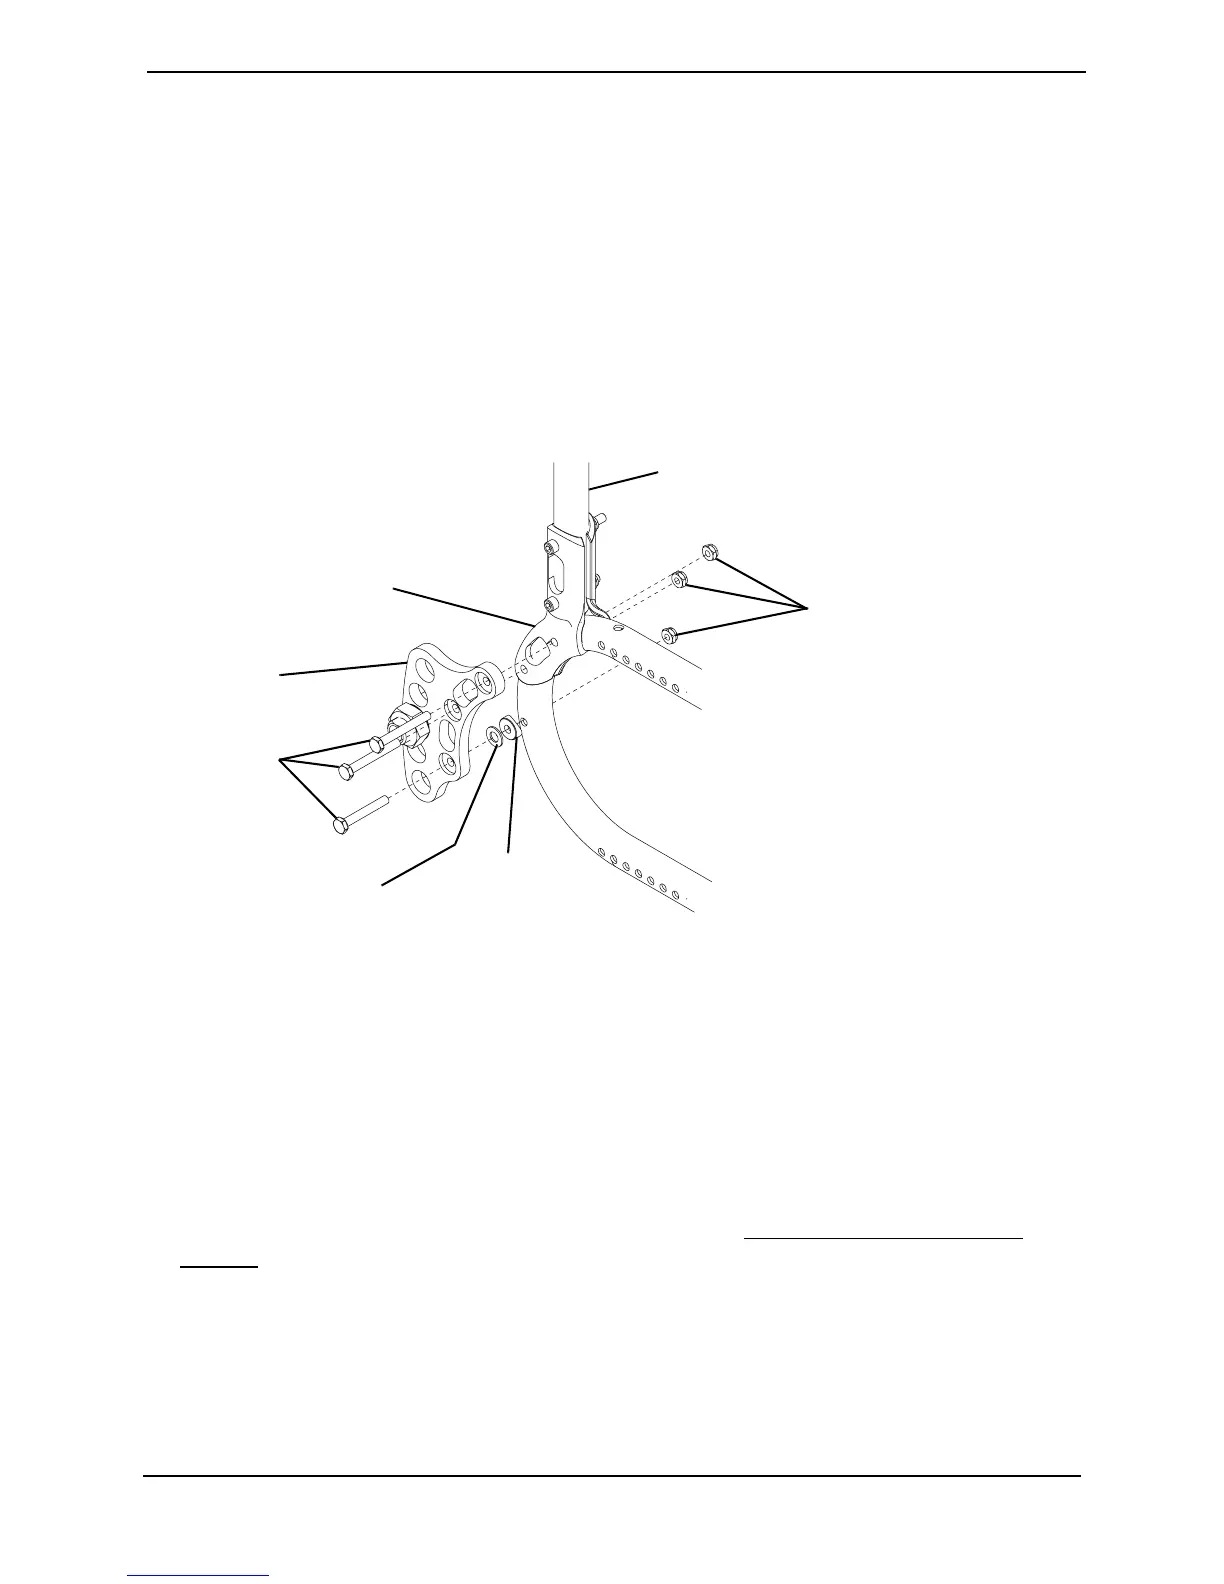
Installing the Amputee Bracket
NOTE:Forthisprocedure,refertoFIGURE11.7.
1. Removethetwoexistingmountingscrewsandlocknutssecuringthebackcane
mountingbrackettothewheelchairframe.
2. Usingthenewthreelongmountingbolts,thewasherandcovedwasher ,andthethree
locknuts,securetheamputeebracketandthebackcanemountingbrackettothe
wheelchairframe.
3. RepeatSTEPS1‐2toinstalltheremainingamputeebracketontheoppositesideofthe
wheelchair.
FIGURE 11.7 Installing the Amputee Bracket
Adjusting Wheelbase Width
NOTE:Forthisprocedure,refertoFIGURE11.8onpage75.
NOTE:Increasingthewheelbasewidthmaypreventthewheelchairfrompassingthroughsmaller
doorjamsandothertightplaces.Consideraccesstodailyactivitiesbeforeincreasingwheelbase
width.
1. Removetherearwheelfromthewheelchair.RefertoRemoving/InstallingRear
Wheelsonpage 67.
2. Loosenthetwojamnutsthatsecuretheaxlebushingtotheaxlemountingplate.
NOTE:EnsurethenumberofthreadsshowingbeyondtheoutsidejamnutistheSAMEforboth
rearwheels.Thiswillhelpavoidaʺ3‐wheelingʺsituation.
Mounting
Screws
Back Cane
Mounting Bracket
Back Cane
Locknuts
NOTE:Existingmountingscrews
andlocknutsremovedinSTEP1
notshown.
Washer
Coved
Washer
Amputee
Bracket