SECTION 11—WHEELS
ProSPIN™ X4™ 76 Part No 1125104
9. Reinstalltherearwheelontothe
wheelchair.Referto
Removing/InstallingRearWheelson
page 67.
10. RepeatSTEPS1‐9fortheoppositeside
ofthewheelchair.
NOTE:Makesuretheaxlemountingplatesare
mountedinthesameposition.Thiswillhelp
avoidaʺ3‐wheelingʺsituation.
11. Adjustthewheellocks.Referto
Replacing/AdjustingtheWheelLocks
onpage 37.
12. Ifwheelchairisequippedwithanti‐
tippers,adjusttomaintainproper
clearance.RefertoInstalling/Removing
theAnti‐tippersonpage 87.
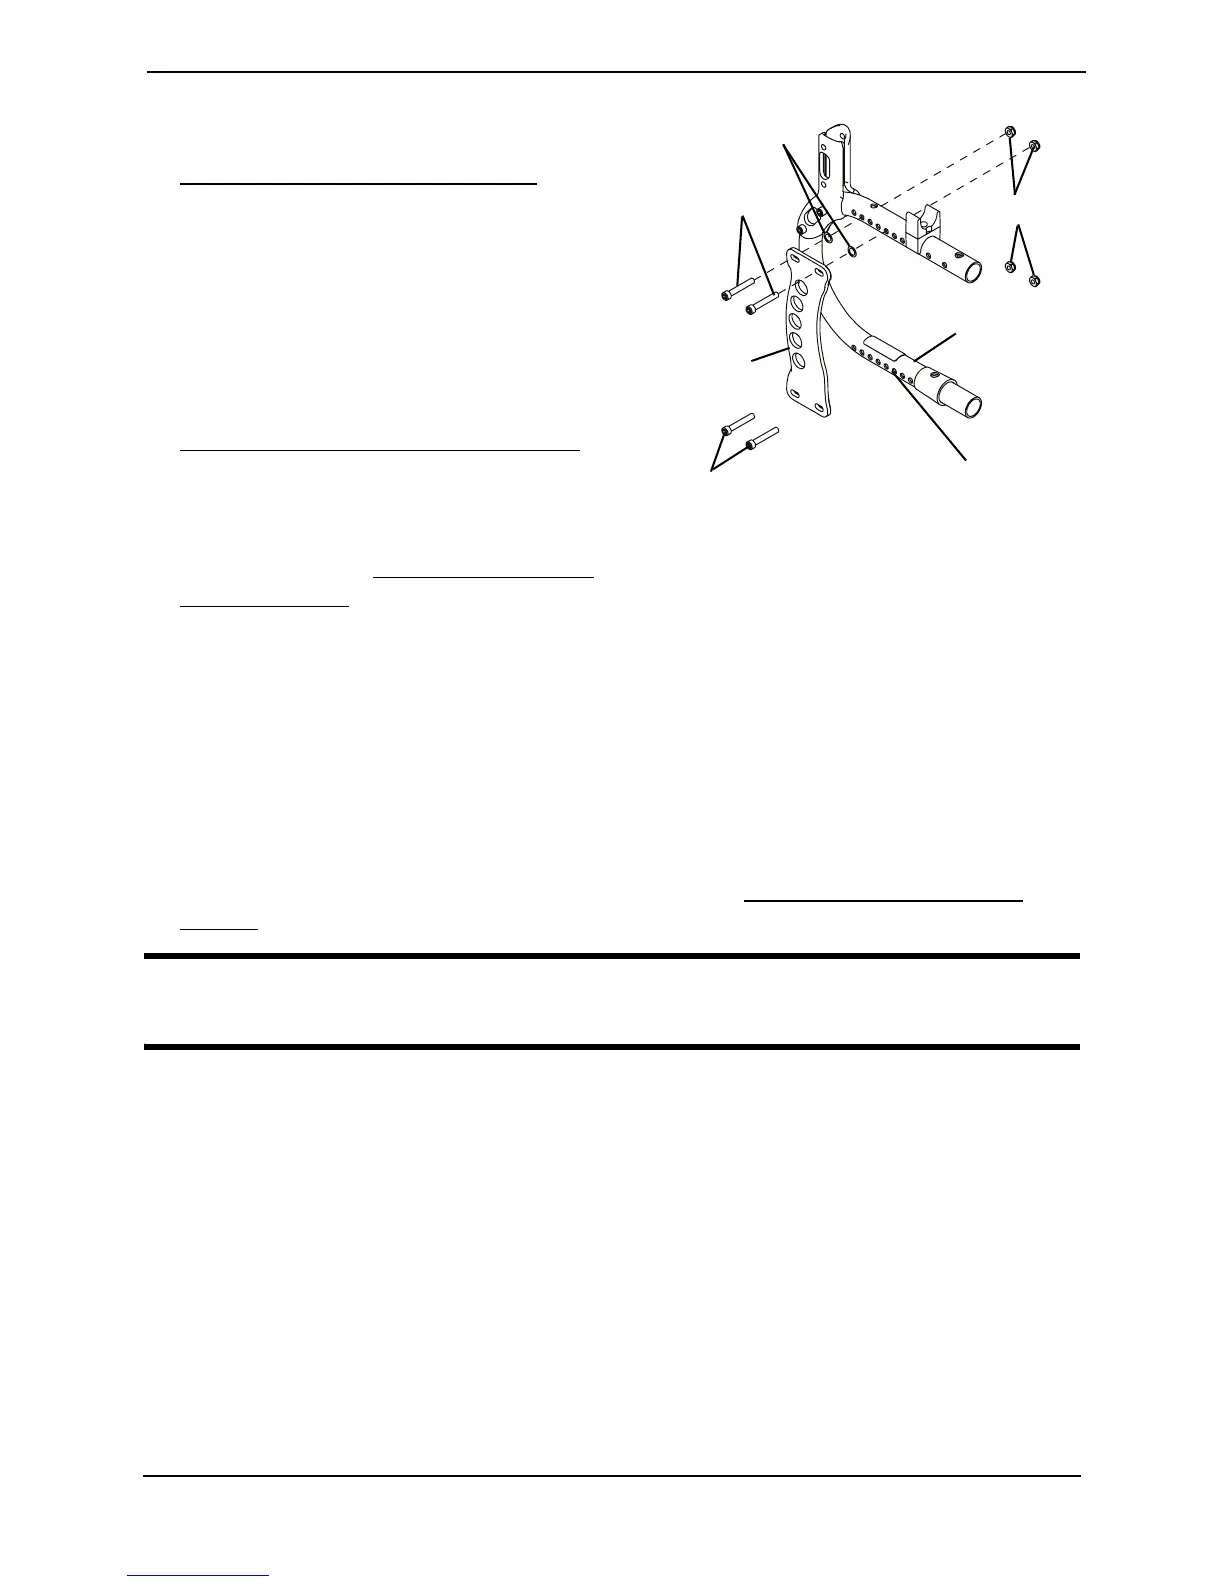
FIGURE 11.9 Adjusting Wheelbase Length
Replacing/Adjusting the Handrims - Spoke Rear Wheels
NOTE:Forthisprocedure,refertoFIGURE11.10onpage77.
NOTE:Ifreplacingthehandrim,performSTEP5usinganewhandrim.
NOTE:Thefollowingprocedureisforprojectionornon‐projectionhandrims.
NOTE:Handrimsforcompositerearwheelscannotbeadjusted.
1. Removetherearwheelfromthewheelchair.RefertoRemoving/InstallingRear
Wheelsonpage 67.
WARNING
Tire MUST be deflated before any disassembly procedures are performed.
2. Removeallairfromrearwheelbypressingdownoncenterpinofthevalvestem.
3. Whilecarefullyholdingthetireandrimstriptooneside,removethemountingscrews
andlocknutsthatsecurethehandrimtotherearwheel.
NOTE:Notethepositionoftheexistinghandrimbeforeremovingfromtherim.
4. Removethehandrimfromtherim.
5. Alignrimmountingholeswithoneoftwohandrimmountingpositions:
•In‐Movingbothhandrimstotheinsidemountingholeonthemountingtabswill
reducetheoverallwidthofthewheelchairby¾‐inch.
•Out‐Movingbothhandrimstotheoutsidemounting
holeonthemountingtabs
willincreasetheoverallwidthofthewheelchairby¾‐inch.
Top Mounting
Screws
Washers
Bottom Mounting Screws
Axle Plate
Wheelchair
Frame
Locknuts
Frame Mounting
Holes