SECTION 11—WHEELS
Part No 1125104 73 ProSPIN™ X4™
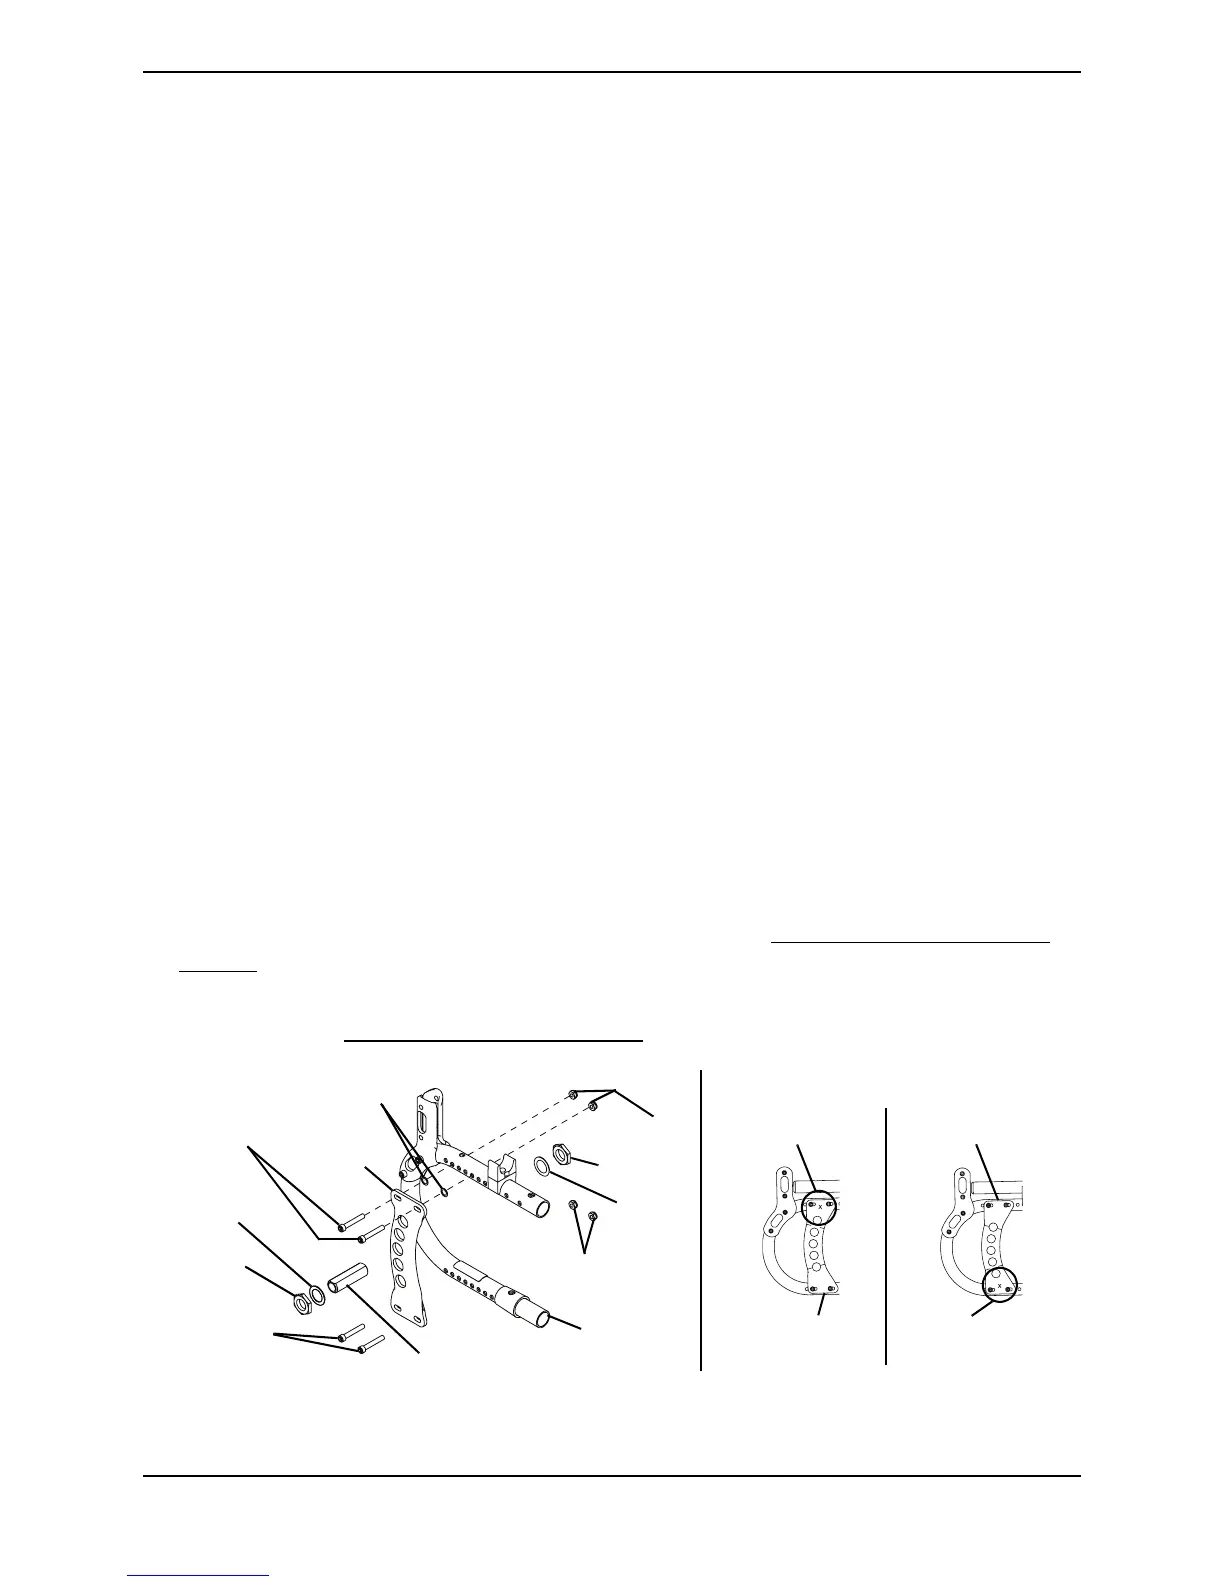
Installing/Repositioning the Axle Bushing and/or the Axle Plate
NOTE:Ifinstalling/repositioningtheaxlebushingonly,followSTEPS4‐8.
NOTE:Ifrepositioningtheaxleplate,movetherightaxleplatetotheleftsideofthewheelchair
andtheleftaxleplatetotherightsideofthewheelchair.
NOTE:A“X”shapedaxleplateorientationmarkislocated
ononeendoftheaxleplatenexttothe
axlebushingmountingholestoindicateaxleplateorientation(“X”attopofaxleplateindicates
theupposition,“X”atbottomofaxleplateindicatesthedownposition)(Detail“A”).
1. Usingthetwotopmountingscrewsandlocknuts,securethe
topoftheaxleplateto
thewheelchairframesothattheaxleplatecurvestowardstherearofthewheelchair.
Looselytightenmountingscrewsandlocknuts.
2. Usingthetwobottommountingscrews,securethebottomoftheaxleplateandany
camberspacersand/oranti‐tipperbracketpresenttothewheelchairframe.
3. Securelytightenallfourmountingscrewsandlocknuts.
4. Inserttheaxlebushingintothedesiredaxlebushingmountingposition.
NOTE:Wheninstallingtheaxlebushingensurethenumberofthreadsshowingbeyondtheoutside
jamnutistheSAMEforbothrearwheels.Thiswillhelpavoidaʺ3‐wheelingʺsituation.
5. Usingthetwojamnutsandlargewasher,securetheaxlebushingtotheaxlemounting
plate.Torquejamnutsto40‐45ft‐lbs.
6. Performoneofthefollowing:
• Removing/RepositioningtheAxlePlate‐RepeatSTEPS1‐3toinstalltheremaining
axleplate.
• Removing/RepositioningtheAxleBushing‐RepeatSTEPS4‐5toinstallthe
remainingaxlebushing.
7. Reinstalltherearwheel(s)ontothewheelchair.RefertoRemoving/InstallingRear
Wheelsonpage 67.
8. Ifwheelscomeintocontactwiththewheelchairframeorarmsadjustthewheelbase
width.RefertoAdjustingWheelbaseWidth
onpage 74.
FIGURE 11.6 Removing/Installing/Repositioning the Axle Bushing and/or Axle Plate
Top
Mounting
Screws
Washers
Bottom
Mounting
Screws
Axle
Plate
Locknuts
Large
Washer
Wheelchair
Frame
Jam Nut
Jam Nut
Axle Plate
Orientation Mark
Axle Bushing
Locknuts
DETAIL “A”
Axle Plate
(UP Position)
Axle Plate
(DOWN Position)
Axle Plate
Orientation Mark
Large
Washer