Change EVOS
™
LED light cubes
To customize your EVOS
™
M5000 Imaging System, you can add and remove LED light cubes to fit the
instrument’s functionality to your own specific research needs. Each LED light cube is coded to allow
the imaging system to automatically recognize it in any position.
For a complete list of available light cubes and to inquire about custom light cubes, go to
thermofisher.com/evos or contact Technical Support.
WARNING! UV LIGHT HAZARD! The EVOS
™
M5000 Imaging System uses a Class 3B ultraviolet
LED for the DAPI channel.
Before changing the LED light cubes, ensure that the excitation light
is turned OFF (the instrument is not in Live mode).
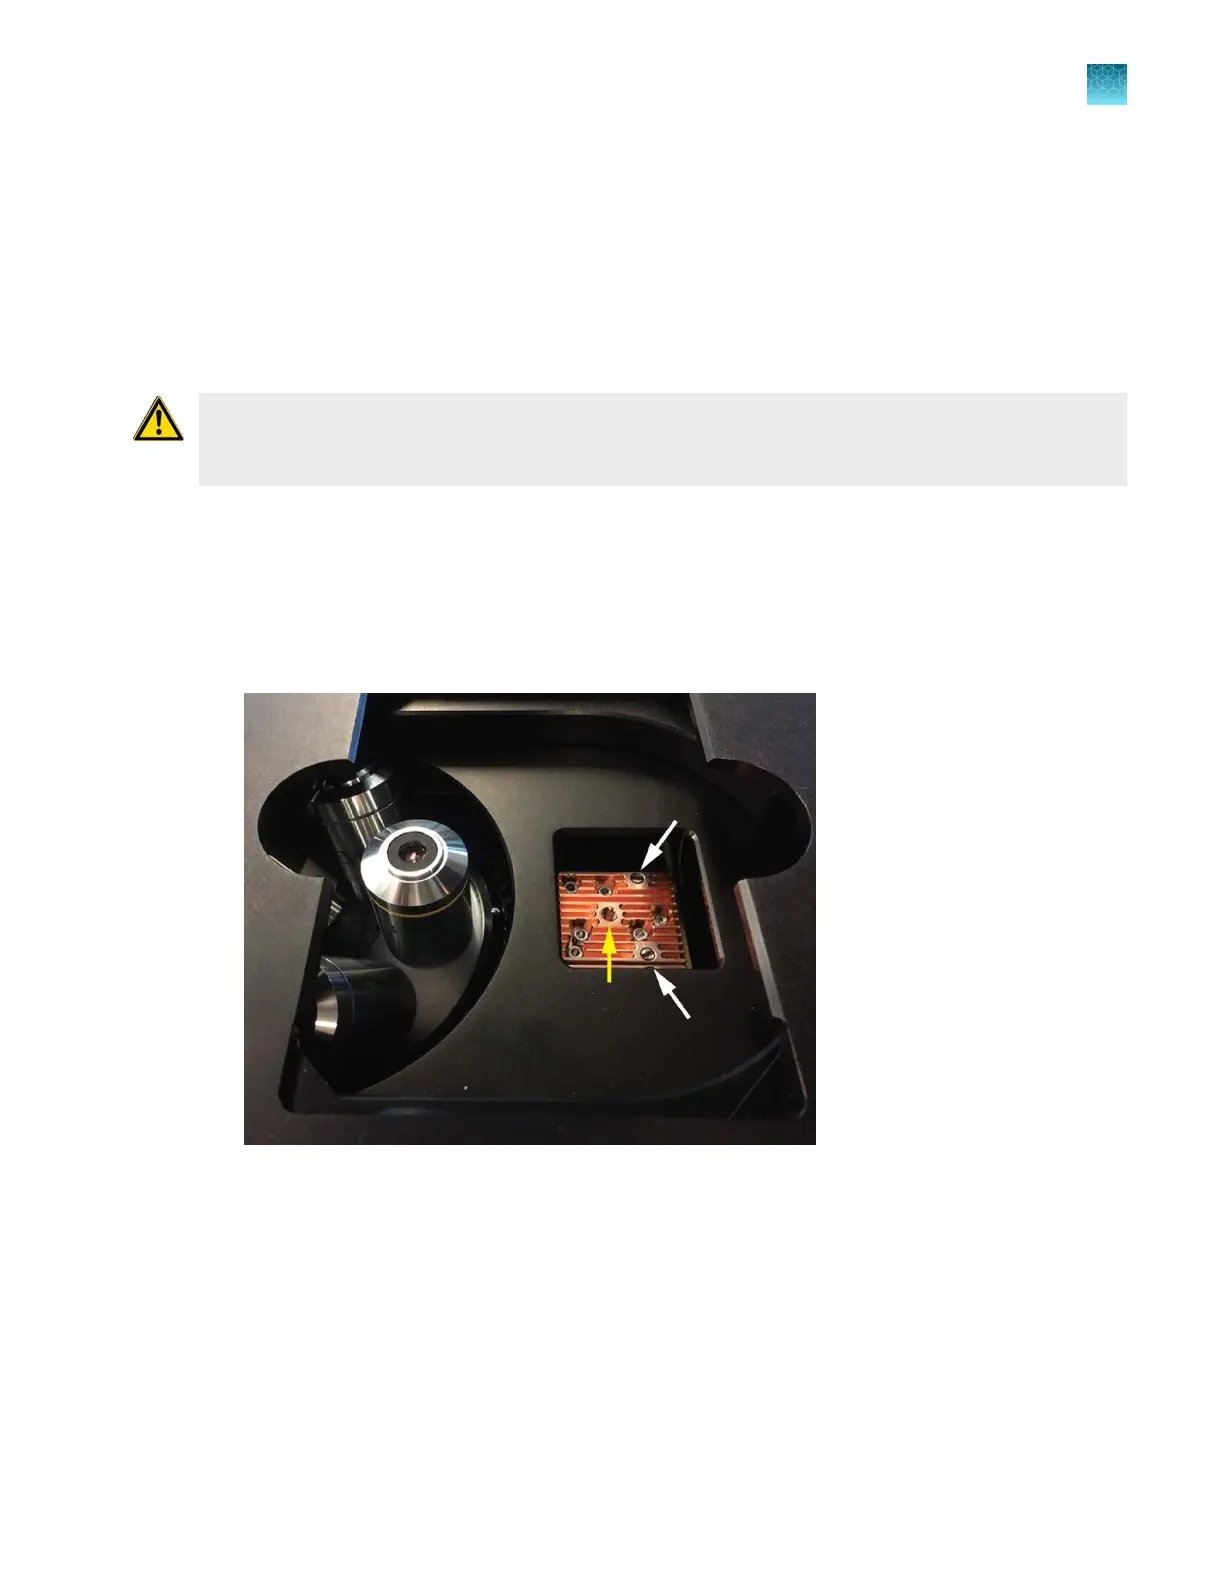
Change LED light cube
1.
Select the position of the Light cube you want to change.
2.
Move the stage back to allow access to the light cube, which is centered under the back of the
stage.
3.
Use the light cube tool to loosen the two slotted screws (white arrows) that are flush with the
ridges on the light cube.
4.
Screw the threaded end of the light cube tool into the hole in the center of the light cube (yellow
arr
ow).
5.
Use the tool to tilt the light cube slightly toward you and lift out gently, and then remove tool from
cube.
Chapter12Instrument care and maintenance
Change EVOS
™
LED light cubes
12
EVOS
™
M5000 Imaging System User Guide
109