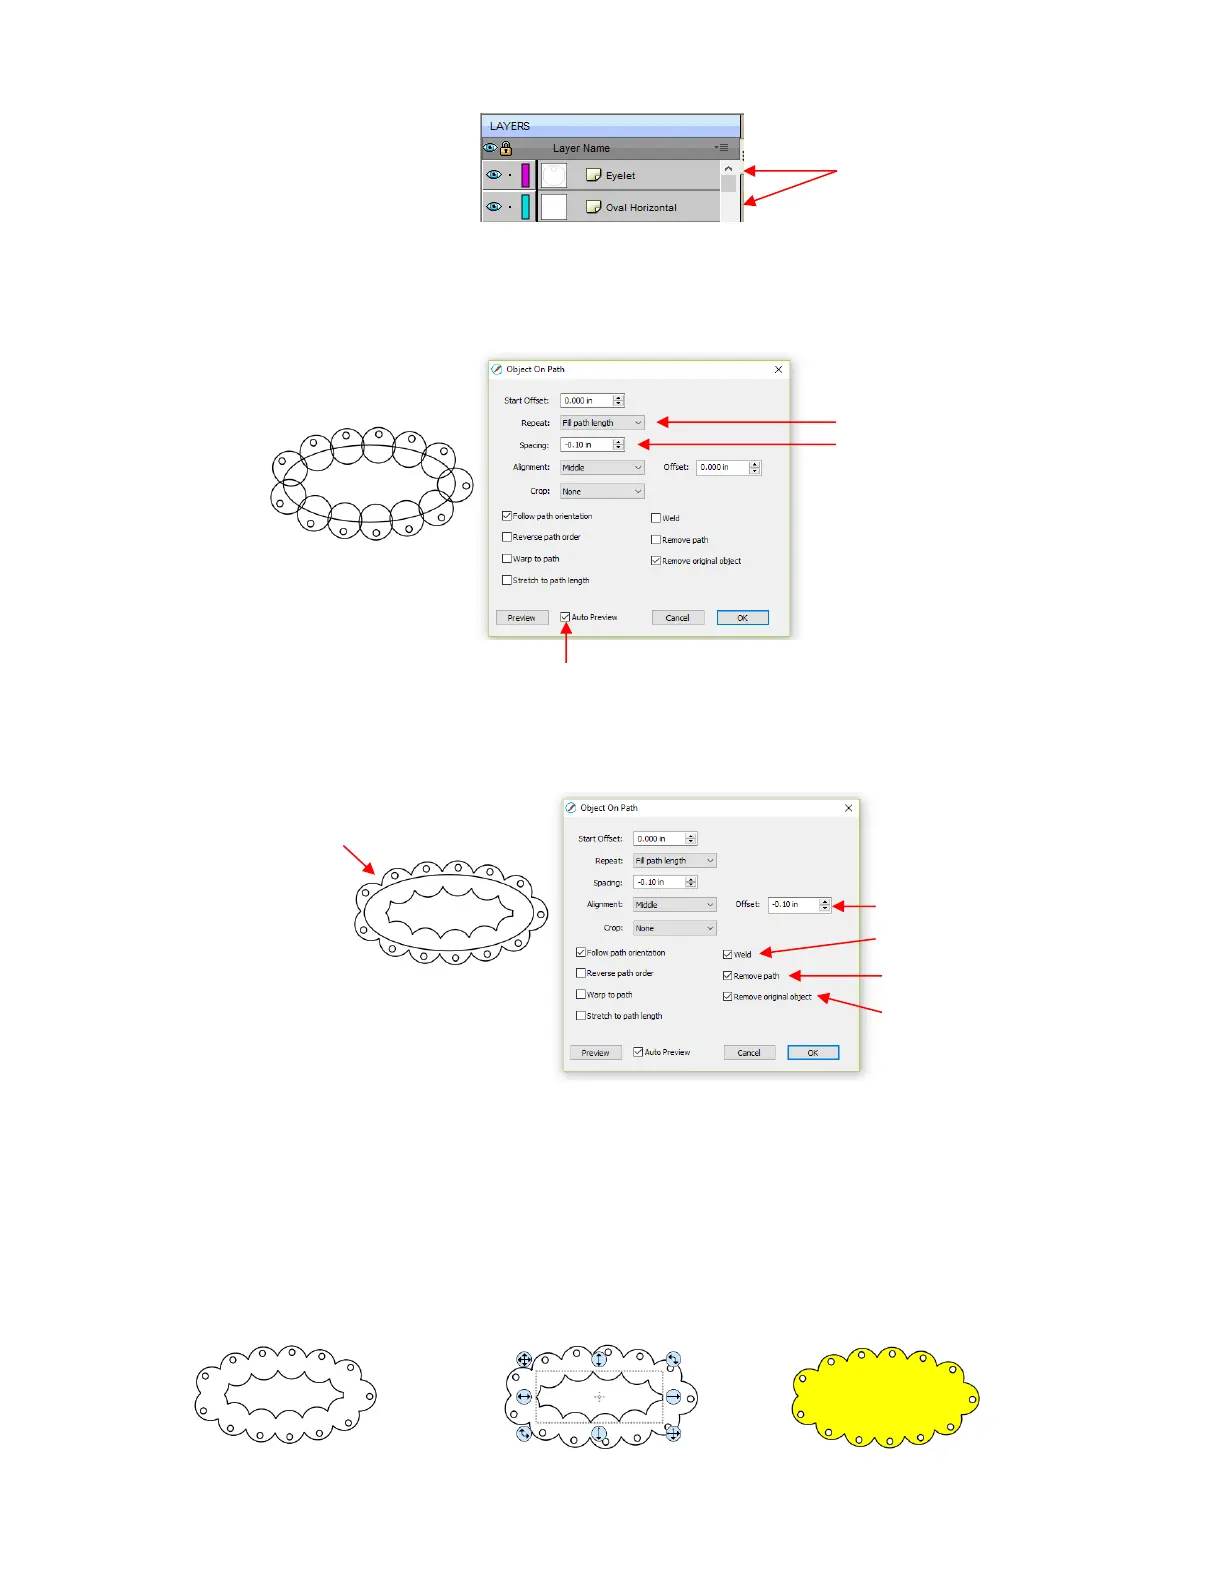
Select the shapes and open the Object on Path window using Effects>Object on Path. The first thing is to
mark the Auto Preview option so that all changes will be immediately reflected. Then choose Fill path
length so the shapes will be distributed over the entire path. Set the Spacing to a negative number so that
the shapes will overlap:
Next the Offset is decreased to soften the scallop. Also a few new settings are noted as shown and
described below:
Weld: Mark this box if you want the shapes welded together, as shown in the screenshot.
Remove path: Choose if you will no longer need the path shape (in this case, the oval)
Remove original object: Choose if you will no longer need the original shape (in this case, the eyelet
circle)
Click on OK and the scalloped oval is mostly complete. To remove the internal scallop, apply Object>Break
Apart. Carefully select the internal scallop shape and delete. Then marquee-select the remaining scallop
border with eyelet circles and apply Object>Merge:
 Loading...