Start Offset: This is the distance from the left side of the path to the location of the first shape:
Repeat: Choose Count if you want to specify how many copies to place along the path. Choose Fill
Path length if you want the program to automatically fill in the number of repeats that will fill the path
using the spacing you enter:
Spacing: Enter the desired spacing between repeats. This only applies when Repeats is set to Count:
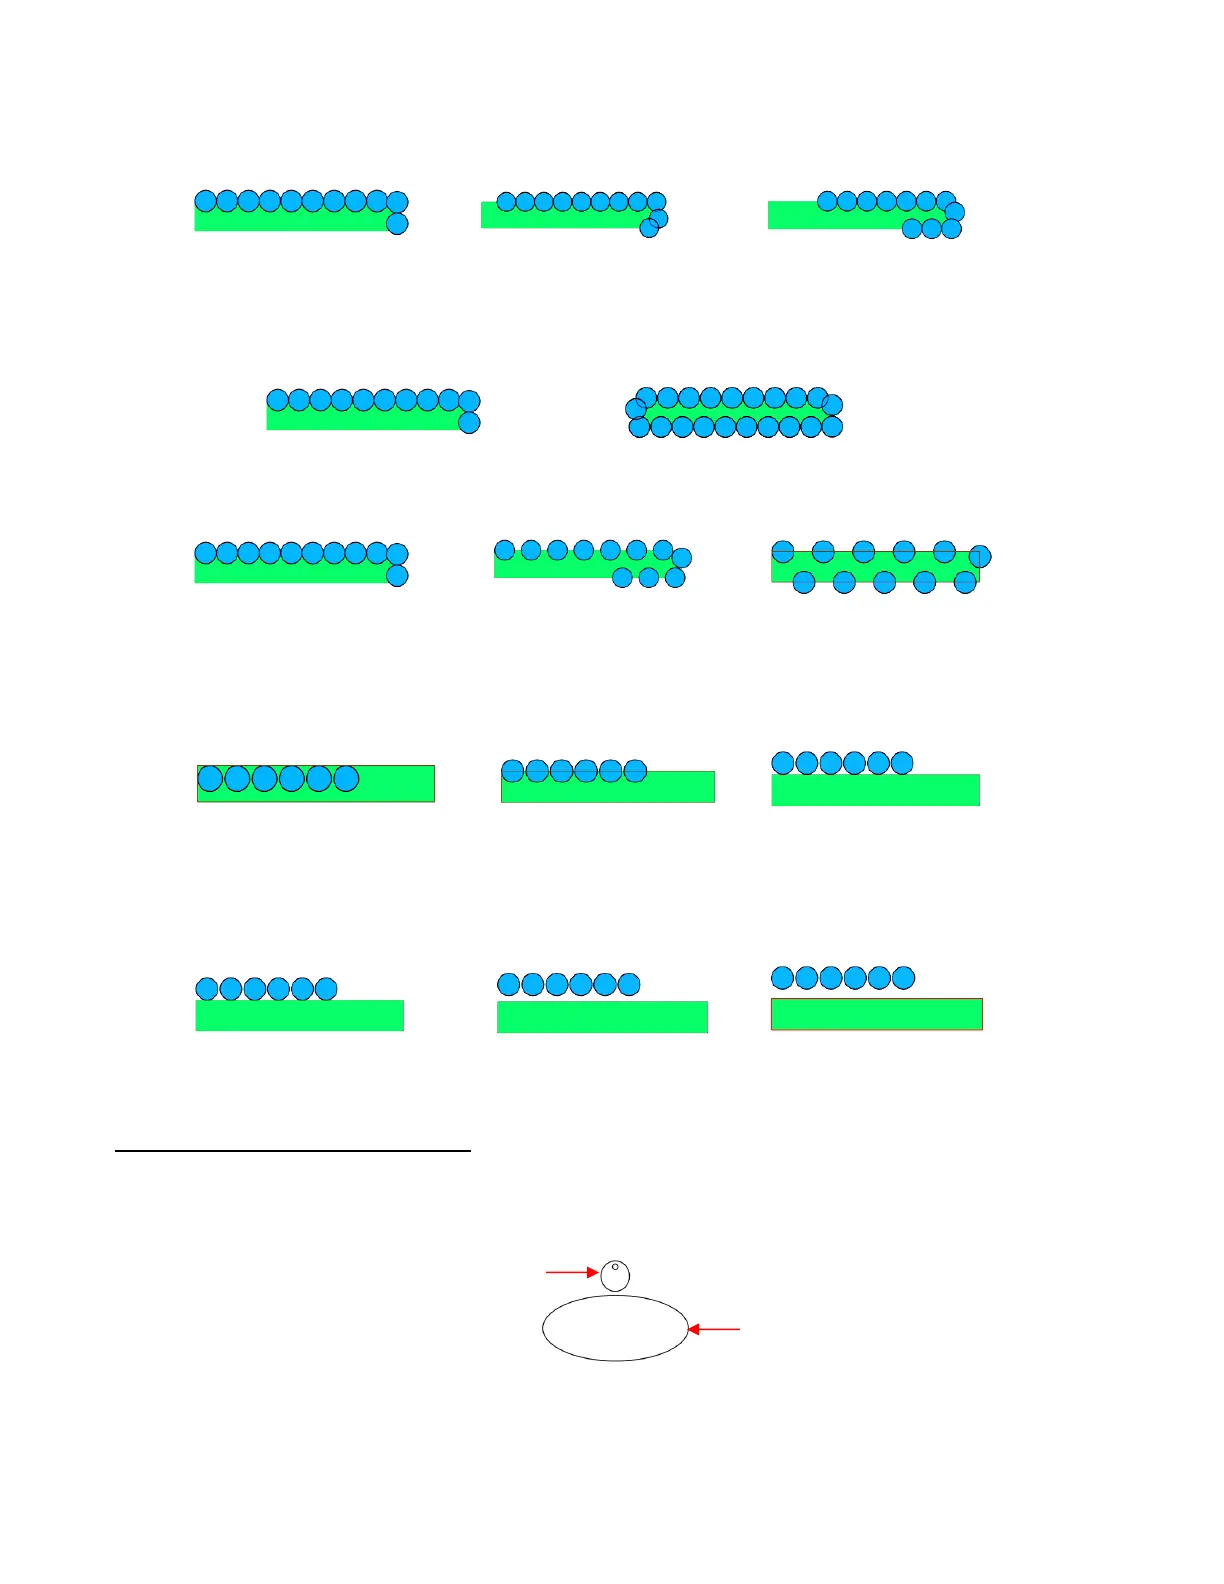
Alignment: This refers to the object being repeated. Choose Top to have the top of the shape aligned
along the path. Choose Bottom to have the bottom of the shape aligned along the path. Choose Middle
to have the center of the shape aligned along the path:
Offset: This is how far off you want the alignment to be. For example, if you chose Bottom for
Alignment and then 0.15” or 0.25” for Offset, then the top of the shapes will be 0.15” or 0.25” above
the path:
9.07.1 Designing a Scalloped Oval
Import an oval and two circles from the Library’s Basic Shapes and resize based on the following
example. After arranging the smaller circle near the top of the larger circle, join the two using Object>Merge
to create an eyelet circle:
Before using the Object on Path function, make sure the eyelet shape is above the oval path on the Layers
Panel:
 Loading...